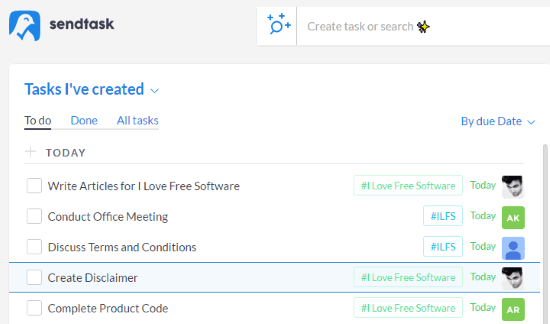
Sendtask is a free collaborative online task manager with various features like unlimited tasks, collaborators, projects, and more. Using this online task manager, you will be able to easily create and manage tasks by collaborating with others. Similar to the online collaborative to-do list websites, you will be able to create tasks as to-do list items and then assign them to other users for collaboration. To create a task, you can simply enter the task title, set due date & time, and assign it to anyone or keep it for yourself. It even allows you to create projects on which you can invite multiple collaborators and add tasks for completion.
There are many other useful features available using which you can add comments to tasks, attach files (like images, documents, etc.) to tasks, etc. One of the unique features of “Sendtask” is Slack integration. That means you can integrate Sendtask to your Slack account and use it directly from Slack. You can view your pending tasks, complete tasks, create new tasks, assign tasks to others, and more from Slack.
How to Use Sendtask for Collaborative Task Management:
To get started, the first thing you would need to do is visit homepage of Sendtask and create a new account. You can either connect your Google account, Facebook account, or enter email id to create the account. Connecting your Google account is pretty useful as all the contacts will be accessible directly on Sendtask.
Once you create an account, the dashboard will open up and you can start creating tasks right away.
How to Create a Task in Sendtask:
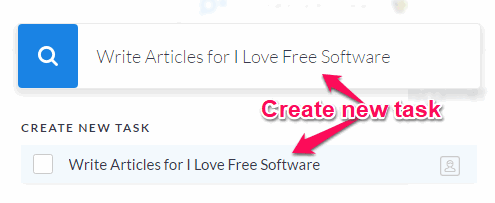
To create a task, you would need to click on the input field at the top of the dashboard that says “Create Task or Search”. As soon as you do that, you will be able to type the task title in the input field and then click “Create New Task” to add the task to the dashboard.
In the same manner, you can create as many tasks as you want. The newly added tasks will be visible on the dashboard under the “To Do” tab. To see the tasks, make sure to select the “Tasks I’ve Created” option from the drop-down menu. When you click on any of the tasks, a panel will appear on the right where you will be able to assign the task to any contact, set due date & time, and also create a new project to add the task if required. In addition to that, you will also be able to add comments and attach files for that particular task on the right panel.
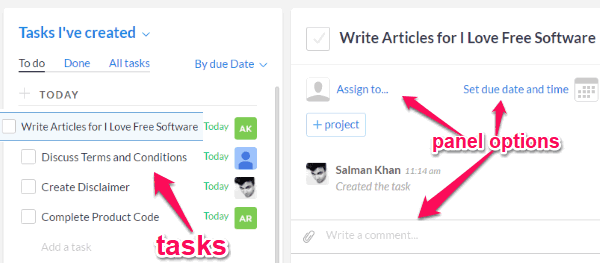
Commenting and attaching files can come in handy for making any collaborator easily understand the subject matter and procedure of completing a task. The comments will actually work as text messages for the collaborators.
How to Assign Task to a Collaborator:
To assign a task, you would need to click on the task on the dashboard and then select the “Assign To” option on the right panel. After that, you can simply enter the email address of the collaborator or choose between the contacts which will appear after connecting your Google account.
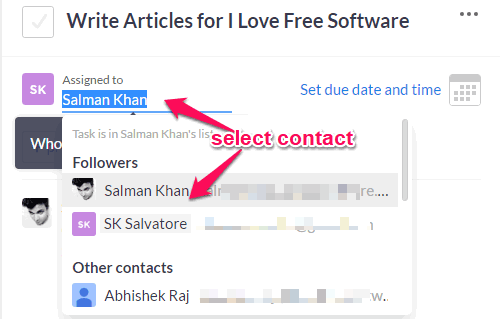
Once you select a contact, a popup dialog will appear where you can compose the invitation message for the contact. You can type any message you want and then click on the “Invite” button to send the invitation.
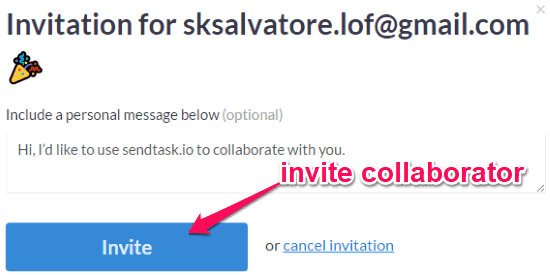
When you send the invitation, the collaborator will receive an email with the task and he/she will be able to directly access the task. The best part is that the collaborator doesn’t need an account to view, edit, or mark the task as completed. However, creating an account will be a good idea for regular tasks collaboration. The collaborator will also be able to add comments and attach files to the task.
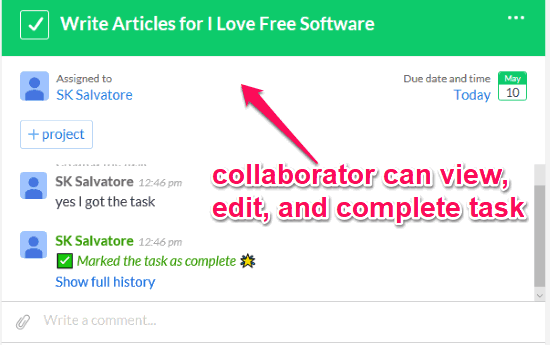
If you don’t want to assign the task to anyone and keep it as a personal task, then you can leave the “Assign To” option blank.
How to Set a Due Date and Time for Tasks:
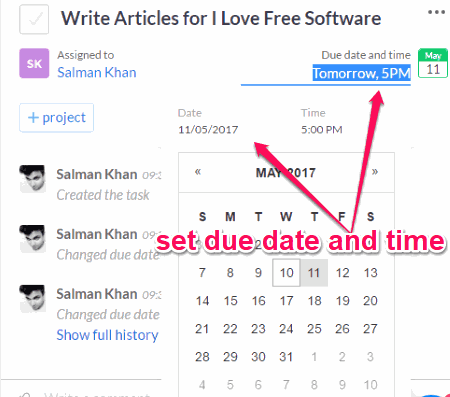
After selecting a task on the dashboard, you can click on the “Set Due Date and Time” option on the right panel. As soon as you do that, you will be able to choose any date you want from the calendar and also enter the task expiry time. When you’re done selecting a date and time, simply hit Enter to set the due date and time.
How to Create a Project and Add Tasks:
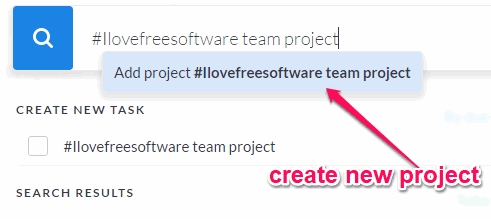
To create a new project, you can click on the input field at the top and then type “#” followed by the project name. After that, select the “Add project” option to add the project to your dashboard. Apart from that, you can also create a new project by clicking on the “Project” button on the right panel which appears after you select a task. You can create as many projects as you want.
When you’re done creating a project, you can access it by selecting the “Tasks in project” option from the drop-down menu on the dashboard. After that, you can click on the “Hexagon” icon on the right of the project title to add collaborators and customize the project title and color. You can add unlimited collaborators to a single project.
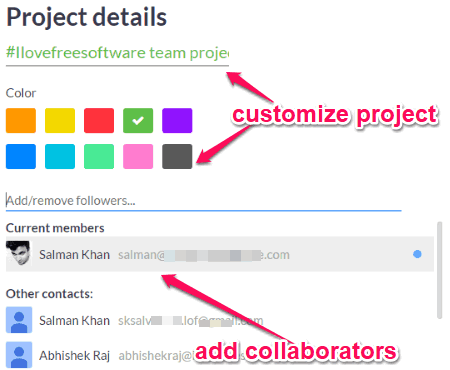
When you’re done with the project, you can start adding tasks to that project which will be visible to all the collaborators. Even though all the collaborators will be able to view, edit, and complete tasks, you can also assign the tasks to specific collaborators of the project if you want. You can also remove specific collaborators from a task in a project.
Now, let us talk about the last and one of the best features of Sendtask i.e. Slack integration.
How to Use Slack for Creating and Assigning Tasks:
To integrate Sendtask with Slack, simply go to your profile “Settings” and click on the “Add to Slack” button. After that, you can simply authorize it for integration and then you will see a new bot named “Sendtask” added under the “Direct Messages” section on Slack.
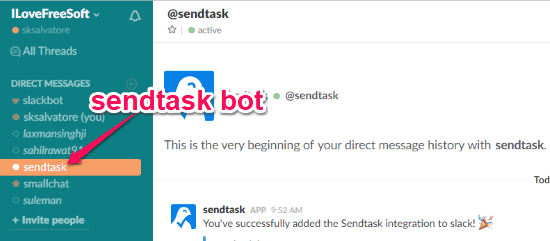
Now, you can simply click on the “Sendtask” bot and then use slash commands to create new tasks, assign tasks, etc. You can use the following commands:
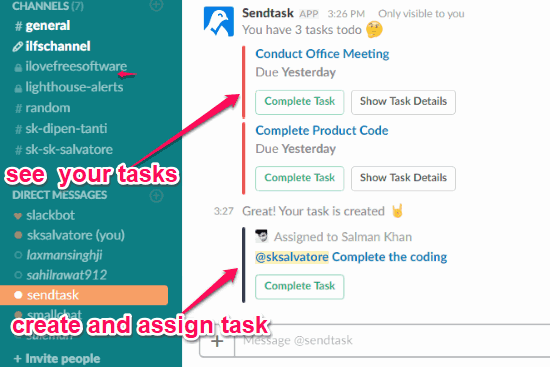
- /sendtasks: This command will help you see all your tasks (complete and incomplete) and also lets you mark tasks as completed.
- /sendtask @[username][task title]: You can use this command to create a new task and then assign it to any user you want on Slack.
Closing Words:
Sendtask is definitely one of the best free collaborative online task managers which makes creating, managing, and collaborating on tasks very easy for you. The best thing about this task manager is that there is no limit on the number of tasks, projects, and collaborators. The Slack integration also makes it pretty convenient for all the Slack users who wants to quickly create tasks and assign them to team members.