This is a curated list of 5 free websites to add Tilt-Shift effect to photos. The tilt-shift effect allows you to highlight any specific part of a photo and blur out the other remaining area. You can use these websites to make your photos look same as the miniature faking models. The tilt-effect works same as the “Aperture” mode of a DSLR camera and diorama effect or illusion. That means you can focus on any particular area of a photo and simulate a miniature scene with the photo.
You might have come across tons of online photo editors, but if you wish to apply (fake) tilt-shift effects to your photos, then these websites would probably the best options for you.
How to Add Tilt-Shift Effect to Photos using TiltShiftMaker:
TiltShiftMaker is a free website which lets you turn your digital photos into miniature models by applying tilt-shift effect. For this, all you need to do is upload a photo from your PC or using a URL, select the area which you want to highlight, and that’s it the tilt-shift effect will be applied automatically to the photo.
Let me show you how to use this website to add Tilt-Shift effect to photos online.
Step 1: Simply visit the homepage of TiltShiftMaker, and start applying tilt-shift effect to your photos instantly as no sign up is required. On the main page, you will see a upload section where you can upload a photo from your PC or using an image URL.
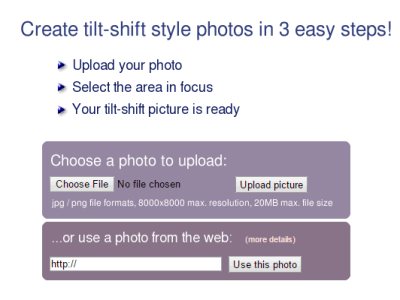
Step 2: Click the “Choose File” button, select a photo, and hit the “Upload Picture” button. If you want to add a photo from the web, then paste the URL in the “Http://” field and click the “Use This Photo” button. It supports only JPG and PNG files with the maximum resolution of 8000×8000 and file size of 20 MB.
Step 3: Once the image is uploaded, the editor will open up with the tilt-shift preview and various options like focus size, defocus strength, defocus gradient, and bokeh boost. You can adjust these options to control the effect intensity and preview the resulting photo at the same time as shown below.
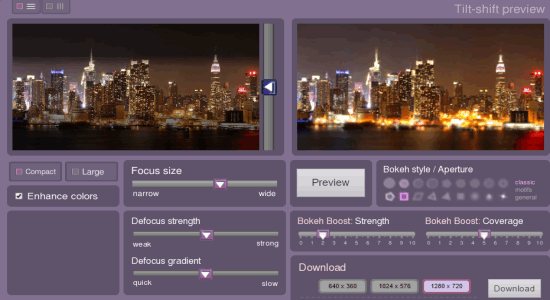
Step 4: When you’re done with adjusting effect options and applying the tilt-shift effect to the photo, download it to your PC with different resolutions like 640×360, 1024×576, and 1280×720.
Read the full review of “TiltShiftMaker” from here.
How to Apply Tilt-Shift Effect to Photos with Fotor:
Fotor is another amazing online photo editor that comes with dozens of powerful tools like HDR, card design, scenes, collage tool, effects, etc. In addition to that, it also offers various photo retouching tools like smoothing, clone, blush, blemish, mascara, eye shadow, wrinkle, and much more. But one of the best features is that it lets you apply tilt-shift effect to your photos with ease.
Simply follow the below steps to apply tilt-shift effect to your photos.
Step 1: Go to the Fotor homepage, and sign in or click the “try for free” button to use it instantly. Click the “Open” option at the top of the blank canvas to import a photo. You will also see a toolbar on the left with tools like basic edits, effects, beauty, frames, etc.
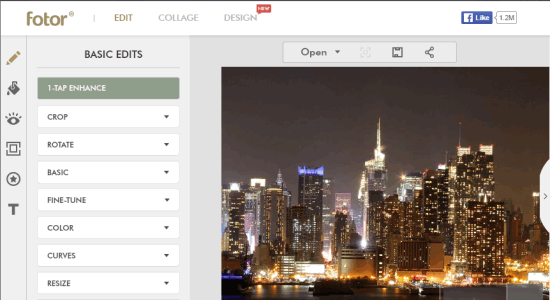
Step 2: Click the “effect” tool on the left and select the option “Tilt-Shift” from the list. As soon as you do that, all the related options like brush style, area style, brush size, and blur intensity will expand as shown below.
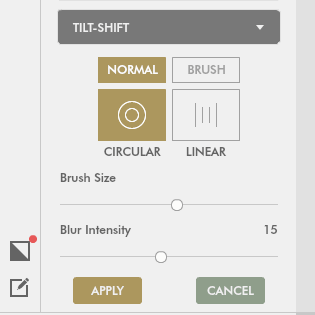
Step 3: When you select the normal style, it lets you choose either the circular or linear option. The circular option lets you apply the effect radially, and the linear option can be used to apply the effect vertically, horizontally, diagonally, and any other angle but with straight line or linear focused area. You can also drag the sliders to change the brush size or the blur intensity.
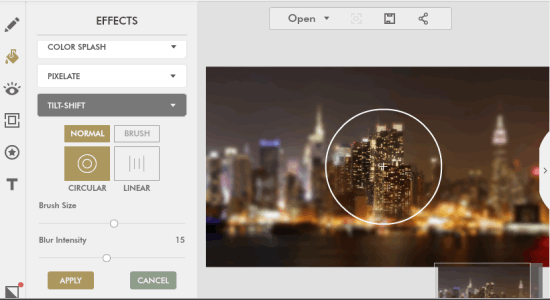
Step 4: Selecting the brush style allows you to draw the focus area on the photo manually. That means you can highlight any area you want in the photo while blurring out the other areas. Once you have selected a focus area, simply click the “Apply” button to add the tilt-shift effect to the photo.
If you would like to know about the desktop client of Fotor, then read the review here.
Add Tilt-Shift Effect to Your Photos with iPiccy:
If you are looking for a simple online application to add the tilt-shift effect to your photos, then you can proceed with iPiccy. It is free photo editing website which offers various tools like fix image, resize image, crop picture, exposure, hue & saturation, and also many filters and adjustment tools. Apart from that, it also comes with tons of photo effects like infrared, rainbow, cross process, gritty, sepia, and more listed in different categories like basic, vintage, area, color, artistic, etc. The effects in “Area” category lets you add the tilt-shift effect to your photos with ease.
Let me explain how to use iPiccy to apply tilt-shift effect.
Step 1: Open the homepage of iPiccy and sign up to get started. After that, it will ask you to import a photo for editing after which the editor will open up with the tools on the left. At the top, there will be various tabs like the basic editor, photo effects, etc.
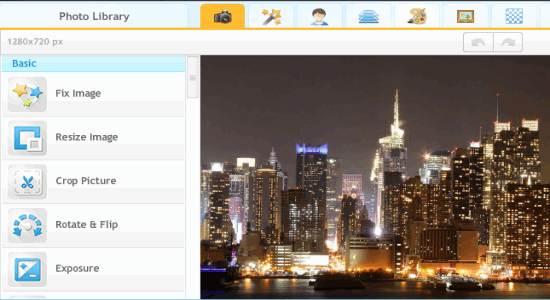
Step 2: Go to the “Photo Effects” tab and you will see all the photo effect categories on the left with associated effects. Scroll down to the “Area” category and you will see effects like focal B&W, fancy focus, focal soften, focal pixelate, and focal zoom. All these effects can be used to apply the tilt-shift effect to the photo. Remember, each effect generates different blurred area like zoomed blur, soften blur, pixelate blur, etc.
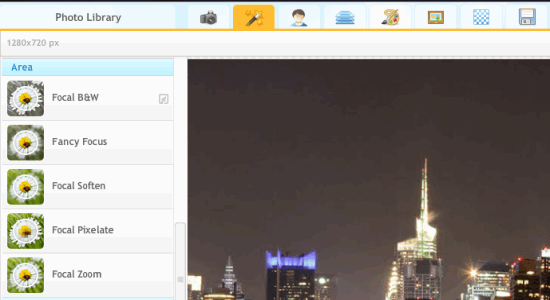
Step 3: Let’s say, you have selected the “Focal Soften” effect. Then you will see the effect related options like blur, focal size, focal hardness, and fade. Adjust these option to change the intensity of the soften blur area. It only lets you focus on any circular area which you can move by simply dragging on the photo.
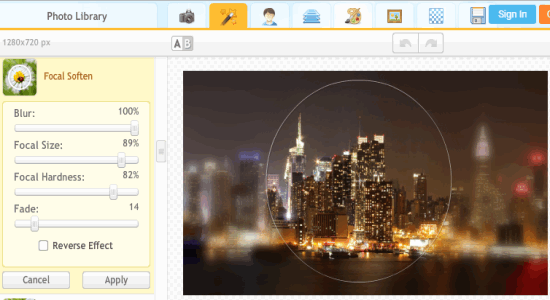
Step 4: In the same manner, you can use the other effects to apply the tilt-shift effect to the photo with different blurred areas. Once done hit the “Apply” button and the effect will be applied to the photo instantly.
You may also like 5 Free Online Photo Editing Websites.
How to Use Pho.to to Add Tilt-Shift Effect to Photos:
Pho.to is quite an amazing and simple website which lets you edit your photos with tools like effects, retouch, instant fix, and more. It offers different effects like retro film, sweet caramel, grunge, broken glass, soft lilac, sun rays, tilt-shift, and more.
Step 1: Visit the homepage of Pho.to and click the “Fun Effects” button to proceed. All the effect categories will appear like realistic photomontage, hats & cats, face in hole, stylized effects, and more. Select the “Stylized Effects” category to browse and use all the associated effects.

Step 2: Scroll down and select the “Tilt-Shift” effect which is normally the last effect in the list. After that, a new page will open where you can upload a photo either from your PC, by URL, or from your Facebook account.

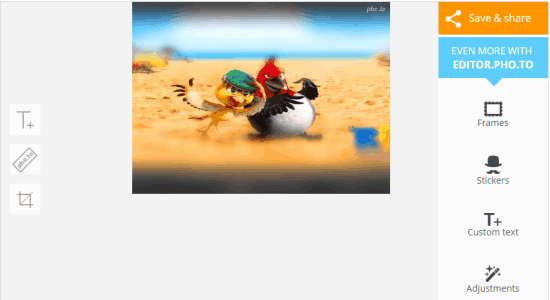
Step 3: As soon as the photo is uploaded, the tilt-shift effect will get applied automatically. It doesn’t have any option to resize the focused area or move the effect across the photo. However, it offers some additional options to crop, adjust tuning, add text, stickers, frames, etc. Once done you can save and share the photo will the applied tilt-shift effect.
Use LunaPic to Apply Tilt-Shift Effect to Photos Online:
LunaPic is another online photo editor that offers 200+ effects, filters, drawing tools, animation effects, and much more. One of the best features of this website is that it lets you add the tilt-shift effect to all your photos in no time. Follow the below procedure to apply tilt-shift effect to your photos.
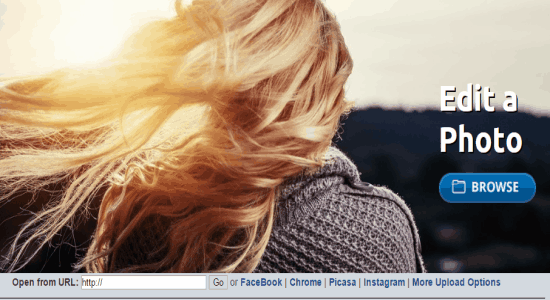
Step 1: When you open the homepage of LunaPic, you will see various upload options using which you can import photos for editing. It lets you upload photos from your PC, Facebook, Chrome, Picasa, Instagram, and also by entering a URL.
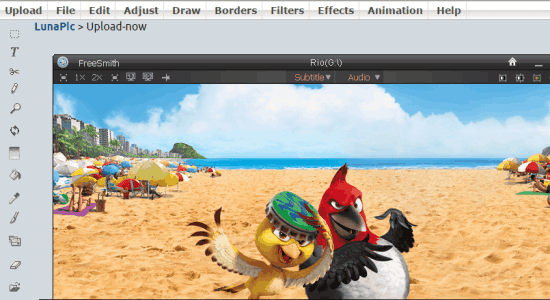
Step 2: After uploading a photo, the editor will open up with various editing tools on the left. You will also see different tabs at the top like upload, edit, adjust, effects, etc.
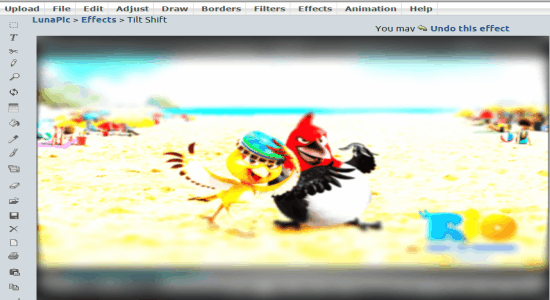
Step 3: Simply hover the cursor over the Effects tab and select the “Tilt-Shift” effect from the list. As soon as you do that, LunaPic will automatically start processing your photo and finally apply the tilt-shift effect to it. This website also doesn’t have any option to change the intensity or move the focused area across the photo.
Step 4: When you’re done with applying the effect, you can save or share it via Facebook, Imgur, Tumblr, and more.
My Final Verdict:
You can use all the above websites to apply the tilt-shift effect to photos and transform them into fake miniature models. Highlight any specific area of your photo while blurring out the other parts. If you don’t have a DSLR camera to capture photos in aperture mode, then do not worry as you can use these online tilt-shift editors to do the same manually.
If you’re looking for software to apply tilt-shift effect to photos, then do not worry as we have also covered 5 free software to add Tilt-Shift effect to photos.