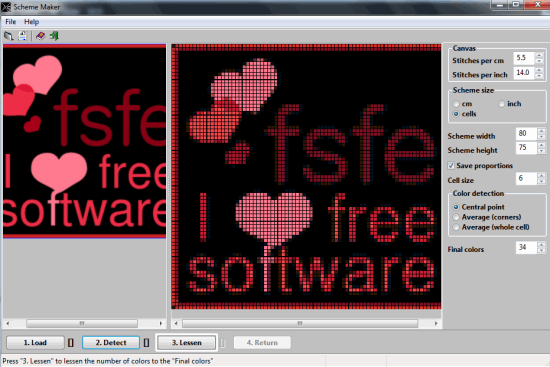
Scheme Maker (beta) is a free software that helps to create cross stitch designs with your own images. Cross stitch design in simple terms is embroidery made with x-shaped stitches (used in carpets or in other things). Those stitches form a full picture/object. This software helps to quickly create cross stitch designs which you can use in t-shirts, or anywhere you want.
It lets you preview original and output image to see the differences. Moreover, you can also set number of stitches per cm/per inch, adjust cell size, and more. Your cross stitch can be saved to PC in any supported output image format.
In above screenshot, you can see original, and cross stitch designed picture. Its beta version works quite well, but few times the interface hanged after loading the image and performing the tasks. This bug needs to be fixed with its stable version.
Other similar software: crosti and Ryijy Stitch Designer.
How To Create Cross Stitch Designs With Your Own Images?
Download this cross stitch design maker software using the link added at the end of this review. Run the setup file and complete the installation steps. After this, open its interface. Now you need to follow these simple steps for creating your own cross stitch design:
Step 1: Add desired image on its interface using Open button. You can also use File menu to insert an image. Inserted image will be visible at left section.
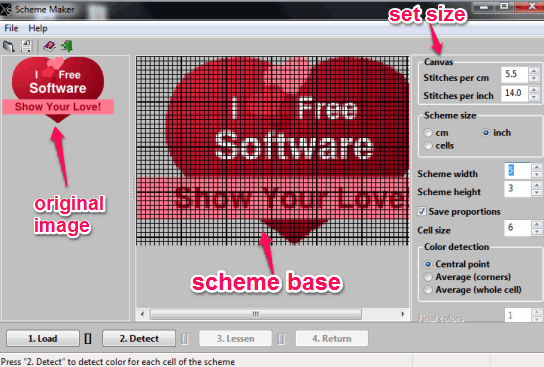
Step 2: Now click on Load button and your cross stitch scheme base (pattern) will be prepared, like visible in screenshot below. Scheme base will come with default size and color detection, but you can customize size, can choose type of size (in cm/inch/cells), set height and width for scheme.
Step 3: After performing the changes, tap on Detect button. This button will help you to see the colors present in each cell of scheme. You can also increase/decrease colors value using Final colors option.
Step 4: This is the optional step in which you need to click on Lessen button. This button will help you to auto reduce the colors present in your cross stitch design base.
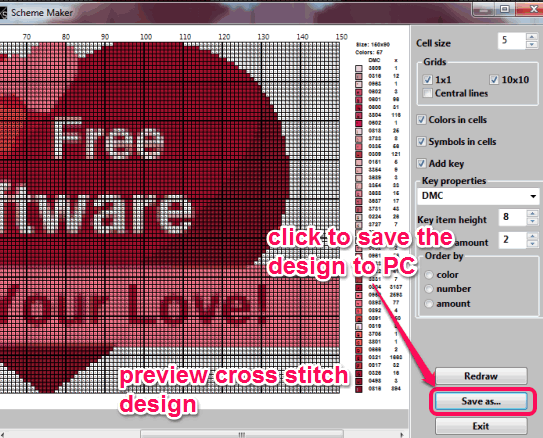
Step 5: Tap on Save button and a new window will open. In this window, you can finally preview how your cross stitch design will look. Apart from just previewing the output, you can also adjust the size of cells. This is helpful to manage the output design if it is too big or small. Moreover, You can also insert keys in design and symbols of colors.
After performing the changes, you need to tap on Redraw button to see the new cross stitch. If you are satisfied with the changes, save your cross stitch design as an image on your PC. Use Save as button and you can save design as bmp, ico, png, xpm, jpg, or other supported output format.
Take print of your cross stitch and use it to on your t-shirt, for carpets, or wherever you want.
Conclusion:
Scheme Maker is a needed software to create your personal cross stitch design with desired images. It is easy to use and self-explanatory interface makes it possible to quickly create a beautiful cross stitch design.


