LiquidIcon is a free Windows icon editor to create ICO files. You can create a bitmap image and save it as a Windows Icon file (ICO) or Windows Cursor file (CUR). The best part is that you can also open ICO files directly in this software to edit. You can add text to the created Windows icon and apply a number of different effects like grayscale, color invert, adjust colors, and, gradient transparency, etc.
This icon editor gives the option to give a button look to the newly created icon as well. In addition to these options, you can also rotate and flip the ICO file. If you are creating a new bitmap file, then you can also save it as a Windows cursor file.
![]()
As I mentioned, LiquidIcon is a nice icon editor which lets you create Windows icons and cursor files. However, there are some other advanced icon editors for Windows as well that you can check out. One of them that comes to mind is Greenfish Icon Editor Pro which will let you convert images to icons and create favicons. However, LiquidIcon is also quite a handy software to create Windows icons and cursor files as it is pretty easy to use and is supported on the older versions of Windows as well.
How to use this free Windows icon editor to create ICO files:
Getting started with this free icon editor is really easy; just download it from the link at the end of this review and then run its EXE file. After that, you will see the main interface of LiquidIcon as shown in the screenshot above. The interface is quite intuitive, but unfortunately, it doesn’t give you the option to resize it. You can either import a Windows icon file to edit or create a new one from the scratch. Select the Pencil tool from the editing toolbar and select a color from the color panel. After that, move the pencil on the drawing canvas to draw freely. It automatically fills the cells on the drawing canvas with the selected color.
![]()
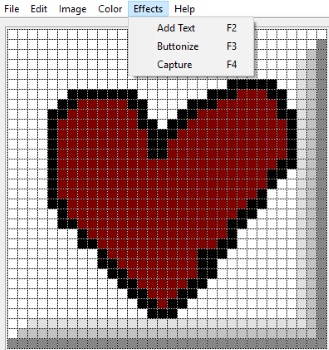
There are some other tools to draw shapes like solid rectangle, line, ellipse, solid ellipse, and, rectangle. Select a shape tool from the editing toolbar and then draw it on the canvas to add a shape to the icon. To fill the color in the shapes there is a Flood tool (actually a color bucket tool). If you want to add text to the icon file then press the “F2” hotkey or select the Add Text option from the Effects menu. After that, you will see a pop-up on which you can specify the text and choose the font size and style. Click on the Ok button to add the specified text to the ICO file. However, the text added to the icon appeared to be gibberish as it was not properly formatted. I had to add single alphabets and then move them on the drawing canvas to make them look coherent and understandable.

You can also apply different effects and adjust the colors of the icon file. I liked the Buttonize effect the most as it gives a button look to the designed icon file, as shown in the screenshot below. To add the Buttonize effect, you can either press the F3 hotkey or select the Buttonize option from the Effects menu. To zoom to a particular part of the drawing canvas, select the Capture tool from the Effects.

It also lets you adjust the color parameters of the ICO file and you can also apply the gradient effect to it. You can also invert the colors of the designed icon file or apply a grayscale color effect as well. In addition to this, you can also adjust the RGB color value of the icon file.
Verdict:
LiquidIcon is a free Windows Icon editor to create ICO and CUR files. You can very easily create a bitmap image and save it as ICO or CUR file. Apart from that, you can also draw shapes like rectangle, ellipse, solid rectangle, lines, etc and add text to an ICO file. You can also open ICO and CUR files for editing. I will definitely recommend it to you as it is lightweight, portable, and simple icon editor for Windows.