Apple’s iTunes is one of the most popular, if not the most popular application for media management, more precisely music management. Even though iTunes are used by millions around the world there are still some things that iTunes doesn’t have, that other media players have. This is where iTuner comes into play, to expand iTunes options and add what’s missing in iTunes.
Think of the iTuner as a plugin for iTunes, a plugin that gives iTunes options like album art, song change notification, quick music pause and play (tray icon double-click) and a lot more. Options that you get with this small utility are really impressive so let’s start with the basics and work our way from there.
iTunes album art, song change notification, playlist management improved
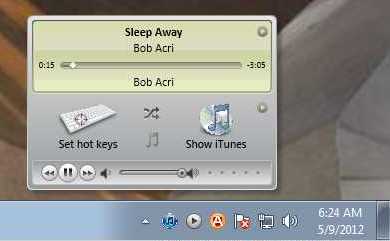
iTunes has its own album art display and fetching, but that of iTuner adds to it, and you can see album art in the song change notification window:
just like iTunes, when it comes to album art iTuner can read it from the hard drive locally, or it can find album art online and use that. If iTunes doesn’t find album art, then you might have better luck with iTuner, two sets of eyes are better than one.
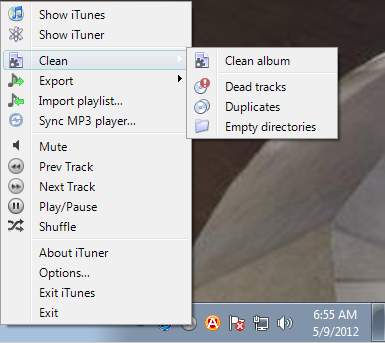
iTunes playlist management is vastly improved with iTuner. You can:
- Check for duplicates
- Search for directories that are empty and remove them
- Remove songs which were deleted from the hard drive
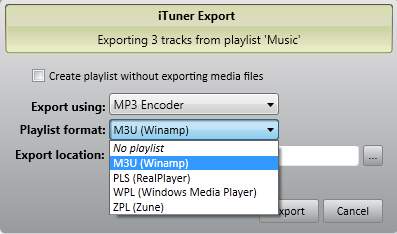
- Export and import playlists
- Supported playlist formats:
- M3U
- PLS
- WPL
- ZPL
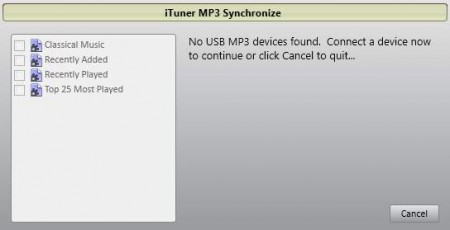
Synchronize playlists with MP3 USB devices
I’m sure on the images above you can see that iTuner has the ability to sync music with MP3 USB devices, not just with iPod, iPad or iPhone but any player that can be connected via the USB port.
Here you would usually find the list of attached USB players. Select the one that you want updated, start the synchronization and your USB MP3 player collection should be updated.
Export and encode music from your iTunes library
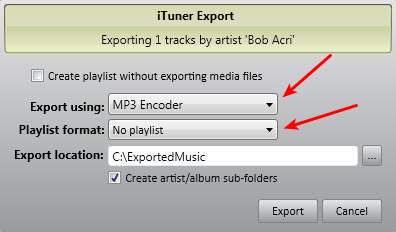
This is undoubtedly the most amazing feature that you get with iTuner. By right clicking on the tray icon of iTuner and then selecting Export a selection will pop-up where you can choose to either export Album, Artist or Playlist, and the window that you’ll get after selecting either one of these options will be the same like when you were exporting playlists. This time we’re not gonna be exporting playlists, but we’re gonna export and encode our music library. This can be done simply by selecting “No playlist” option where we’re asked to choose a playlist format:
After you’ve done that select the format in which you’d like to encode your library, 5 most popular codecs are offered and it should be enough to please every audiophile. Supported formats for iTunes library encoding are:
- MP3
- AAC
- FLAC Lossless
- AIFF
- WAV
Select the format that you wish to export, select the output folder click export and just sit back and watch everything converted, as simple as that. One more thing that’s worthy of a mention is that iTuner also supports Audio CD ripping, you can use it to back up your Audio CDs. iTuner is amazing, and you’ll love it for sure, download and see how exactly can iTuner improve your iTunes experience.
