Radial Menu is a free application launcher for Windows to organize and get quick access to documents, applications, and other important files. You can easily clean up and organize your desktop by adding all the application shortcuts and other files into the radial menu. It lets you add and launch various items like website URLs, applications, images, videos, documents, and many other files. The best part of Radial Menu is that you can create as many groups and subgroups as you want for all your items. Adding items are also pretty easy as you can simply drag and drop files into the menu or groups.
Unlike other menu tools such as Start Menu X and Start Menu Reviver, this one comes with an intuitive radial menu and lets you create unlimited groups for all you applications, websites, images, documents, etc. In addition to that, you can also control the radial menu opacity, change the size of the menu, icon size, and set the minimum items count to be shown on the menu.
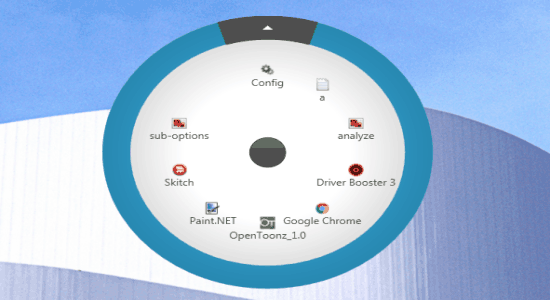
How to Add Applications to the Radial Menu and Create Unlimited Groups:
Step 1: After you open this application, a circular radial menu will appear on the screen with a “Config” button as shown below.
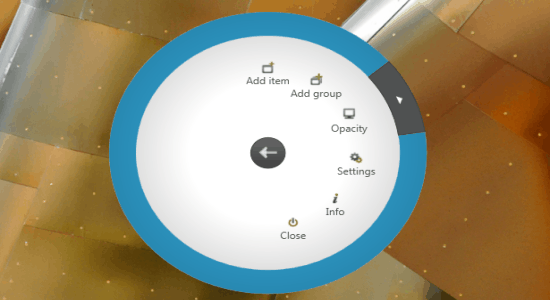
Step 2: Click the “Config” button to add any item such as application shortcut, image, document, or any other file to the radial menu. As soon as you do that, various options like add item, add Group, settings, and Opacity will appear in the menu. All the items added in the menu can be launched with a single click.
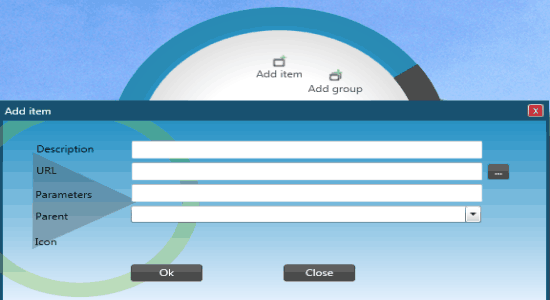
Step 3: Select the “Add item” option to add items like documents, images, archive files, website URLs, applications, and more to the radial menu. You can either enter item details like description, URL (path in case you want to add any item from PC), parameters, and parent (group) or use the “Dots” button associated with URL field to browse your PC and add any item. It also allows you to drag and drop items directly to the menu. Whatever item you add will be visible on the main window of this application, as shown in the first screenshot.
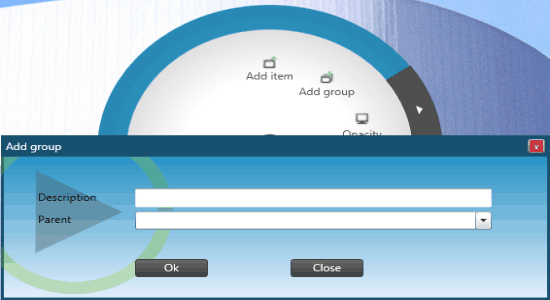
Step 4: If you want to create a group for any particular kind of items, then click the “Add Group” option and proceed. It will simply ask you to enter the group description and parent (in case you’re creating a subgroup). To add any item to a group, all you need to do is select the group from the parent field while adding a new item or the drag and drop function will do. If you wish to change the group of any file, then simply click the item and change the parent directory.
Step 5: It also has the option to change the opacity of the radial menu. Simply click the Config button and choose the Opacity option. A Watch-like screen will appear where you can move the mouse cursor to any number for setting the opacity as required.
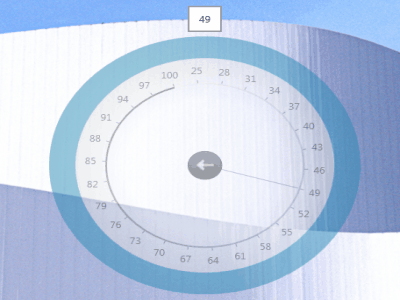
Step 6: From settings, you can change the size (width & height) of the circular menu, icon size (either as large, small, and auto), and set minimum items count to be shown on the radial menu.
My Final Verdict:
Radial Menu is simple and easy to use application launcher for Windows that lets you add, organize, and launch applications, images, videos, documents, URLs, etc. You can also create unlimited groups and subgroups for assigning all the items of any particular kind. Adding items to the radial menu help you access and launch them quickly. Ultimately, it lets you create your own custom menu where you can add various items for easy launch.