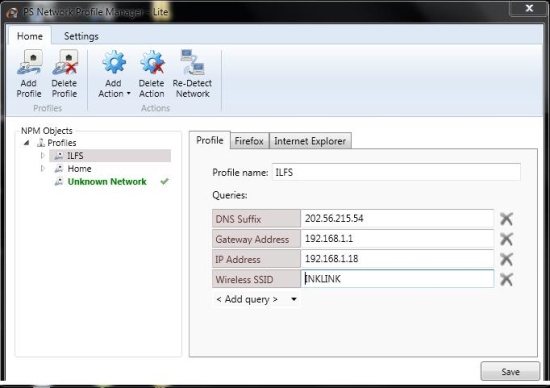
PS Network Profile Manager is a free network profile manager that lets you create and manage network profiles. In a profile, you can set the address for the Gateway, IP Address, DNS Suffix, Wireless SSID, configure proxies for the browsers installed in the computer, set home page etc. This network profile manager lets you quickly switch from one profile to another as you switch your internet connection or connect to a different network.
If you work on the move and connect your laptop to various networks then it might be a little hard for you to remember all those network settings like the SSID for wireless networks, the IP Address or the Gateway. PS Network Profile Manager lets you easily manage all those settings by just a click on its icon in the system tray and choosing the appropriate profile for your network.
How to work with PS Network Profile Manager?
Once you download this network profile manager, you can create profiles according to the network you’re using. Once you create a profile, you can easily switch profiles that match your network and all the settings with regards to the proxy, gateway address, IP address etc., will be set automatically as you choose a network profile.
Create a Profile
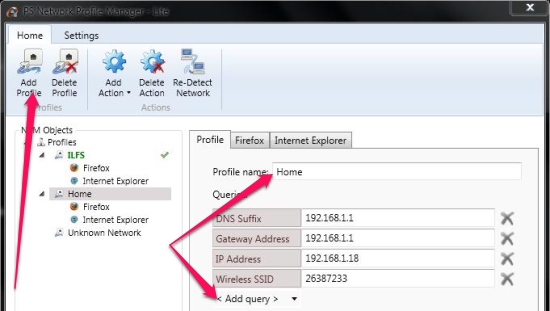
To create a profile, click on the “Add Profile” button on the top left and click on “Add Query” to add the information in to the profile. The default would be “Unknown Network”, however this would change according to the network profile you wish to switch to.
Setting up you Browser
You can configure the home page and proxy address for the browser right from the Network Profile Manager. To configure your browser automatically while you switch profile, click on “Add Action” and choose your browser. [Note: If you’re using Google Chrome and change the settings for Internet Explorer and it would affect Google Chrome too.]
Switching profiles
Switching profiles in this network profile manager is as simple as right-clicking on its icon that appears in the system tray and choosing the right profile that matches your network. To access the main interface to add a profile or make any changes to the current or any other profile, click on “Show designer”.
Deleting a Profile/Action
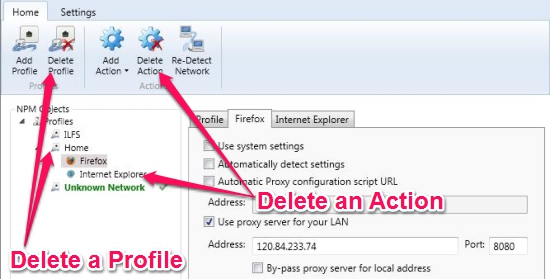
If you want to get rid of any of the profile for a network that you’ll not be using anymore, then click on the profile and click on “Delete Profile”. This will delete the profile with all the settings like the proxy settings, homepage for your browser, IP address, gateway etc., associated with the profile.
To delete an action within a profile, choose the action you want to delete from the left pane and click on “Delete Action”. This would just take of the action (proxy settings for your browser) and not the entire profile.
Conclusion
PS Network Profile Manager is a simple but effective network profile manager that eases the task of changing the proxy settings for your browser, IP Address for your computer, Gateway, SSID and the DNS Suffix you use. As it starts automatically when your system boots up and stays there in the system tray, it is more accessible. The simple interface makes it simple even for an inexperienced user to use it. You might want to install this free network profile manager to manage your networks efficiently while you’re on the move.


