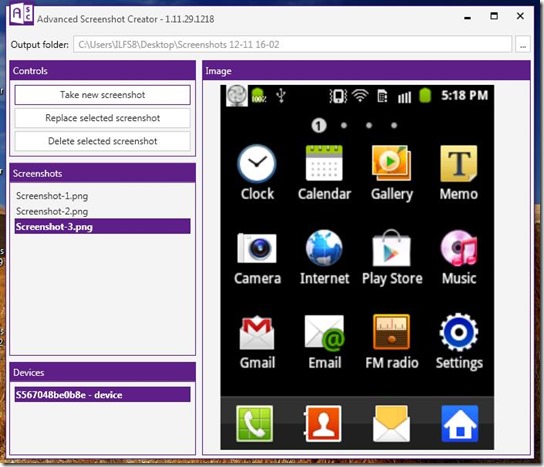
Advanced Screenshot Creator (ASC) allows users to take screenshots of Android phones from PC in a single click. Taking snapshots of your Android phone screen and then sending them to PC used to be an elaborate process but Advanced Screenshot Creator has made it very simple and fast. You just need to connect your phone to your PC using USB (make sure USB drivers for your phone are already installed on your PC) and then use this software to take screenshots of Android screen from PC.
The freeware has three simple controls that help the users to capture images of their Android phone from their Windows PC. It lets you set the output folder and saves all the screenshots automatically. The application has a preview feature. You can replace the image with another screenshot if you don’t like the preview.
Key Features Of Screenshot Capture Software for Android:
- captures screenshots of your Android device.
- Simple and Fast to use.
- Automatically saves screenshots in a user-defined folder.
- Automatically refreshes before taking next screenshot.
- Works in Windows Vista, Windows 7, Windows 8.
- USB connection required between Android device and PC.
- Microsoft .NET 4.5 required (link given at the end of the page)
- Easy to install and understand.
- Take screen shots in only one click.
- Saves image in PNG format.
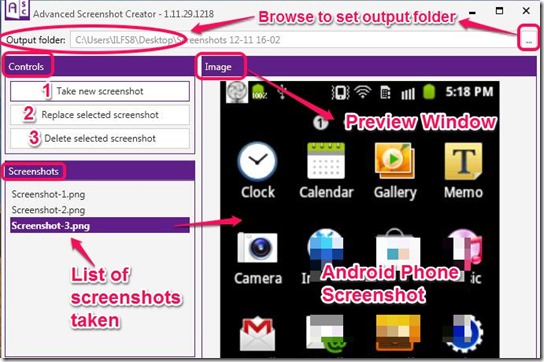
- Preview windows also available inside the application itself.
- Option to replace previously clicked screenshots.
- Shows a list of all screenshots taken in a session.
Controls to Capture Android Screenshots On Windows PC:
First of all, set the folder where you want to save your captured screenshots. Browse to the desired folder from the 3 dots button given to the right, just below the close (X) button. Once you have defined an output destination, you can go ahead and start taking screenshots of your Android phone with your Windows PC using Advanced Screenshot Creator.
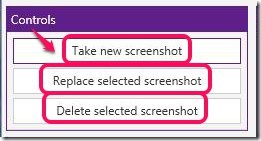
Advanced Screenshot Creator has 3 simple controls to help you take desired screenshots.
- Take New Screenshot: You can use this option to capture a screenshot of your Android phone i.e. the image seen on your phone at that instant. When you click this button, it saves the image automatically. A preview is shown in the Image Window.
- Replace Selected Screenshot: This option is used if you did not like the previously captured screenshot. Select the particular screenshot from the Screenshots Window (just below the controls), and click on the Replace Selected Screenshot button to instantly replace it with the image on your Android phone at that moment. The application automatically updates it in the output folder, too.
- Delete Selected Screenshot: Click on the name of the screenshot you want to delete, from the Screenshots List and click this button to delete it from the output window.
Also, check some of the screen capture extensions to take screenshot in Chrome that we reviewed earlier.
Final Verdict:
Advanced Screenshot Creator is really good software that takes fine quality screenshots in just 1-click and automatically saves them. It is very simple to use. There was only one issue that I found troublesome. It could not capture pop-up windows, and did not capture screenshots when the screen was too bright. But this software is so hassle-free that I still like to use it.


