Chronolapse is a free software to create time lapse videos of PC screen for Windows and Linux. Using this software, you can create time lapse video of your computer screen. Time lapse is a technique to capture several images over a period of time, after specified time intervals. These images can then be processed to create a video, which is called time lapse. Using this software, you can schedule a time lapse, add annotation, set time lapse video parameters, add custom audio, and do much more. Let us now look at the basic features of this software to create time lapse videos.
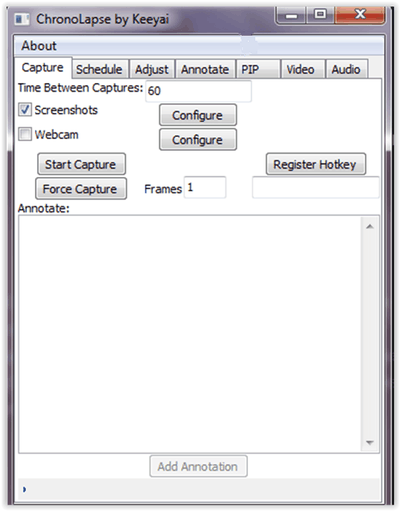
This software Automatically Captures Screenshots When Screen Changes.
How To Capture Desktop Time Lapse Using Chronolapse
To capture desktop time lapse using this desktop time lapse software, you first need to set up various parameters. Let us understand how to set up this software to take desktop time lapse.
There are various tabs to setup parameters.
Setting Up Capture Parameters

On the basic interface of the software, the first tab on the extreme left is of Capture. In this tab, you can set the time gap between each capture. There are two options to create time lapse. You can either create a time lapse video of screenshots or from your webcam. Select the Screenshots option to capture time lapse of desktop. You can customize screenshot properties from the Configure Screenshot button.
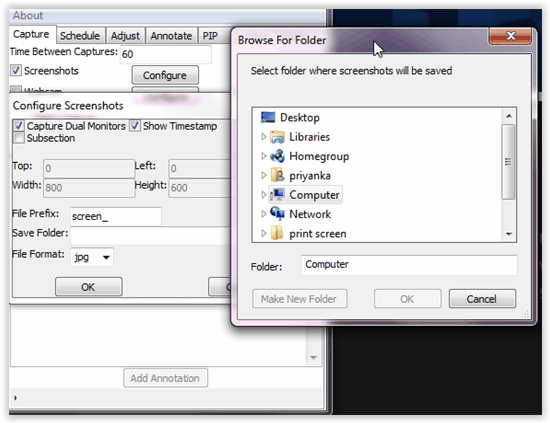
Here, you can set the software to capture dual monitors (if available), set area to capture, folder to store screenshots, and screenshot format.
Once you have finished configuring the capture screenshot section, you can specify the number of frames and start the capturing process. You can start capturing time lapse from here on, or configure some more options. As you hit the Start Capture button, you can see a blue line moving across the screen. The line continues to move unless you manually stop the process. If you do not wish to open the software for initiating this process, you can set a hotkey as per your choice for capturing time lapse screenshots.
How To Schedule Time Lapse Capture
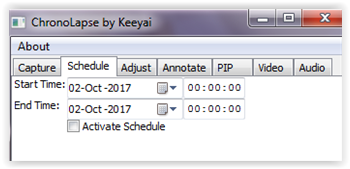
In this Schedule tab, you can preset a time period to capture time lapse screenshot. During the set time, this program automatically takes screenshots for specified interval till the time interval comes to an end. You can also set time, then activate or deactivate schedule according to your choice.
Set Folder To Save Screenshots and Set screenshot Resolution
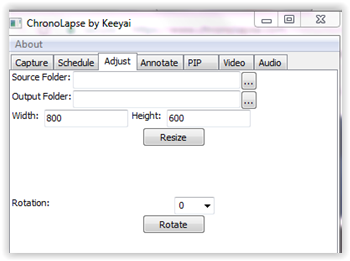
In the Adjust tab, you can specify the source folder and output folder for screenshots. You can also set the screen resolution along with height and width of the image. This software gives a user the liberty to rotate screenshots, if required.
How To Annotate Time Lapse Screenshot
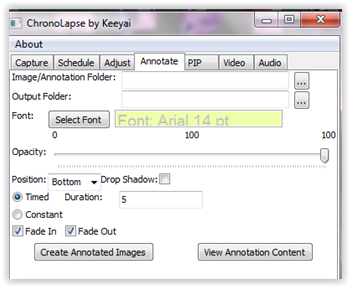
In the Annotate tab, there are lot of options which you can use to annotate selected screenshot. Select the image, or folder containing images to apply annotation. For the annotation text, you can choose font, opacity, and also specify other options like drop shadow.
How To Add Picture Inside A Picture In Screenshot
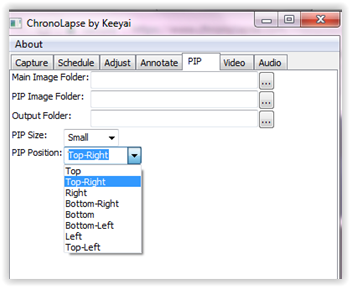
PIP in common terms is known as picture in a picture. The PIP tab lets you add picture inside a picture. This feature helps to describe an event or procedure from the main video by opening a small side window inside the main window. In the PIP tab, you can specify the source folder on which effect has to be applied, the PIP folder which has PIP images, and also the destination folder to save images. The user can customize the size of the PIP image and its position within the main image.
Setting Time Lapse Video Properties
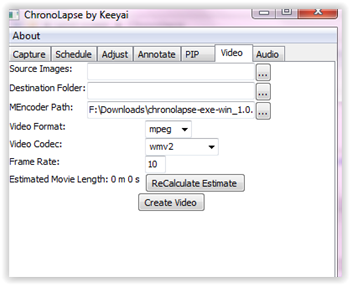
The Video tab is important for people who wish to specify video output parameters. In this tab, you can specify the source image folder, destination video folder, and the Media Encoder path. As a user, you can also specify the Format of the video, Codec, and Frame rate. Once you feed in all your details, you can get an estimation of the movie length.
How To Set Audio Properties Of Desktop Time Lapse
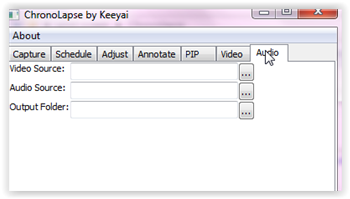
This desktop time lapse recorder software also allows users to add audio manually to time lapse video. The process is really simple and you just need to specify both the video and audio source, and then select the output folder to save video with audio.
Once, you are done with setting up all the parameters, you can begin capturing time lapse screenshots.
Verdict
Chronolapse is well designed software to create time lapse video. The interface is really simple and easy to understand. You can get more detailed idea about the working mechanism of this software by viewing a tutorial on the software’s official website. There was a problem which I encountered during the testing process; the software sometimes shut down when I tried to minimize its window. Reopening it from the main folder every time makes the user experience very troublesome.