This tutorial throws some light on Storage Sense in Windows 10. There’s no denying the fact that Windows 10 is probably the most powerful and feature laden Windows release to have ever come out from the stable of Microsoft. With a whole barrage of new and exciting features baked across its entire length and breadth, you’re almost certain to stumble upon something interesting or the other, as you go about using Windows 10 on a regular basis.
One such interesting and hugely useful feature is Storage Sense. Utterly simple to use, Storage Sense provides you a detailed breakdown of your computer’s hard disk space usage. Sounds pretty cool, don’t you think. It sure as heck is. Head past the break as we find out everything about Storage Sense in Windows 10.
So What Is Storage Sense?
Storage Sense is a brand new feature of Windows 10, that analyzes your computer’s hard disk (partitions) to find out the disk space being consumed by the files, programs etc. stored on the system. Once done, Storage Sense provides you with a detailed partition-wise categorical breakdown of your system’s disk space usage. Using Storage Sense, you can easily find out exactly how much space is being consumed by the installed modern apps, what share of storage can be attributed to documents and other files, how big of a chunk of the storage space pie are temporary files hogging up, and a lot more. What’s more, clicking on each category provides handy information about the stuff taking up the storage space, and how you can manage/free up space.
Note: As of my writing this article, Storage Sense only lets you find out the disk space usage of the Windows system partition, with the other partitions grayed out. However, I’m hopeful this is something that’ll be fixed soon through future OS updates.
How To Use Storage Sense In Windows 10?
Using Storage Sense to analyze your computer’s disk storage space usage doesn’t really involve much work, especially because this thing pretty much works on its own.
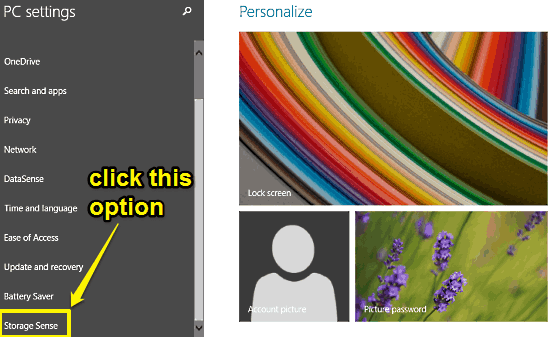
Step 1: Open the modern style PC Settings app. Scroll the listing of the major system settings (in the left column) all the way down, and click on Storage Sense.

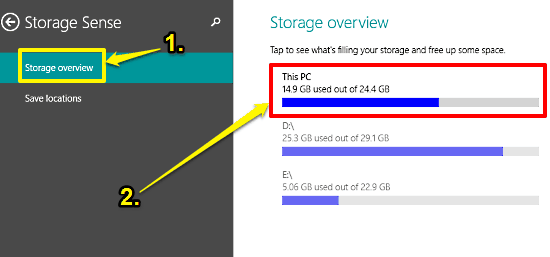
Step 2: From the Storage Sense sub-options displayed on the left, select Storage overview. The right pane will now display a partition-wise overview of the hard disk space usage, complete with indicative horizontal bars. Click on the bar labeled This PC (indicating the system partition).

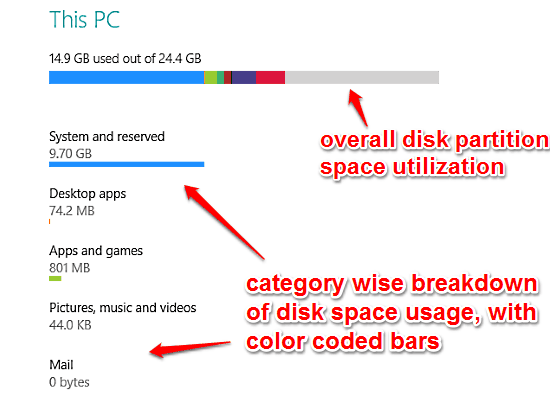
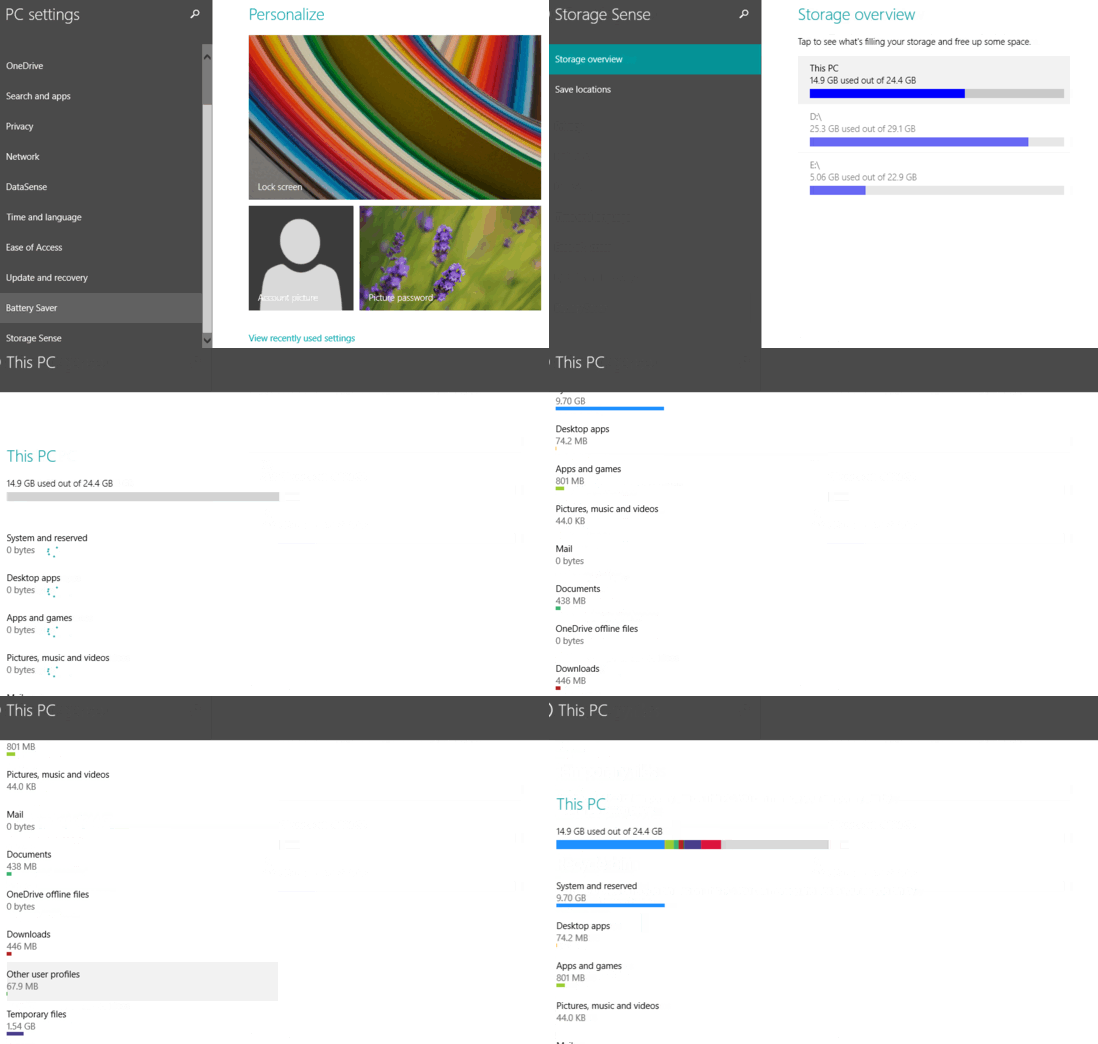
Step 3: And Voila! Storage Sense will now quickly analyze the system partition’s storage space usage, and in a matter of seconds, provides comprehensive categorized information about the disk space usage, with color coded usage bars for indicating the space being consumed by each category. To find out more information about a category’s space consumption and options to manage consumed storage space, simply click on it. Here’s a screenshot:

Do Check Out: Check Disk Space Taken By Modern Apps In Windows 10
Conclusion
Storage Sense in Windows 10 is an incredible feature that lets you find out detailed information about your computer’s disk storage space usage. It’s simple, easy to use, and rocket fast. And goodies such as color coded information bars, categorized overview, and the ability to manage and free up disk space, only make it more awesome. In essence, Storage Sense truly makes sense of your system’s disk storage. Do give it a shot, you’ll absolutely love it.
