Screen2SWF is a free software for Windows to record desktop activities, edit and save them with different file formats like SWF, AVI, FLV, and MP4. Not only that, you can also save the recording as self-playable EXE, sound interesting isn’t it. Similar to other core screen recorder software, “Screen2SWF” also lets you easily record desktop screen activities and save files with good quality. You can define a custom screen area, choose frame speed rate, and include audio before starting a recording session.
After recording desktop activities, you can either save it directly or open up the editor to retouch the recording. You can completely customize the recording such as add annotation, add images, zoom/focus, add mosaic, add delay, cut clips, optimize frame, and re-dub audio. While saving the recording session, you can personalize, video/audio quality, file format, recording size, etc.
How to Record Desktop Activities and Save them as SWF, AVI, Self-Playable EXE, etc.:
Step 1: After the installation, open up the software to start recording desktop activities. The working of this software includes three simple step named, record, edit, and save.
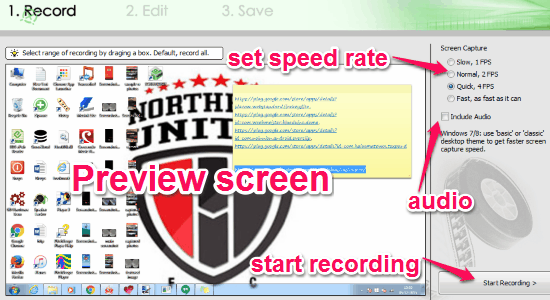
Step 2: The first application window is for starting a recording session. You can choose the frame or capturing speed rate from slow, normal, quick, and fast. To select the custom recording area, simply drag your mouse cursor on the preview screen. It also lets you include audio along with the recording. When you’re done, click the “Start Recording’ button at the bottom.
Step 3: The software will minimize to the system tray while recording session is active. Click the icon on the system tray to stop recording. You can also use shortcuts like F10 to stop, and F9 to play/pause.
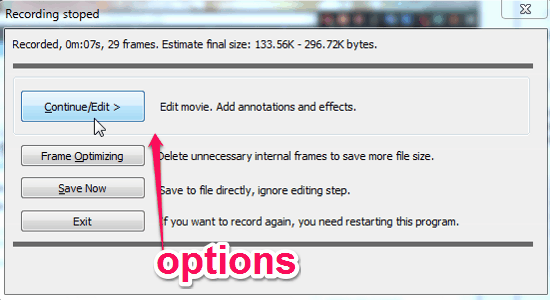
Step 4: When the session is stopped, a pop-up window will appear with options like edit recording, optimize frames, and save it directly.
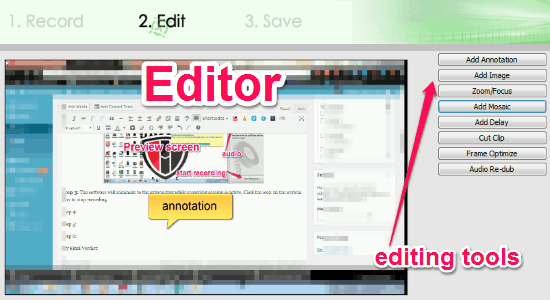
Step 5: Click the editing option to open up the editor or simply save the recording. The editor comes with powerful tools like annotation, frame optimization, audio re-dubbing, and more. Use these tools to customize the recorded file.
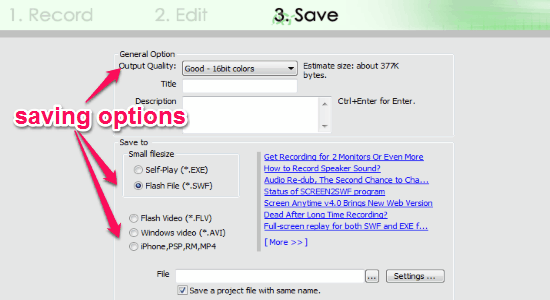
Step 6: After you’re done with playing around and editing the recorded file, proceed to save it as an AVI, MP4, SWF, FLV, and a self-playable EXE. You can set custom video/audio quality, file destination, file format, etc. before saving it.
My Final Verdict:
Screen2SWF is a pretty useful tool for Windows to capture desktop activities and save it with different file formats. Simple three step working and comes with a powerful editor. Customize you recording with options like add annotation, add mosaic, optime frames, cut clips, and much more.
Get “Screen2SWF” from here.
