Here are 3 best free Windows 10 kiosk software. Kiosk mode is actually used for public-facing PC or touch displays for public use where only one or a limited number of functions and features are enabled. The rest of the features and Windows functions (in case of Windows 10) are disabled for people, say access to Task Manager, switch between accounts, access to programs, hard drives, etc. By setting up the Windows 10 kiosk mode, you can limit your children or other people to built-in features/functions and/or specified apps/programs. You can use it for some other purposes also.
The different options that I have covered in this article for kiosk mode are free software and Settings app of Windows 10. Each option has its own importance based on which kiosk mode is enabled. You can also undo all the changes and disable kiosk mode in Windows 10 anytime. So, you will have everything in control. Still, it is good to create some restore point or system backup.
Let’s check these free options to enable Kiosk mode in Windows 10. I will start with the built-in option.
Set up a kiosk using Settings App of Windows 10
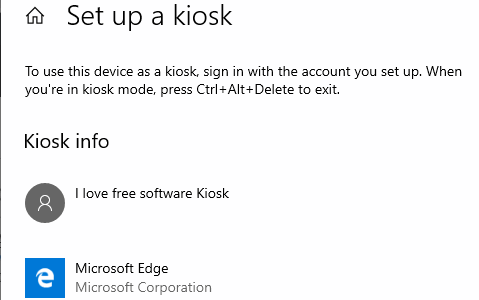
Settings app of Windows 10 comes built-in. So, you don’t need to download and install it separately. It lets you create a separate account for kiosk mode and that account will have only one app, nothing else. There will be no Start menu, Taskbar, Task Manager, File Explorer, etc. Only that app will be visible and available to use. Also, do note that you can select only one of the built-in apps of Windows 10 for kiosk mode.
To set up Windows 10 kiosk mode, first of all, make sure you are using the 1809 version (October 2018 update) of Windows 10. After that, follow these steps:
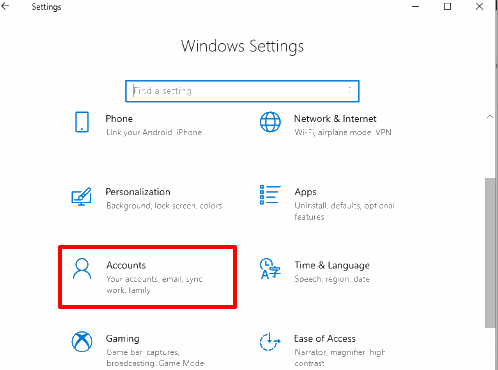
Step 1: Access “Accounts” menu in the Settings app (Windows logo key + I).
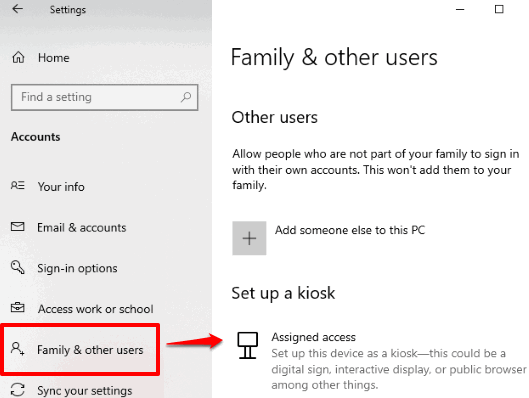
Step 2: The Accounts menu has “Family & other users” page. Click on that page and you will see “Set up a kiosk” section on the right side. Do a click on “Assigned access” option under that section.
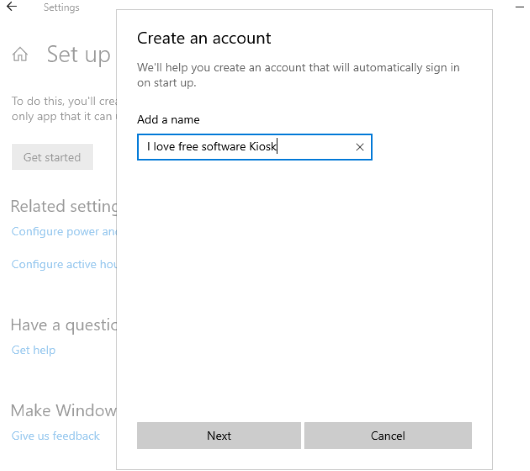
Step 3: In the next step, you will see a Get started button. Use that button and a pop-up will open where you need to add a custom name for the kiosk account you’re going to add.
Step 4: Now you need to add an app for that kiosk mode. There will be a list of built-in apps (like Microsoft Edge, Camera, Maps, Calendar, Game bar, Mail, OneNote, Movies & TV, etc.) in front of you. Select an app and press the Next button.
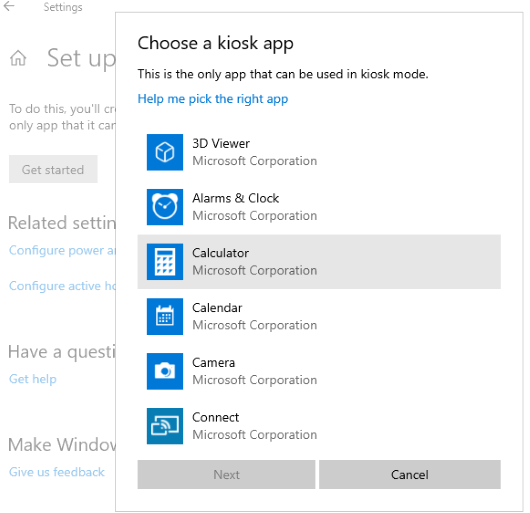
That’s it! Your kiosk mode Windows 10 account is created and you can see the name and app for that kiosk mode.
Now lock your PC and you will see kiosk mode account there. Select that account and you will enter in the kiosk mode.
Since kiosk mode account doesn’t have any Start button, Taskbar, etc., so you need to use Ctrl+Alt+Del to sign out from that account and access the original account (local or Microsoft account). Using that main account, you can also change the kiosk mode app or simply remove the kiosk mode. Access set up a kiosk section under Settings and then you will be able to change app and remove the kiosk account.
FrontFace Lockdown Tool
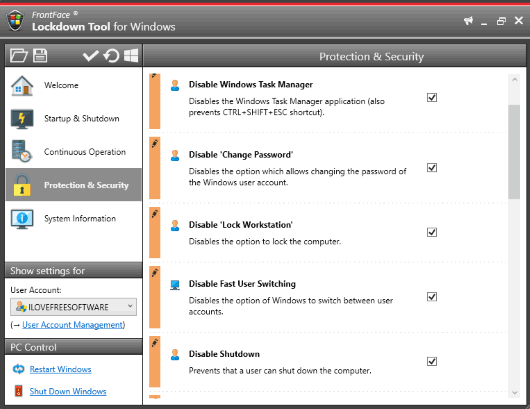
FrontFace Lockdown Tool is a feature-rich software which helps to turn PC into a digital signage player PC or interactive kiosk terminal. For both the options, there are separate profiles. And for each profile, it provides pre-defined options which you can configure as per your requirements. For example, for interactive kiosk terminal, it provides various options, such as disable Cortana, disable:
- Windows Search.
- Audio.
- Cameras.
- Driver Updates.
- Windows Feature Updates.
- Telemetry.
- Shutdown.
- Autorun.
- Log off.
- Lock Workstation.
- Change password.
- Windows Task Manager.
- Screensaver.
- Sticky Keys.
- All USB Storage Devices.
- Hide/show drives.
- Enable Windows Tablet Mode.
- Hide Blue Screens, etc.
I wasn’t able to find out the options to disable apps and programs. So, this software is mainly helpful to enable kiosk mode in Windows 10 for Windows functions and features only. While some of these options can be disabled using Registry Editor or Group Policy Editor, it is a bit difficult as well as time consuming to use those methods. Therefore, this software is handy where you can load a pre-defined profile, change options, and apply the profile to turn on kiosk mode in Windows 10.
To set up the kiosk mode and get step by step instructions, you can check the detailed and separate review of this tool here.
Simple Run Blocker
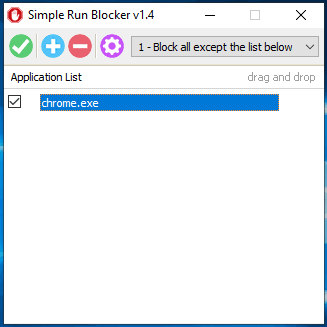
Though the name is “Simple Run Blocker“, it is very powerful actually. It lets you block or allow applications of your choice. You have the option to block all the applications except added on the list, which is visible on its interface. Or else, you can add some applications to its interface that will be blocked but rest of the applications will run normally. So, to use this software for kiosk mode in Windows 10, you need to use the first option “Block all except the list below“.
You can drag n drop any shortcut or exe file and use the first option to block rest of the applications. After that, press green tick mark to apply the changes. It is not able to block File Explorer, but Task Manager and other applications are blocked pretty well. In addition to that, you have the options to hide hard drives of your choice and also “Block Microsoft Store“.
Thus, the software will limit your Windows 10 PC up to a great extent. To unlock the items, use “Disable blocking” option and then press the green tick button.
You may also read its separate review.
The Conclusion:
All these are effective ways to use Windows 10 in kiosk mode. Those who want to enable access to only one app in kiosk mode, they must use the Settings app method. Users who want to disable programs, Task manager, etc., they may try “Simple Run Blocker”. And those who are interested to block access to some important features and functions of Windows 10, they should use the second option.