Zimilate is an amazing free online service that lets you save practically any digital content for future reference. You can use Zimilate to save images, notes, links, simple files, and even entire webpages. You can either simply drag and drop files from your computer to Zimilate’s web interface to save them, or use the Zimilate browser clipper extension to directly save entire web pages to your Zimilate account. You can save your content to different sections (called spheres), and add tags in order to manage and organize it better. Zimilate lets you create as many spheres as you want, and you can even re-order them to create a hierarchical structure. All of the saved content in Zimilate is searchable, and can be made private or public (if you want to share it with others). You can even browse spheres created by other users to find something that you might like. Sounds pretty awesome, doesn’t it? Let’s find out more.
Zimilate: Sign Up and Primary Web UI
Before you can start saving content with Zimilate, you need to create a free account. You can simply sign up using your Google or Facebook account credentials (Though there’s an option to sign up using email, but you’d be required to link your Facebook or Google account afterwards anyway!). Once your free account is created, you’re logged in. Here’s how the primary web interface looks like:
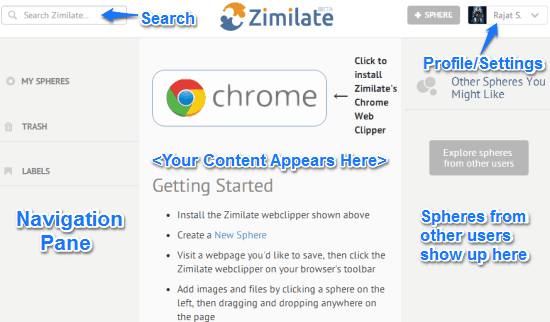
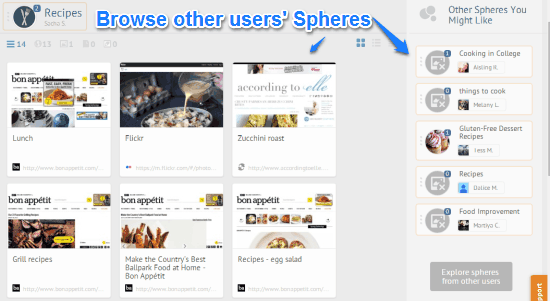
As illustrated by the above screenshot, Zimilate’s web interface is primarily divided into three panes. The left pane is the navigation pane, which can be used to access your created spheres, and the content uploaded to them. The middle pane is actually the one that shows up your uploaded content. The right pane consists of recommended spheres from other users. You can manually browse spheres from other users in this pane too. The header consists of a search box in the top left corner that lets you search your entire uploaded content, and buttons to create a new sphere and access your profile on the right.
How to create a New Sphere and Save Content on Zimilate?
You can directly drag and drop files on your Zimilate page to upload/save them. However, it’s good to install the Google Chrome clipper extension, as it makes saving entire webpages really easy. The link to add the extension is provided on the getting started page itself.
Here’s a step by step procedure to get started with Zimilate:
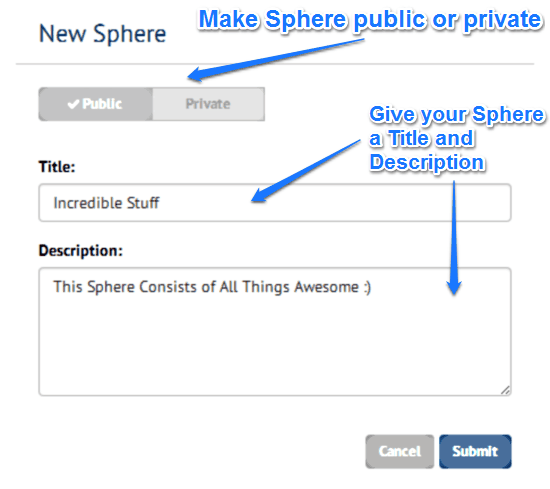
Step 1: First off, you need a Sphere to save content to. To do so, click the Sphere button on the top right corner of the homepage, and a window pops up. You can give your Sphere a name and description here. You can also choose to make it private or public. Once done, click Submit.
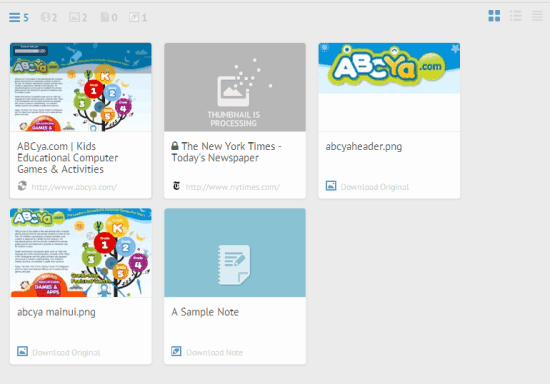
Step 2: Once a Sphere has been created, you can add notes, images, and other files to it. You can also save complete webpages as well, via the browser extension. Each sphere also has icon based links to add/upload content, and counters for the number of images, notes etc. that have been uploaded to it.

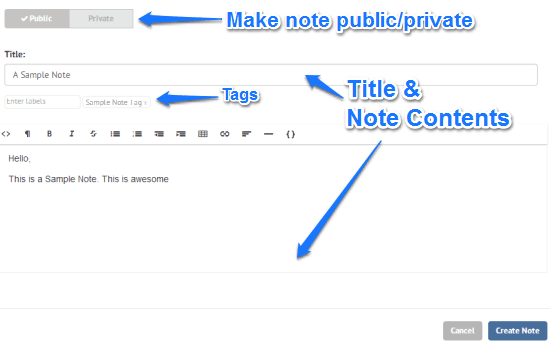
Step 3: As mentioned before, you can save different types of content on Zimilate. You can upload files, images, as well as add notes. To add a note, simply click the + icon on the top right corner of the sphere, and the note creation window will pop-up. Give your note a title, add content to it, and you’re good to go. You can add tags to your note, and choose to make it private too.
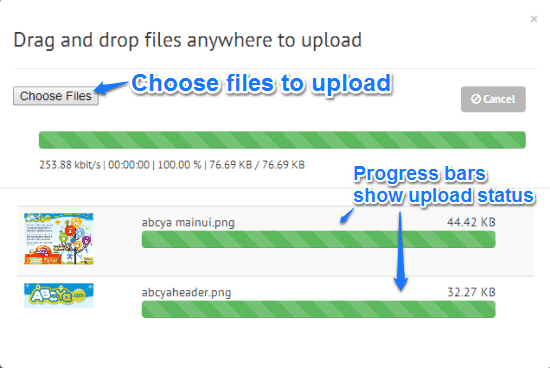
Uploading files, images etc., is really simple too. You can either directly drag and drop them on the sphere, or upload them manually (use the cloud icon on the top right corner of the sphere to do this). You can upload multiple files at once, and the upload status of each is shown via individual progress bars. Check out the screenshot below:
How to save webpages using Zimilate browser clipper extension?
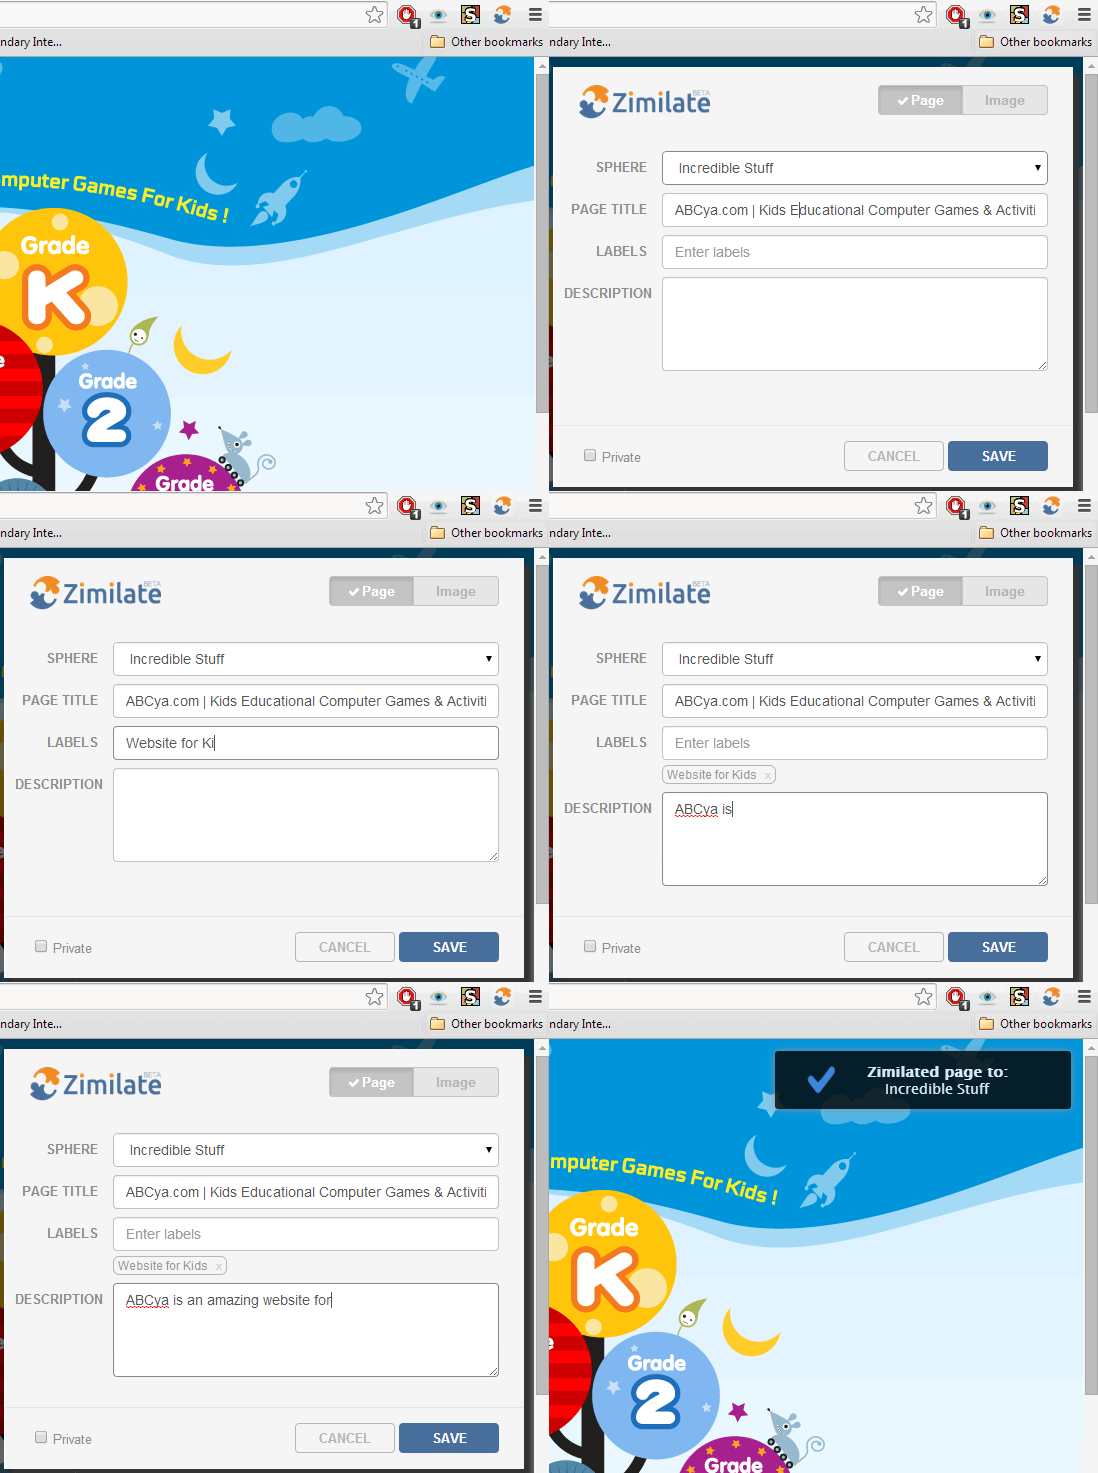
Zimilate lets you save perfect copies of entire webpages to your spheres for further reference. And the browser clipper extension makes it really easy. To save a webpage, all you have to do is click the Zimilate browser extension when on the webpage. Once you do that, a pop-up window lets you save the webpage to your spheres. You can also add a title, labels and description to your saved webpage. The clipper extension even lets you make your saved webpage private or public. Here’s a little animated graphic showing it in action:
Browse Spheres created by other users
Apart from creating your own Spheres, you can also browse spheres created by other Zimilate users in the right pane. Zimilate also serves up automatically recommended spheres based on the content of your Spheres. To browse the contents of a sphere, simply click on it, and it’ll open up in the main viewing pane.
Conclusion
Zimilate is a pretty awesome service that lets you save a lot of stuff instantly, for future reference. Features like the ability to save notes, drag and drop upload of images and all other kinds of files are really nifty additions. And of course, there’s also the browser clipper extension, which makes saving entire webpages a breeze. Although there are services like Evernote that let you do the same, but hey, what’s so bad in trying something new? I suggest you give Zimilate a try, you’ll love it.