This tutorial explains how to change save location of new apps in Windows 10.
By default, when we install a new app from Store in Windows 10, it is stored in Windows installation directory (usually, it’s ‘C’ drive). However, you have the option to change the storage location for new apps in Windows 10.
You need to follow only a few very simple steps to change the save location of new apps in Windows 10. This will also be helpful when you are out of space or very less space is remaining in C drive.
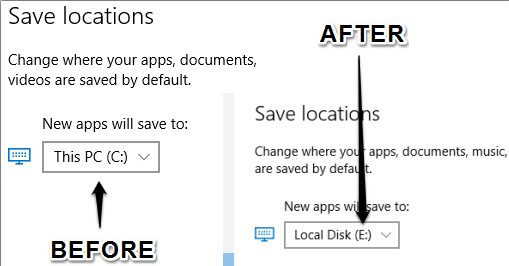
Below you can see save location of new apps changed from C to E by me in my Windows 10 PC.
You may also check:
How To Change Save Location of New Apps In Windows 10?
Follow these steps:
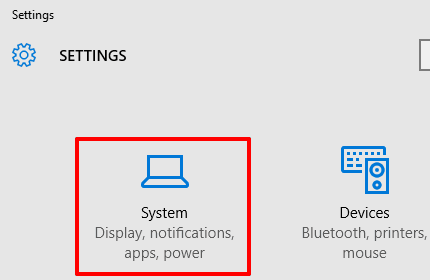
Step 1: It’s a basic step. You need to open System menu available under Settings.
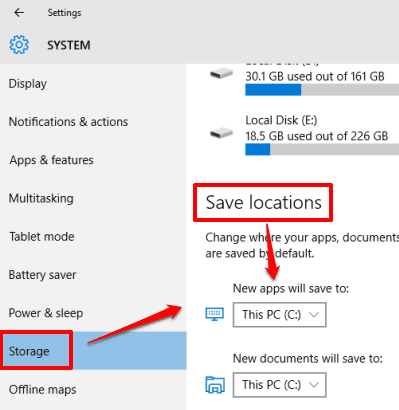
Step 2: System menu has multiple sub menus. You need to access Storage sub-menu. This menu has options to change Save locations for new apps, documents, music, etc. You need to change Save location for new apps, which is set to This PC (C:) by default.
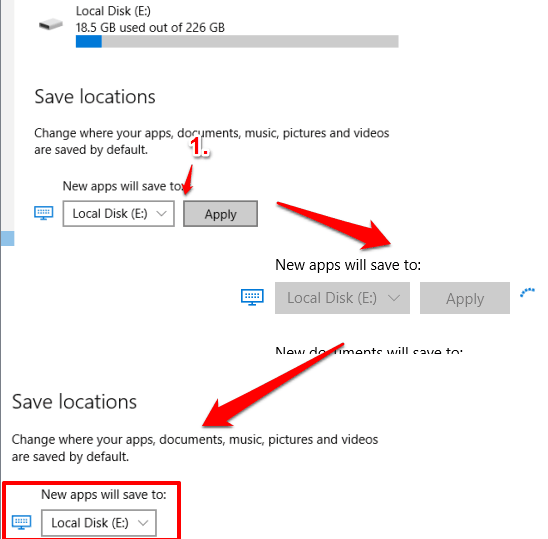
Step 3: Click on drop-down icon and it will show other drives. Select a particular drive, Apply changes, and that’s it! It will quickly set new drive as default storage location for new apps.
Now you can access Store and install any app to the newly selected storage drive.
Conclusion:
The most important reason to change default storage location of new apps in Windows 10 is to save the space of Windows installation directory. When you don’t have enough space on C Drive, switch to some other directory to store new apps.


