OpExams is a free Online Exam Creator tool that helps you to create and grade paper as well as online exams and quizzes. Once the paper exams are generated, you can take their printout and distribute it to your students. The Free version of OpExams allows you to create paper exams only. For creating and publishing Online exams and for automatic grading, you must upgrade to their paid plans.
Considerable time and effort are expended in the creation and grading of exams by Teachers. Online exam creator tools like OpExams not only makes it easy for them to generate and administers various types of exams, but also assists them in grading the students automatically and evaluate the learning outcomes. This saves a huge amount of valuable time that can be better used on planning their lessons, teaching the students, and providing them feedback on their performances.
Features:
- Create Paper Exams: OpExams provides all the tools you need to design, print and generate requisite reports for your paper exams.
- Online Quizzes: Create and publish online quizzes to sharpen your students’ skills, keep them actively engaged in the subject and increase their motivation.
- Online exams: Create online exams with a variety of questions like Short answer, Long answer, Multiple choice, Recorded audio and more with a provision to upload images and PDF documents to support the question. (Available in paid plans only)
- Advanced Proctoring and Rule Setting for Online Exams: OpExams support advanced Proctoring in case of online exams Camera capture /recording, Screen capture /recording in addition to setting automated Rules like No mouse right click, No resizing screen, No extra screen / monitor, No Session switch and more.
- Automatic grading: OpExams deciphers the answer papers of the Print exams once you upload their scanned copies. The AI algorithms of OpExams will then read and understand the questions and answers and automatically grade them. This feature is only available for paid subscribers.
How it Works:
1. Navigate to OpExams using the link that we have provided at the end of this article.
2. Register for a free account as a teacher using your Google credentials and sign in. You will be automatically taken to the OpExams Dashboard.

3. Click on ‘Create Course’, provide the course title and upload any cover image for it if required. Once the course is created successfully, you will be taken to its main page from where you can develop its question bank, create and administer exams, define learning outcomes and more. Prior to this you must invite Teachers and Students so that they can be added to the respective courses.

4. Click on ‘Go back’ to return to the main dashboard and in the panel on the left, click on Classrooms | Create Classroom, input a title for the classroom and then add students to the classroom by clicking on the button ‘Add Student’

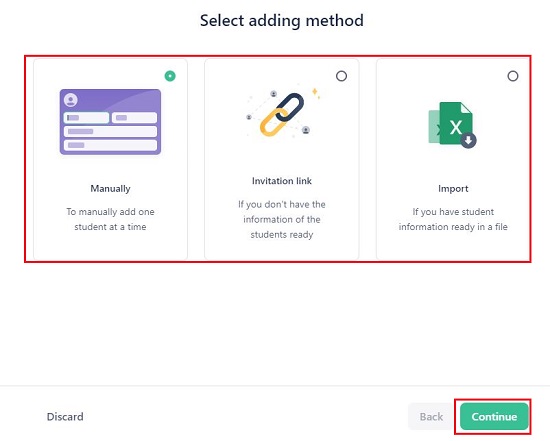
5. You can add students to a classroom manually or by creating and sending an invitation to link to them. They can use this link to create their account and automatically get added to the specified classroom. Alternatively, you can also import a list of students from an Excel or CSV file.
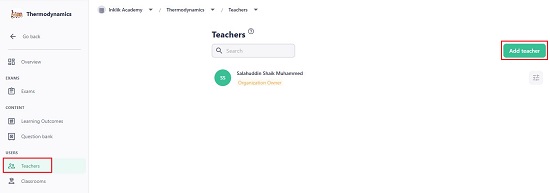
6. Next, click on Teachers | Invite Teachers, specify their Email address and choose a role to be assigned to them such as Admin or Teachers.
7. Once you have finished all the preparatory steps as defined above, click on ‘Courses’ and then choose the course that you created in the Step 3 above to open the Course Overview page.
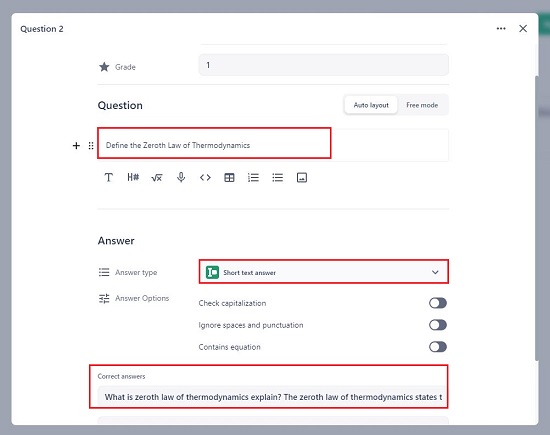
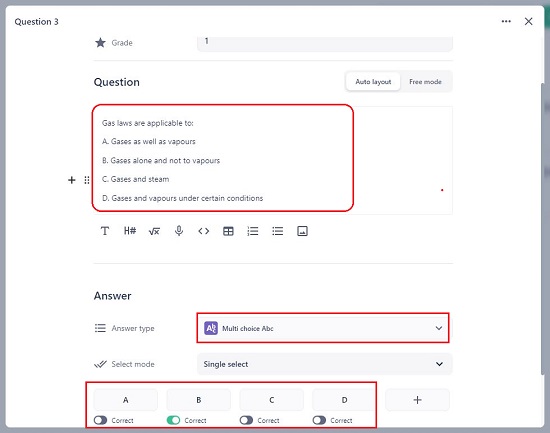
8. Click on ‘Question bank’ in the left panel and then click the button ‘New Question’. Assign a grade (marks) to the question and choose the question type by clicking on the dropdown list in the Answer section. OpExams provides a variety of choices such as Short text answer, Long answer, Multiple choice True / False, Multiple choice with ABC options, Multiple choice with images, Recorded audio and more. Now type the Question in the space provided and format it using the options in the toolbar and then specify the correct answer in the field available at the bottom of the box. Finally click on ‘Save changes’ to add the question to the bank. Repeat the same procedure to add all the questions pertaining to the selected course.
9. In the ‘Users’ section in the panel towards the left, click on ‘Teachers’ and add the teachers for the current course. Similarly, click on ‘Classrooms’ and link the classroom that you have created in the Step 4 above.

10. Next, click on Exams | Create exam, choose ‘Paper Exam’, assign a name for it and click on ‘Next’
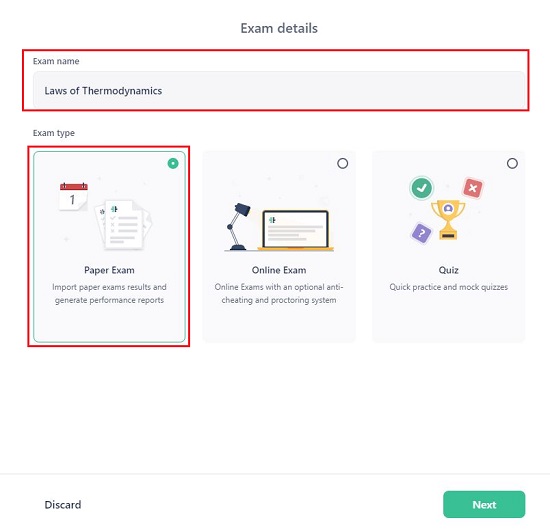
11. Now select the classroom for this exam. Observe that the number of students in the classroom will be visible. Click on ‘Create’ to initiate the exam and then click on ‘Start designing’.
12. Click on ‘Add questions from the bank’ and all the questions that you have added in the bank will be visible. Choose any question that you wish to add by clicking the ‘Add to exam’ button and finally click on the button ‘Add questions’ at the bottom right to add the selected questions to the exam.
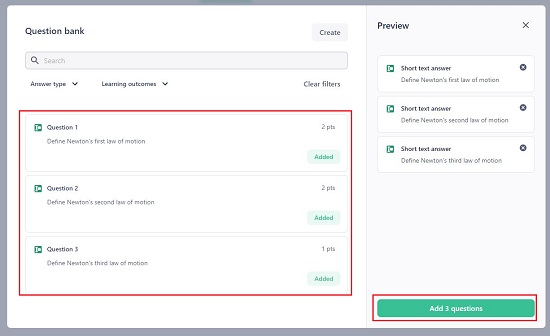
13. If you wish to directly add a question that is not present in the question bank, you can click on the button ‘Add new question’ and carry out the same steps used to add a question to the bank.
14. Your question paper is now ready for printing. Click on ‘Print’ in the toolbar at the top, use the toggle buttons in the right panel for inserting various elements into the paper such as organization name / logo, exam name / date, exam duration, course name, student name and more. Specify the paper size from the dropdown at the top of the panel and then click on the ‘Print’ button at the bottom right of the page to print the question papers.
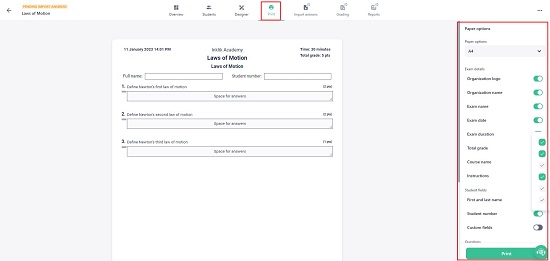
15. Once the students attempt the print exam, the scanned answer sheet in PDF format has to be uploaded to OpExams for an AI analysis of the answers. Click on ‘Import answers’ in the toolbar at the top and then click on ‘Import handwritten answers’ Click on the ‘Upload’ button, upload the ready answer papers to OpExams and then click on ‘Next’.
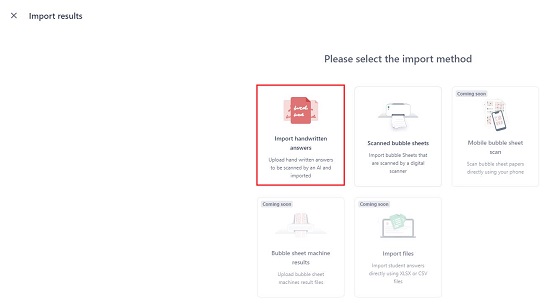
16. Specify the number of papers per student and the number of question columns depending on the design of your print exam and click on ‘Continue’.
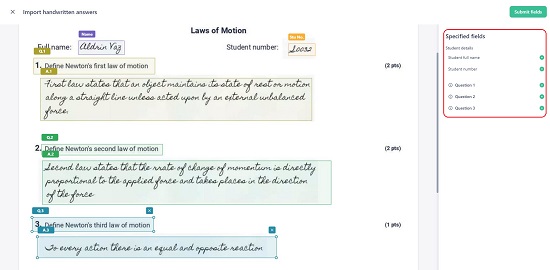
17. In the next step you must select the fields available on the right panel one by one and move the colored boxes to the precise location on the scanned page where the information required by the field is available. For the Question fields, you must place both the question as well as answer boxes in the correct location. Once you have finished this entire process, click on ‘Submit fields’ and OpExams will read the handwritten papers and grade them accordingly. You must remember that the Grading feature is only available in the paid version.
Closing Thoughts:
OpExams is a decent tool for Teachers and Educators to create and administer exams and relieves a lot of their burden. This lends them valuable time that they could use in planning and executing their lessons and providing important feedback to their students.
Click here to navigate to OpExams.