Arcade is a free online platform that enables you to effortlessly create product demos in just a couple of minutes. All that you need to do is record your product and Arcade automatically renders it into an interactive demo that can be embedded on websites, social media posts, blog posts and more. Prospective users can then walk through and experience your product at their own speed without pausing and rewinding.
During the product recording, Arcade automatically captures and stitches together your screen captures, videos, tool tips and more include your actions such as clicks, scrolls etc. Further, you can customize your hotspots like changing color, adding text and more so that the users get more context and proceed downwards into your product and funnel.
Arcade also provides you with in-built analytics that enable you to easily and swiftly identify the specific elements of the product demo that resonate the most with the audience. Based on the analytics, you can go ahead and modify the demo flows to include new features and the changes will be automatically reflected in the Arcades that have already been published.
Let us go through the steps that are involved in creating an Arcade:
- Record: You can begin recording directly from the Arcade Chrome Extension. Once the recording starts, the extension will connect the screen recordings, videos, images etc to develop an engaging product story.
- Edit: Once the recording is done, you can use the Arcade flexible editor to add and customize additional hotspots, callouts and use interactive features (only in paid version) like Pan & Zoom, Blurring and more.
- Share & Embed: Once you are through with the editing, you can embed the Arcades in your website, blog posts, applications, changelogs and more to drive curiosity and interest and among users to turn them into power users.
Working:
1. Click on this link to navigate to Arcade and register for a free account using your Google or Microsoft credentials.
2. You will automatically be navigated to the Arcade Dashboard after providing a few details about yourself and your organization.
3. Click on ‘Install Chrome Extension’ to download and install the Arcade Extension in your browser.
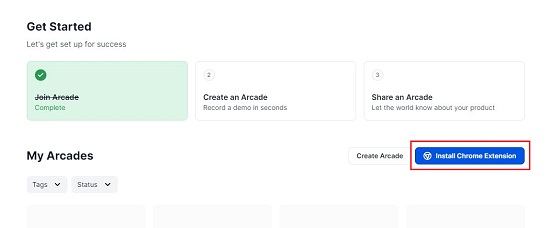
4. Now, click on the button ‘Create Arcade’ and choose the option to capture the demo with the extension. Alternatively, you can also upload a media from your computer to produce the Arcade you already have the product recordings ready.

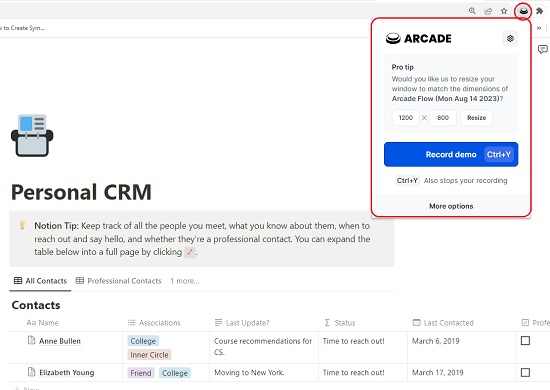
5. Navigate to the weblink (URL) of the product that you wish to capture, launch the Arcade extension, and click on the button ‘Record demo’. Go through your product screens and perform all the actions and activities that you desire to record such as clicks, scrolls etc and when you are done, just click on the extension to stop recording. You can also use the key combination ‘Ctrl + Y’ to start and stop the recording.
6. The recorded product demo will now be uploaded to your dashboard along with all your actions. You can play the demo and click on an all the hotspots (clicks, scrolls etc) to move ahead and walkthrough the recording.
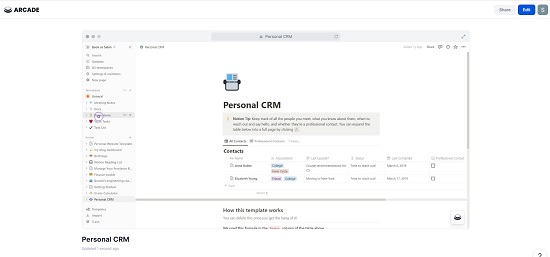
7. If you wish to edit the demo, click on the ‘Edit’ button at the top right of the dashboard. This will take you to the Arcade Editor where you can observe all the screen captures in the left pane. You can click on any of the screens to load them in the editor.
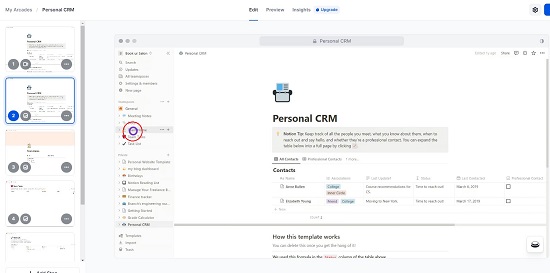
8. You can click on any hotspot and change the Style, Background / Text color, Position etc. Additionally, you can also configure to open the hotspot by default and modify the Destination step as well. By default, clicking on the hotspot takes the user to the next step.
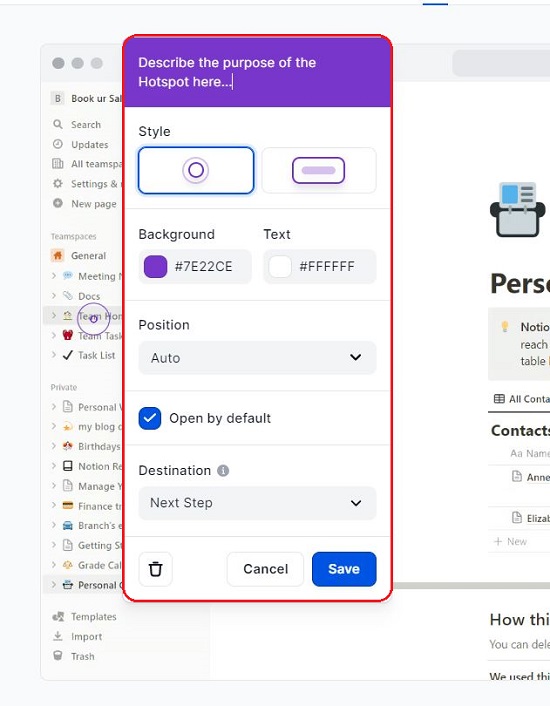
9. Also, you can input some text in the textbox at the top to explain the benefit of the chosen hotspot.
10. Observe that there is a toolbar located towards the right of the Editor. You can use it to insert additional callouts, hotspots etc or insert some media from the Arcade library.
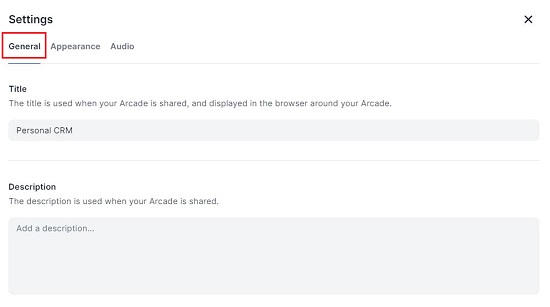
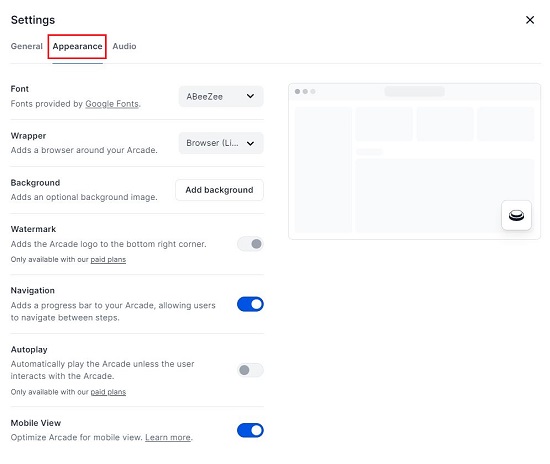
11. Click on the ‘Settings’ icon at the top right of the dashboard to configure the Title, Description, Appearance (font, background, progress bar etc). If required, you can also add a background music to the demo using the ‘’Audio’ tab of the ‘Settings’ pop-up window.
12. Once you have tested the entire demo and are satisfied with it, click on ‘Share’ and enable the toggle button to Publish and Share it with anyone. Next, click on ‘Copy link’ to copy the URL of the product demo and share it with whomever you wish. You can also click on ‘Copy Code’ to copy the embed code and insert the demo on your website. Alternatively, you can click on ‘Tweet’ to post it on Twitter.
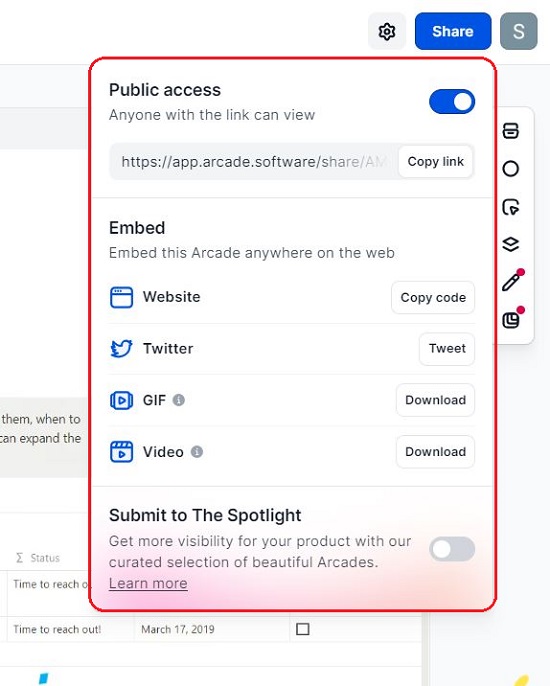
13. To download the finished demo in GIF or Video format, click on the corresponding buttons in the Share window.
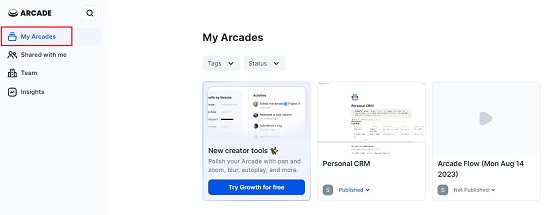
14. All your Arcades can be accessed by clicking on the ‘My Arcades’ link in the Dashboard.
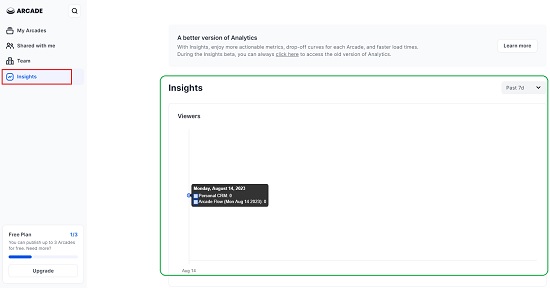
15. Click on the ‘Insights’ link in the Dashboard to view the Analytics that help you to find out which elements are resonating the most with your users.
The free version of Arcade allows you to publish 3 Arcades with a watermark. To overcome this limitation, you can subscribe to their Pro, Growth or Enterprise plans. Click here to read about them.
Closing Comments:
Arcade is an intuitive way to create demos and showcase to potential users to that they can try it out before turning into power users. The demos can be shared via a URL or embedded in websites, tweets, blog posts and more.
Arcade is a great tool for product managers, marketers, customer support managers and all those personnel who believe in showcasing their products at the right place rather than plain talks. Go ahead and try it out and write to us about your experience with it. Click here to navigate to Arcade.