This tutorial explains how to add tiles in groups in Windows 10 Start menu. This will be very helpful to add and access tiles that are related to a particular category. By adding Start menu tiles in groups, you will come to know exactly where you will find a particular tile. This will also save precious space of your Start menu.
Earlier, it was not possible in Windows 10 PC, but now this feature is natively supported. Adding tiles in group is already a part of Windows Phones (both Windows 8 and Windows 10 phones). Now, the same feature is also a part of Windows 10 PC. You can remove any tile from group whenever you want.

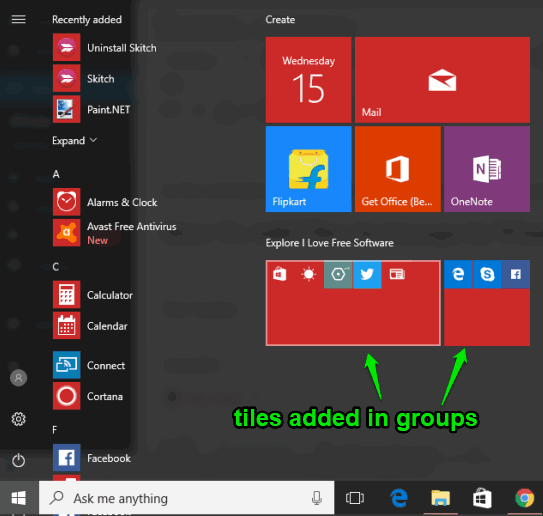
In the screenshot above, you can see some Windows 10 Start menu tiles added by me in groups.
Before moving further, do note that this feature is currently available in the preview build of Creators update (the next big update of Windows 10). So you need to wait till the stable version of Windows 10 Creators update is released by Microsoft. If you can’t wait any longer, then you can join the insider program of Windows 10 and use this feature. If you are already using insider preview and want to use this feature, then this tutorial will help you for sure.
How To Add Tiles In Groups In Windows 10 Start Menu?
Step 1: Open Start menu. You can resize tiles that you want to add in a group. You can do this later as well.
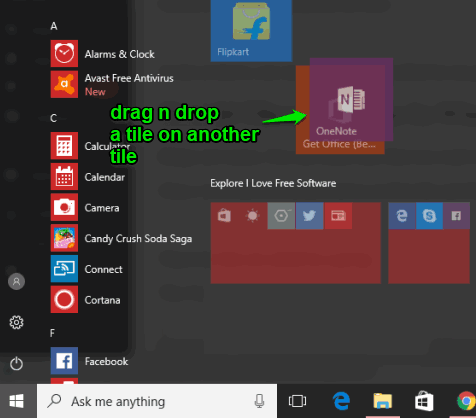
Step 2: Now press n hold left mouse button on first tile and drop it on the second tile.

That’s it! Both the tiles are added in a group. Repeat this action to add more tiles in that group.
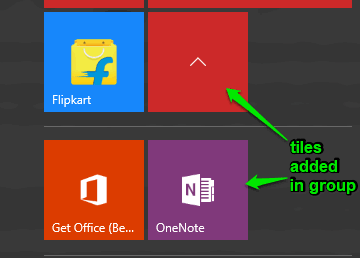
Step 3: The main tile (or parent tile) is created (which creates the group) and this way tiles are added in the group. Now you can click on the parent tile to show or hide the tiles available in the group.

You can also resize the main tile by right-clicking and selecting resize option. In a similar way, you can resize other tiles available in the group. This is just to set the size of tiles as per your needs.
When you want to remove a tile from the group, click the parent tile to show all the tiles, drag a tile and drop it on some other area in Start menu. This will detach tile from the group immediately.
To overcome from unwanted changes in Start menu layout, you can also take a backup of Start menu layout and restore it later. Or else, you can also lock tiles in Windows 10 to prevent resizing and uninstalling Start menu tiles.
The Verdict:
This is really a handy feature and all those who pin tiles on Windows 10 Start menu to access frequently used programs must be happy with the arrival of this feature. Now you will be able to add more tiles and still save space on your Windows 10 Start menu. Just drag n drop a tile on another tile and add tiles in group in Windows 10 Start menu.