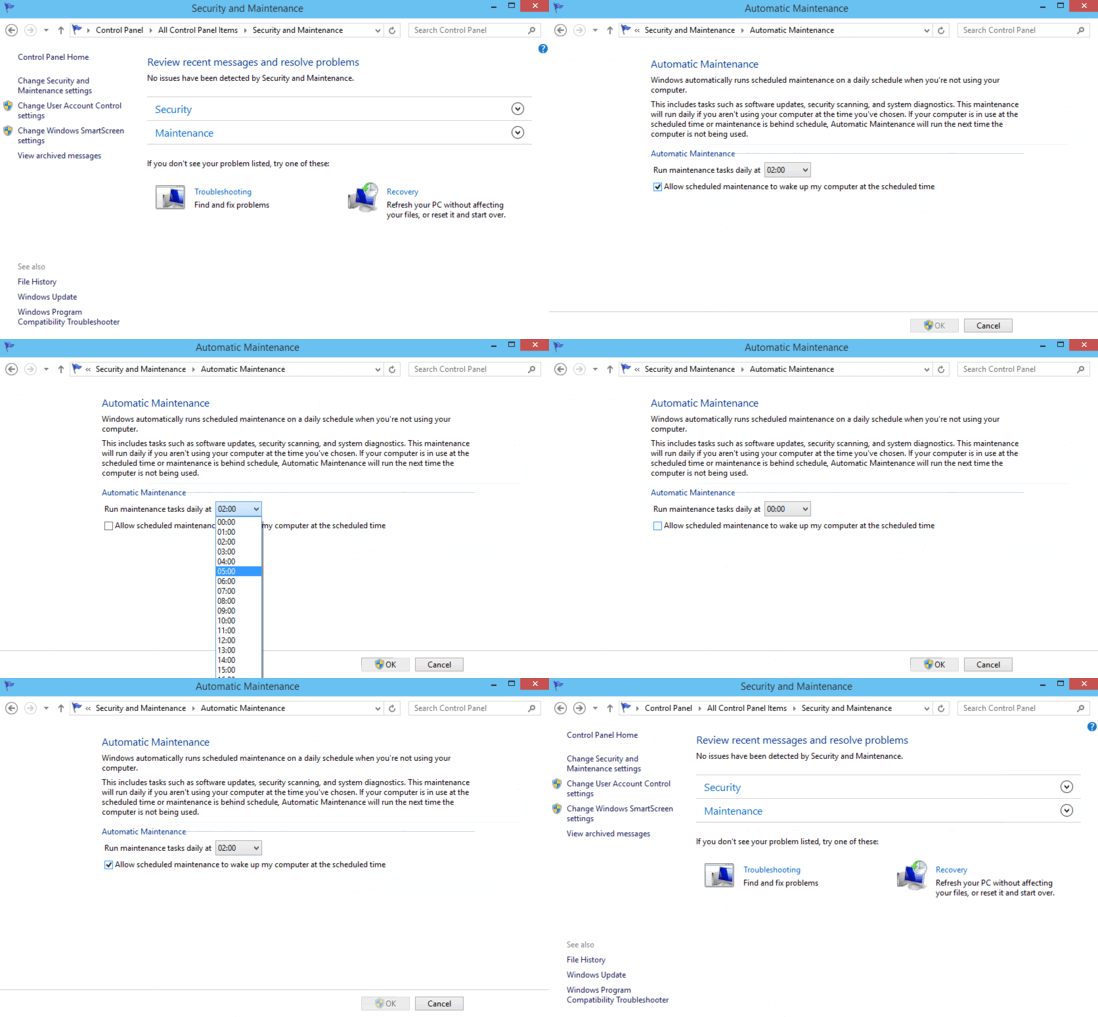
This tutorial details how to to schedule automatic system maintenance in Windows 10.
Modern Operating Systems are extremely complicated software, spanning billions of lines of code. Microsoft’s latest offering, Windows 10 is also one such OS. It can handle multiple tasks, allocate and de-allocate system hardware and software resources, control other devices, and do a heck of a lot more, all at the same time, without breaking a sweat.
But do you know that Windows 10 can even run automatically scheduled maintenance tasks on your computer on a daily basis? Bet you didn’t. Let’s jump over the break, and see what automatic maintenance is, and how you can configure automatic system maintenance in Windows 10.

What Is Automatic System Maintenance?
Automatic System Maintenance is a built in feature of Windows 10 (it has been present in previous major versions of Windows as well), that’s responsible for the daily upkeep of your computer. As the name pretty much sums it up, Automatic System Maintenance includes the Operating System running maintenance tasks (system diagnostics, security scans, software updates etc.) on the computer, in accordance with a pre-configured schedule.
One of the most important facts about Automatic System Maintenance is that it always runs when the system is idle, so that the maintenance tasks don’t interfere with the normal usage of the computer. If the computer is being used at the scheduled time of maintenance, the Operating System postpones it to be carried out the next time the computer is free. Pretty cool, right?
How To Configure Automatic System Maintenance In Windows 10?
Setting up automatic system maintenance in Windows 10 is a ridiculously simple and straightforward affair, and takes nothing more than a couple of seconds. However, you still need to have administrator privileges to configure it. Given below is a detailed illustrative walkthrough, explaining how it’s done:
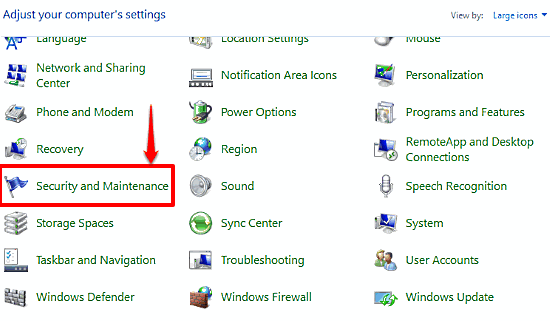
Step 1: Go to the classic Windows Control Panel, and click on the Security and Maintenance item.

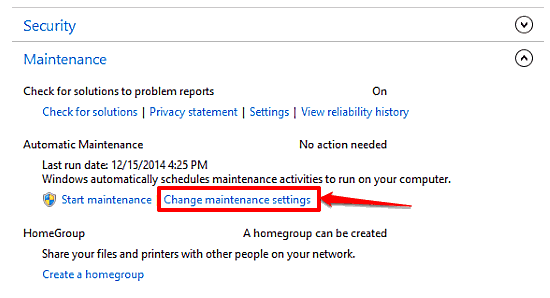
Step 2: You’ll be now directed to the Security and Maintenance settings section. Expand the Maintenance menu, and under the Automatic Maintenance subsection, click on Change maintenance settings.

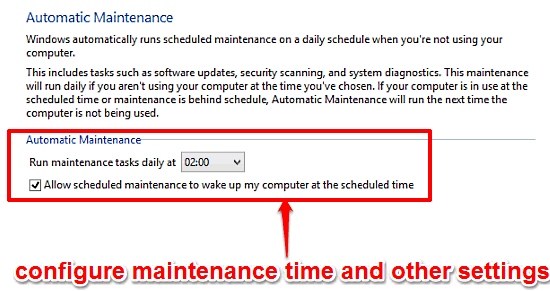
Step 3: The screen now displayed will have a brief information about Automatic System Maintenance. Go to the drop down menu marked with the words Run maintenance tasks daily at, and select the time of the day when you want Automatic System Maintenance to run. You can also (optionally) opt to have automatic maintenance wake up the computer (if it’s in sleep mode) at the scheduled time, by clicking the checkmark against that option. Click OK. Here’s a screenie:

That’s it, pals! Going forward, Windows 10 will automatically run maintenance tasks on your computer at the specified time, to make sure it keeps working the way it’s supposed to. Pretty dope, ain’t it?
Check Out: Specify The Processor Cores On Which A Program Can Run In Windows 10
Wrapping It Up
Automatic System Maintenance is an incredibly useful native feature of Windows 10, that makes sure that your computer stays in a perfect working condition. Unobtrusive yet functional, it silently takes care of your computer, so you don’t have to. Take it for a spin, you’ll love it.