This tutorial details how to specify disk space to be used for system restore in Windows 10. An essential native security feature that has been included in almost all major versions of Windows till date, System Restore allows you to (mostly) undo the damage done by system crashes and get it back to a working state. This is accomplished via automatically created “Restore” points, which the system can be rolled back to, thus “restoring” it to a working condition.
Quite obviously, these Restore points take up a chunk of hard drive space. This means that the Operating System has to automatically delete older Restore points, in order to free up space for the newer ones. But what if you want to have more than a couple of restore points stored (just to be on the safe side), or conversely, just the most recent one?
Not a problem, amigo. Windows 10 allows you to precisely specify the percentage of hard disk space you want to use for System Restore points, for each disk partition. Can’t wait to find out more? Let’s see how you can specify disk space to be used for System Restore in Windows 10.
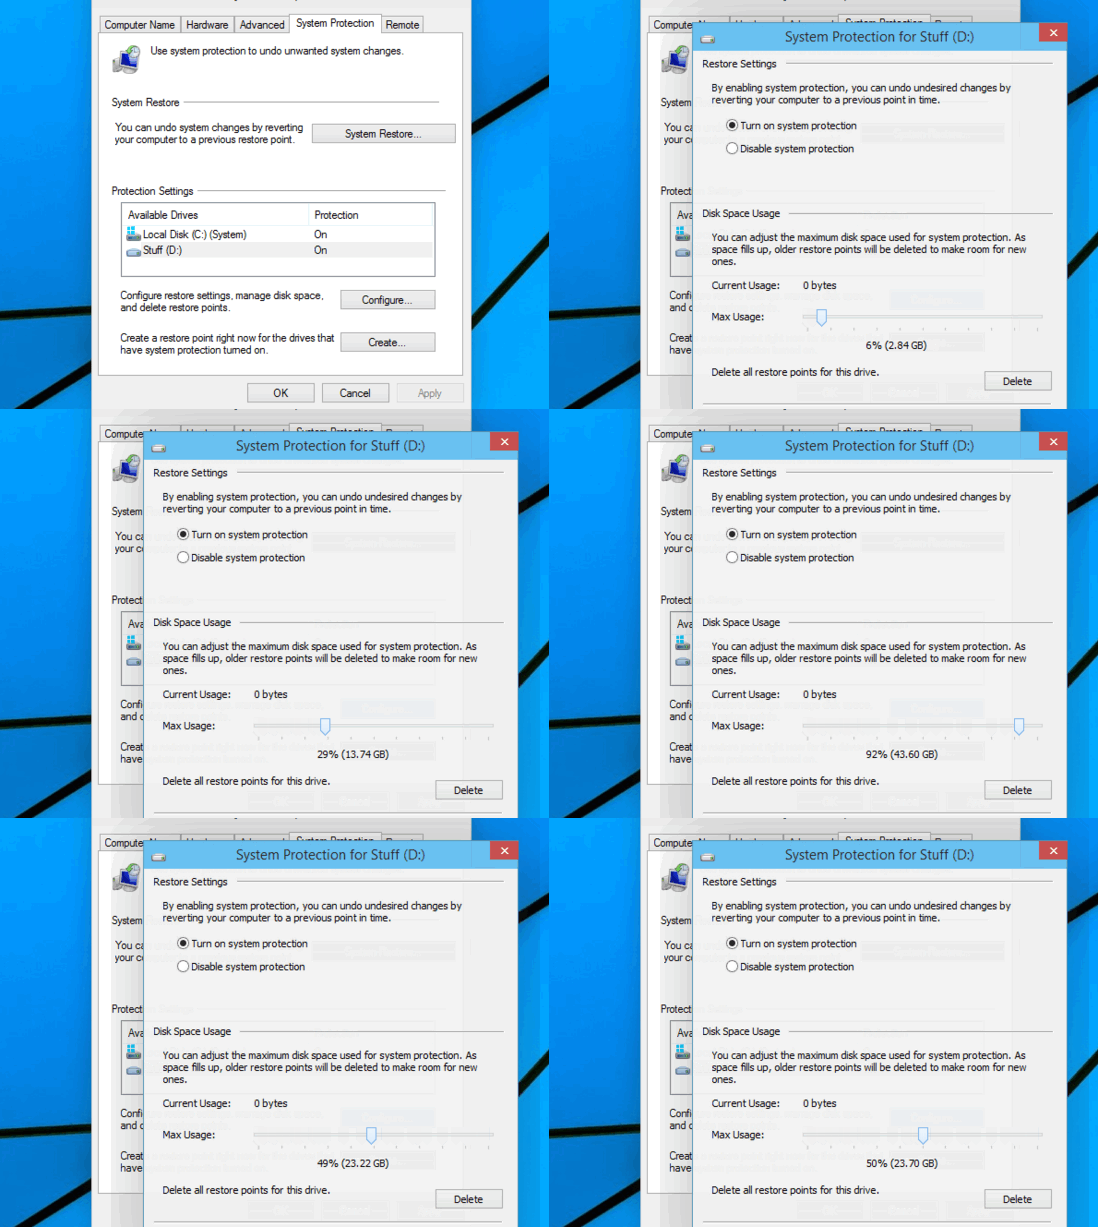
How To Specify Disk Space To Be Used For System Restore In Windows 10?
It’s easy to specify the exact disk space that you want to be utilized for saving System Restore points in Windows 10. And the best part is that you can configure set this disk space limit for each individual disk partition. Here’s a little step by step tutorial to get things rolling:
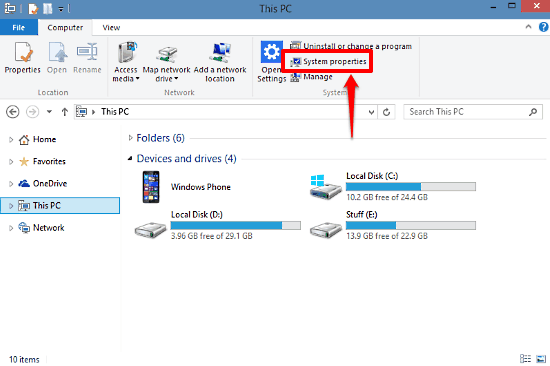
Step 1: Open up This PC (earlier known as My Computer). Head over to the Ribbon Menu and click on System properties option on the Computer tab.
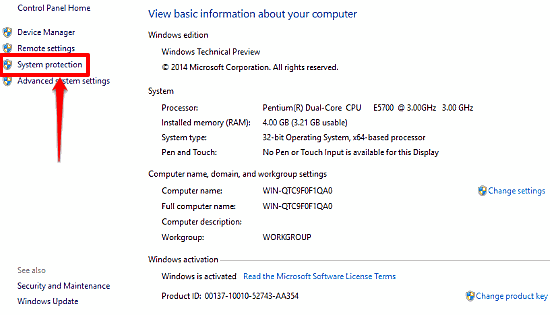
Step 2: You’ll be taken to the System information pane, that gives essential information about the major hardware and software aspects of your computer. On the top left corner, click on System Protection.
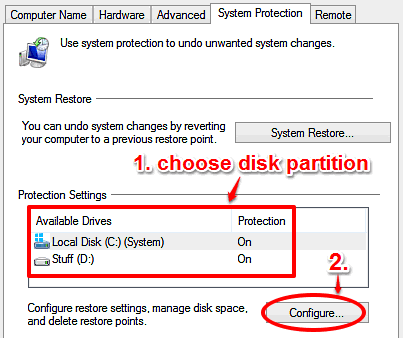
Step 3: The System Properties dialog box will pop up, with the System Protection tab already focused. Under the Protection Settings sub-section, you’ll see a listing of all available disk partitions. Select the partition for which you want to specify the System Restore disk utilization limit, and click on the Configure button.
Step 4: Almost there fellas. Yet another dialog box will now show up. Under the Disk Space Usage sub-section, you’ll see a Max Usage slider. Use this slider to exactly specify the percentage of space (of the currently selected disk partition) that you want to allocate for System Restore. Here’s a screenie:
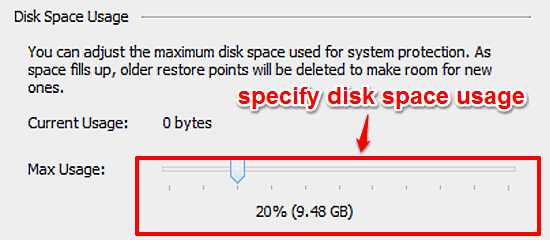
That’s all. You can use the same procedure to specify the exact System Restore disk space utilization limit for all the other disk partitions. Pretty cool, right?
Related: Turn On System Restore For Individual Disk Partitions In Windows 10
Closing Thoughts
System Restore is one of the most important and essential features of Windows, as it allows you to get back your computer to a working condition, and with the latest Windows 10, it’s even better. Add to it the fact that you can specify the exact disk space to be used for storing restore points, and you can have absolutely no reason left not to use System Restore. Try it out and let me know what you think in the comments section.