Editor Ratings:
User Ratings:
[Total: 0 Average: 0]
This tutorial will explain how to burn a CD or burn a DVD in Windows 8 without using any third-party software. This ‘How to’ is of basic level and will be over in a while. So lets get started with this very simple and easy ‘How to’.
All the basics of how to burn a CD/DVD in Windows 8 remains the same as in Windows 7; it’s just that the interface has changed a little bit. This tutorial will help you navigate through the new interface of Windows 8 so that you can burn a CD/DVD in Windows 8.
Steps to burn a CD/DVD in Windows 8:
- First thing that you should do is switch to the desktop from the start screen; to do so, just click on the desktop tile as shown in the screenshot of the start screen.
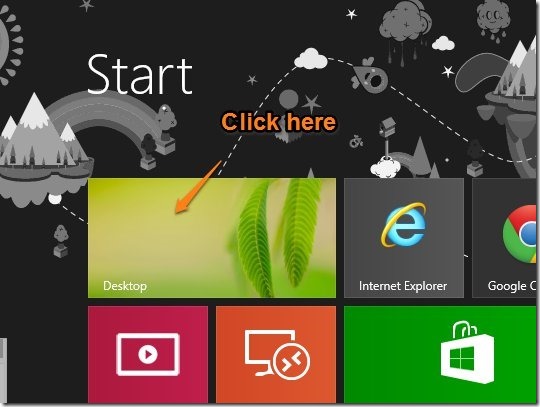
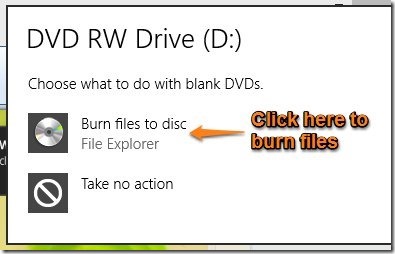
- Now that you are in desktop mode, just eject your CD/DVD drive and insert the blank CD/DVD in your drive which you want to burn. Now, a dialog box as shown in the screenshot will open up; just click on it to see further options.

- After you have clicked on the dialog window as shown above, a window will come up as shown below that will show you two options: Burn files to disc, or Take no action. As we intended to burn our DVD, let’s click on the first option.

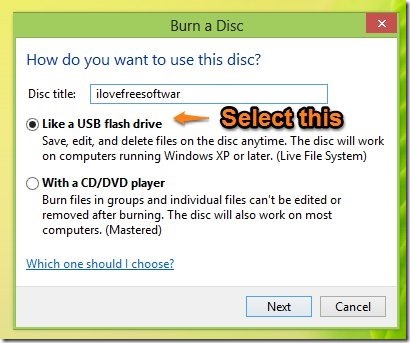
- Then a window as shown below will open up. Here you are supposed to add the name of the disc, by default it will be the current date at which the CD/DVD is being created; change it according to your need. Now that you have named your CD/DVD disc, just select the like a USB flash drive as pointed out in the screenshot below and click on the Next button.

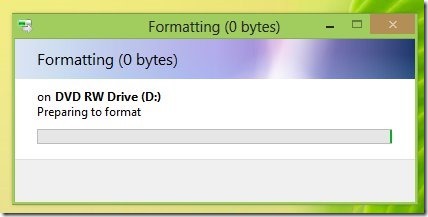
- When you click on the Next button as shown in the screenshot above, a window will appear which will start formatting your disk as seen below. This part will take a few seconds so that Windows can format the CD/DVD according to its needs.

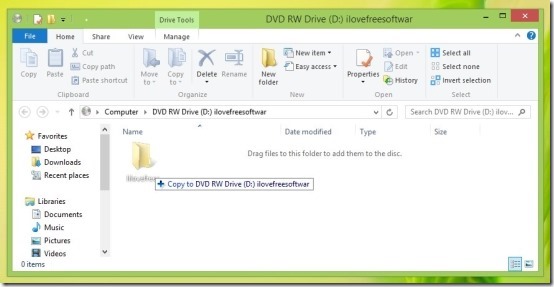
- Now after the formatting is completed a window will open up as shown below and just drag and drop files to burn to the disc or you can simply copy the files or folders to the disc and that’s it; your are done. The files have been burned to disc.

- Now when you eject the disc; Windows will automatically close the disc session so that it can be used on other computer as shown in the screenshot below. If you want to add more files to the disk just copy more files to the disk and they too will be written on to the media disc.

Here are some other interesting tutorials for Windows 8:
How To Use Task Manager In Windows 8
How To Get Start Menu In Windows 8

