This tutorial explains how to set total number of failed login attempts in Windows 10. By default, we can try as many failed login attempts in Windows 10 as we want. But there is a secret trick that will help you set total number of invalid login attempts. You can do this by using the Local Security Window, which is a native feature of Windows 10.
When the number of failed login attempts are reached, your PC is locked for 30 minutes, which is the default lockout duration. You won’t be able to access your PC or that particular Windows 10 account until lockout duration time is over. Even if you enter correct password after failed login attempts, the PC will remain locked. Although you can change default lockout duration also, but I will cover that in a separate tutorial. For now, let’s see the steps to set total number of invalid or failed login attempts in Windows 10.

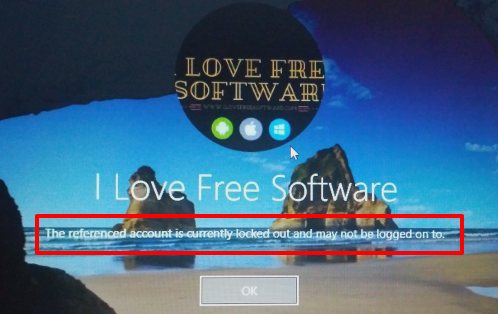
Above screenshot shows a message that will visible when failed login attempts are reached in Windows 10.
How To Set Total Number of Failed Login Attempts In Windows 10?
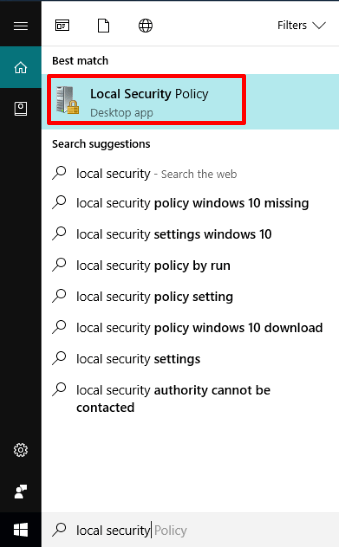
Step 1: In this step, you need to open “Local Security Policy” window. Type “local security” in Search box and then press the Enter button. This will help you launch the Local Security Policy window.

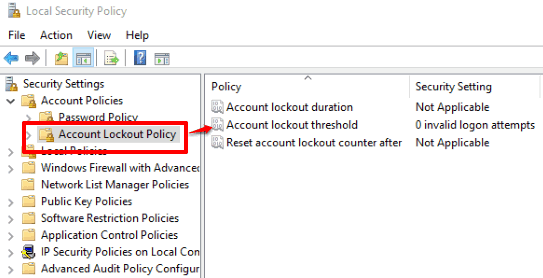
Step 2: When Local Security Window is opened, you have to access “Account lockout threshold” option. For this, first of all expand “Account Policies” folder and then tap on “Account Lockout Policy” folder. Under this folder, you will see Account lockout threshold option. See the screenshot below. Double-click this option.

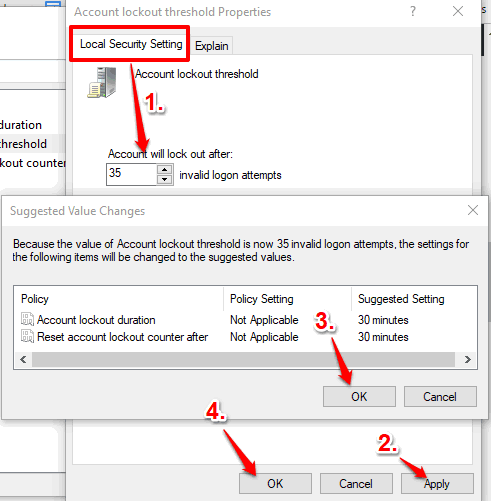
Step 3: Account lockout threshold Properties window will open. That window contains Local Security Setting tab. That tab provides a box in which you have to enter the number of failed login attempts. By default, it is set to ‘0’, which means there is no limit to failed login attempts. You have to change this value with desired number.
Enter a number and press Apply button. A small window will open showing you that account lockout duration is set to 30 minutes. Close that window using OK button and save new changes.

That’s it! You have set total number of failed login attempts. Now lock PC (Win+L) and enter wrong passwords. When failed login attempts are reached, it will lock your PC for 30 minutes.
In case you don’t want to set login attempts, then you can set ‘0’ value again in the associated box (mentioned in step 3) and save the changes.
You can also look at this video to set total number of failed login attempts in Windows 10:
You may also learn How To Disable Shut Down, Restart, Sleep Options In Windows 10 Start Menu and How To Remove Password Reveal Button from Windows 10 Login Screen.
The Verdict:
Setting up total number of invalid or failed login attempts in Windows 10 can come in handy when you leave your PC unattended. The other person who don’t know your PC password will try to guess password and as soon as failed login attempts are reached, you PC will be locked down. I hope this tutorial will help you in this.