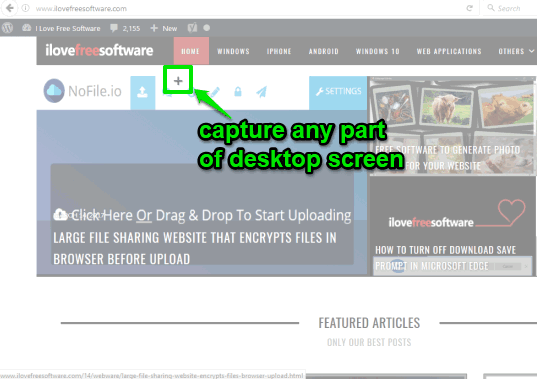
This tutorial explains how to take screenshot of specific area in Windows 10 without any tool. This is possible using the native feature of Windows 10. Windows 10 is not limited to capture only the full screen anymore. Just select any part of desktop screen of your choice and save the screenshot to PC.
Earlier, there was only “PrintScreen” key which is used to capture full desktop screen. After that, Windows 10 came with feature to capture and automatically save full desktop screen using hotkey and Game Bar feature. Now Windows 10 supports feature to capture a particular region of desktop screen, which was not possible earlier. The captured area is copied to the clipboard. After capturing the specific area, you can use MS Paint or any other image editor software to paste the captured screenshot and then save it to PC. I wish Windows 10 would come with feature to automatically save captured region. But for now, this feature can only capture a particular area and copy it to clipboard.

In the screenshot above, you can see a particular area captured by me using this native feature of Windows 10.
Note: Capturing the screenshot of a particular area in Windows 10 desktop is made possible via Creators Update. This major update is yet to come. Therefore, this feature is currently available in the preview build of Windows 10. If you want to use this feature now, then you should get the insider preview of Windows 10. Or else, you may wait till the final release of Windows 10 Creators update.
How To Capture Screenshot of A Particular Area In Windows 10 Without Any Tool?
This is an extremely simply feature of Windows 10. Just a hotkey is all you need to press to capture screenshot of any part of your Windows 10 desktop screen.
Open any application or webpage whose area you want to capture and then press “Win+Shift+S” hotkey. This will cover the whole desktop screen with a translucent white color. Your mouse cursor icon will also turn into a crosshair icon. That means you can now take the screenshot of any part of desktop screen.

Use left mouse button to select the area that you want to capture and release the button. That’s it! The selected area will be copied to the clipboard. After that, you can open any image editor to paste the captured area and save the screenshot to PC.
The Verdict:
Taking screenshot is a basic thing that almost all of us do on regular basis. Although we already have lots of advanced screen capture software for Windows 10, but this feature is a good addition. Many users would be happy to know that Windows 10 has gifted the feature to capture any part of desktop screen and then save that area to PC. Personally I am quite happy, though I was expecting that the captured area will be saved to Pictures folder automatically. Still, the feature is quite useful.