Guidde is a free browser plugin for Chrome and Edge that can be used to easily create ‘how-to’ videos of any workflow for any application with automatic callouts and quickly share them with your team members and customers. You can make the videos appear visually professional and beautiful without any prior experience in graphic designing or video editing.
Guidde is tailor made for Knowledge base articles, Training manuals, New Feature announcements, Customer communication and more. Hence is a great tool in the hands of Customer Support, Presales teams, Product teams and Training agencies to supercharge their requirements.
Many teams that work across various companies and roles do not routinely use multimedia as a tool for their how-to guides, instead relying on text and screenshots for their requirements. This is basically due to the challenges of handling audio-video stuff like recording and editing, lack of graphics designing skills, challenges pertaining to hosting and storage of the stuff so that it can be searched and accessed easily and so on. Not anymore. With Guidde at your disposal, all these challenges are taken care of easily so that the creation of the how-to guides becomes a cake-walk for even novice users.
The entire process of creation of the guides can be broken down into the following 3 simple Steps :
Steps:
- Recording: Go through your workflow as you normally would and use the Browser extension to capture all the steps in real-time.
- Editing: Guidde will automatically create the call-outs and highlights for each step. If required, you can Edit the steps by freely adding text / annotations and custom branding. At the same time, blur out any sensitive information if it is present.
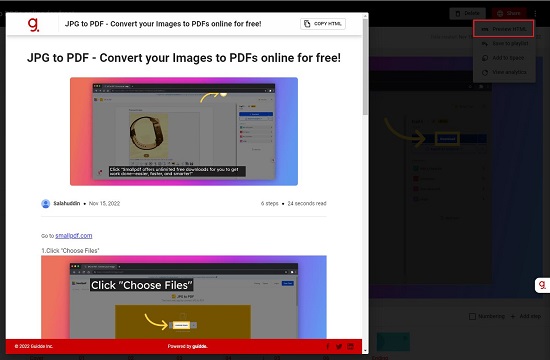
- Sharing: Share your guide internally / externally by a single click and control who should have access to it. You can also create an instant HTML copy of your guide.
The free version of Guidde allows you to make a maximum of 25 videos with a watermark. To overcome this limitation, you must subscribe to their Pro or Business plans. Click here to learn about the Guidde paid plans.
Working:
1. Navigate to Guidde using the link that we have provided at the end of this article. Download and install the Extension / Plugin for Google Chrome or Microsoft Edge and sign in using your Google or Microsoft account.
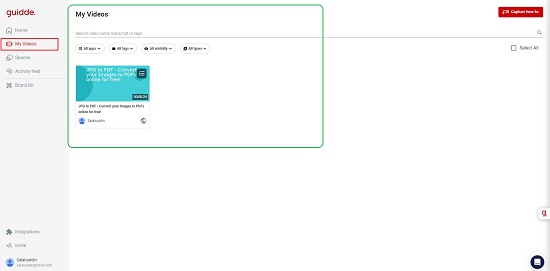
2. Complete the onboarding process and you will be taken to the Guidde dashboard that allows you to View and Edit any of guide videos that have been created.
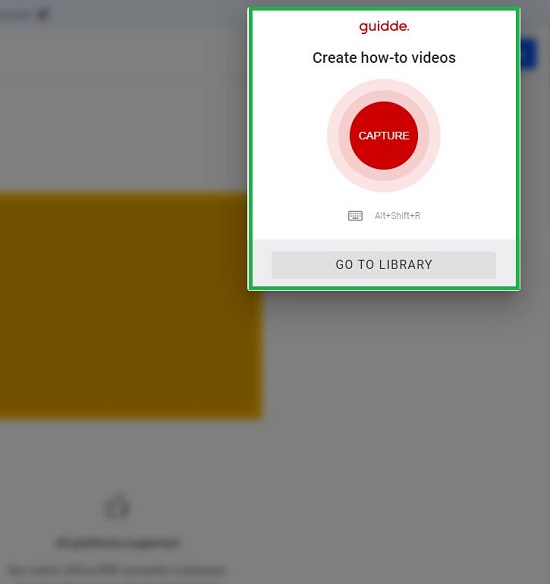
3. Open a new tab in the browser, navigate to the required website or application and when you are ready to execute the steps of the workflow, click on the Extensions icon of Chrome (ahead of the address bar), click on the 3-dots icon next to the Guidde Extension and then select the Start / Stop recording option to begin the process of capture.
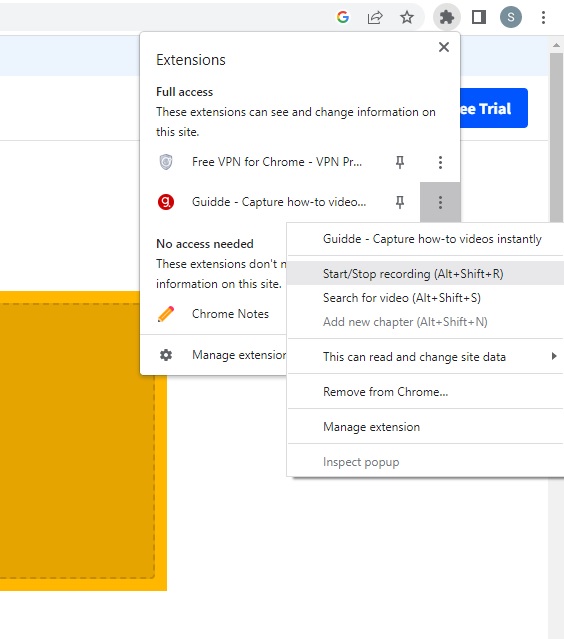
4. Follow through all the steps of the workflow as you would normally have done. When you wish to stop capturing, repeat the same steps as indicated above. Alternately, you can conveniently use the keyboard shortcut Alt + Shift + R to Start / Stop recording instead of using the mouse.
5. After the capturing is stopped, Guidde will take a while to process and render the video after which you will automatically be navigated to the video that you just recorded.
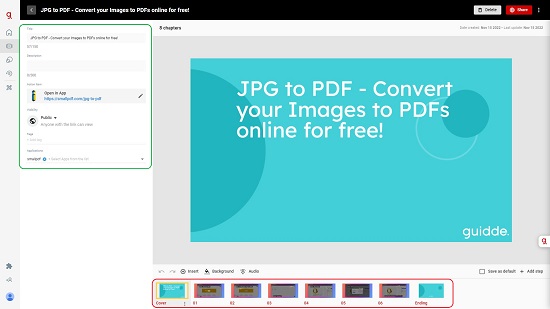
6. Click on the ‘Edit’ button at the top right of the page to load the Guidde Editor and add a Description to the video using the panel towards the left side.
7. All the step-by-step slides of the video you just recorded, will be displayed at the bottom of the screen.
8. Click on any slide and you will observe that Guidde has automatically created the Call-outs and Highlights for each step. Click on any call-outs, arrow marks etc to edit their color, size etc wherever required.
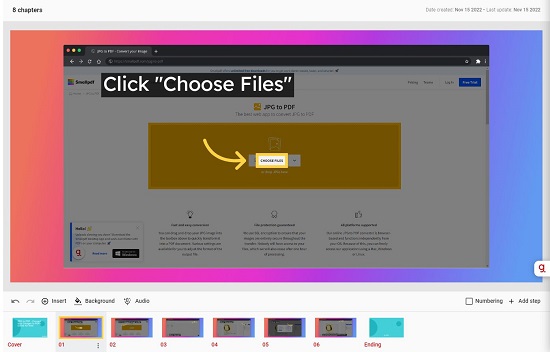
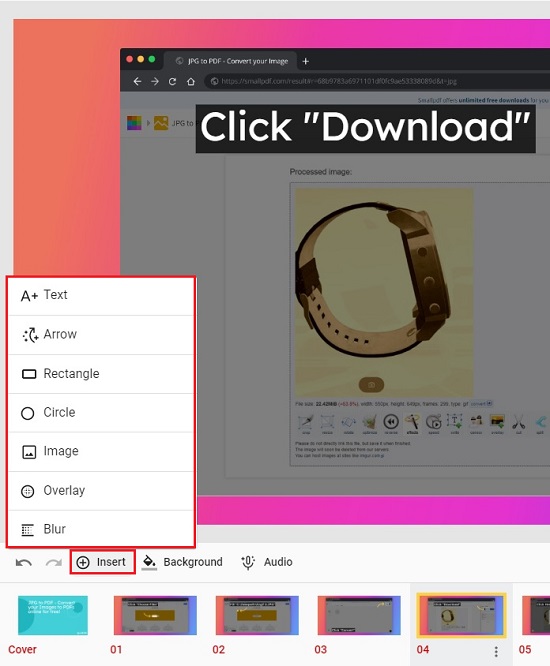
9. To insert any additional Text, Arrows, Shapes and more, click on ‘Insert’ in the horizontal toolbar above the slides and select any element that you wish. Once it is inserted, you can drag and move it to the desired location and change its attributes. Click on the ‘Background’ link to modify the background colors.
10. To add automatic numbering to the slides, you must enable the ‘Numbering’ checkbox. To add an additional step, click on ‘Add Step’ towards the right of the screen and do the needful.
11. Click on ‘Save Changes’ at the top once you are satisfied with the entire video and have gone through all the steps.
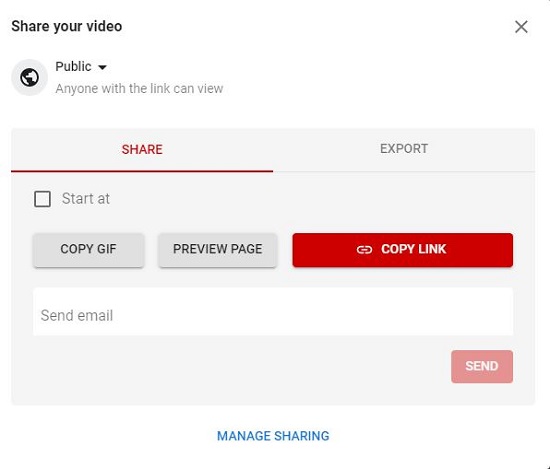
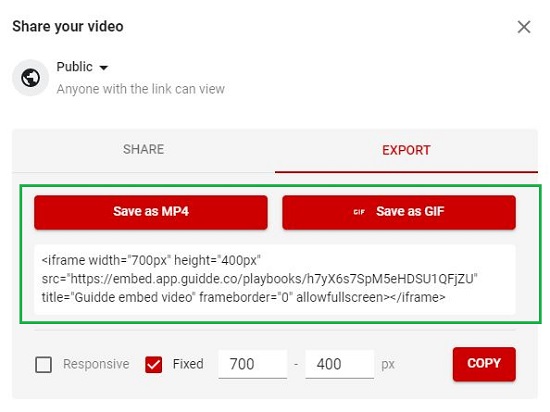
12. To share the video that you just created, click on the ‘Share’ button at the top right of the workspace to open the ‘Share your video’ popup box. You can click on ‘Copy Link’ to copy the URL of the video and share it with whomever you like. To export the video in MP4 or GIF format, select the ‘Export’ tab and use the respective buttons to complete the steps.
13. To preview the guide video in HTML format, click on the 3-dots icon at the top right of the page and then click on ‘Preview HTML’.
Closing Words:
After using Guidde for some time, I observed that it is a very good tool for creating how-to guides easily and effortlessly without any prior experience in graphic designing or video handling. One of the best features is that after the video is captured, Guidde automatically renders each step in the form of a slide which you can modify and rework easily to explain the process of the workflow as per the requirements.
Click here to navigate to Guidde and start creating amazing how-to guides for yourself.