This tutorial explains how to add animation in photos using Windows 10 Photos app. Using Windows 10 Photos App, you can easily draw on any existing photo, and then replay the drawing as animation. The best part is that you can share the animated photos with others as well. Windows 10 Photos app also comes with option to save animated photo as video, which you can in turn share with anyone.
Its really easy to add animation to photos using Windows 10 Photos app. Just draw on the photo, and it is animated. It’s as simple as that.

How To Add Animation In Photos Using Windows 10 Photos App?
Before you proceed, make sure that Photos app is updated to its latest version. You can open Store, update the app, and then launch it. After that, just follow the steps below to add nice looking animation to your photo.
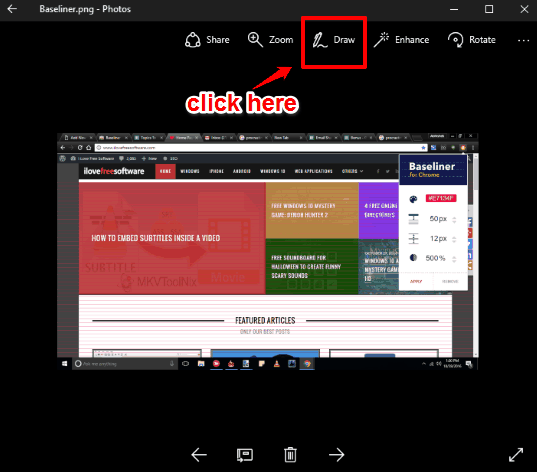
Step 1: Open the Photos App and select a photo to view in it. Now at the top menu, you will see a new Draw option. Click on that option to draw on the photo. If you don’t see “Draw” option, then you still don’t have the updated version of the app.
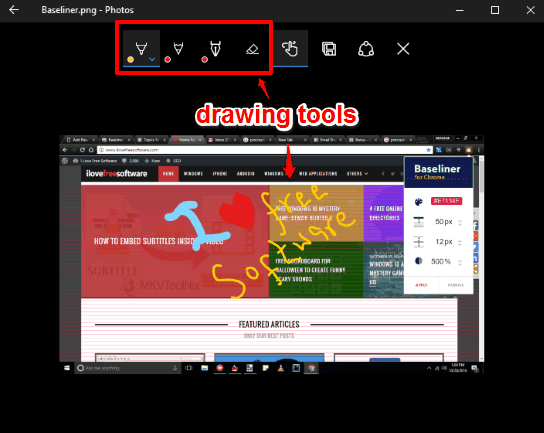
Step 2: The Draw option comes with a Pen, Pencil, Calligraphy Pen, and Eraser tools. You can use these tools to draw on the photo. You can change color of the pen, and set the pen width to draw on the photo. When the drawing is completed, press the Play button and the app will automatically play the drawing as a beautiful animation. You can see the animation in the first image of this tutorial.

Step 3: When you press the Save button, the photo is saved as JPG file on your PC. When you open the same image with Photos app of Windows 10, you will be able to see the animation. To share it with others, you can choose Share option and choose to Share as Photo or Share as Video. Share as Video option didn’t work for me and gave error on multiple PCs. My understanding is that Share as Video option should convert the animation to a video that you can share with others. As the feature is still very new, so probably there is some bug in it. I am sure it would be fixed in future updates.
Now, even though the image is saved as JPG, if you open the image in Photos App, you can see the animation. Also, if you send the image to anyone else and they open in Photos app of their Windows 10, they would also be able to see animation. But if the image is opened with any other image viewer, it would come as normal static image, and the animation won’t be there.
This took me quite some time to figure out, but after thoroughly analyzing the file I found that actually Windows is saving that image as “Living image“. Living Image is like the Live photos of iOS, and was introduced by Microsoft for Windows Lumia first. Now they seem to have added the same to Windows 10 Photos App as well. So, your animation is saved as actually a Live Image, but the resulting file is still JPEG. Advantage of it being JPEG is that those who have Windows 10 photos app can see the animation, and those who don’t have that app can still see the final still photos.
Final Words:
Microsoft has really enhanced Windows 10 Photos app, and the feature to add animation to photo is a nice feature. I am especially excited to see that they have integrated Living Images in Photos App for Windows 10. However, practically speaking it might have made more sense to go with animated GIF, as that could have been opened with all the GIF viewers.
Nevertheless, the animation feature itself in Windows 10 Photos app is pretty good, and I really like how easy it is to use.
