This tutorial describes how to selectively allow services and apps through Windows Firewall in Windows 10. There are a lot (and I mean, a whole lot) of goodies that make Windows 10 the beast of an Operating System that it is. Enhanced support for modern apps, super fast startup and shutdown times, the ability to run on a myriad range of devices, and the list goes on. In addition to that, Windows 10 carries over the features introduced by its predecessors as well, improving them even further.
One such native security feature is the Windows Firewall. Tightly integrated into the Operating System and incredibly efficient, Windows Firewall secures your computer from online threats by blocking any and all kinds of malicious network traffic. While that’s completely perfect, sometimes, Windows Firewall can get a little too extreme, and block even harmless programs and services from accessing the network. That’s quite an inconvenience, right?
But it doesn’t have to be like that, as you can conveniently specify which apps and services are allowed access through the Windows Firewall. Sounds like something that you can use? Head past the break to see how you can selectively allow services and apps through Windows Firewall in Windows 10.

How To Selectively Allow Services And Apps Through Windows Firewall In Windows 10?
Specifying the apps and services that can pass through the Windows Firewall barrier is hardly a problem. Couple clicks here, a little tweaking there, and we’re all set. Here’s a picture laced tutorial, explaining how it’s done:
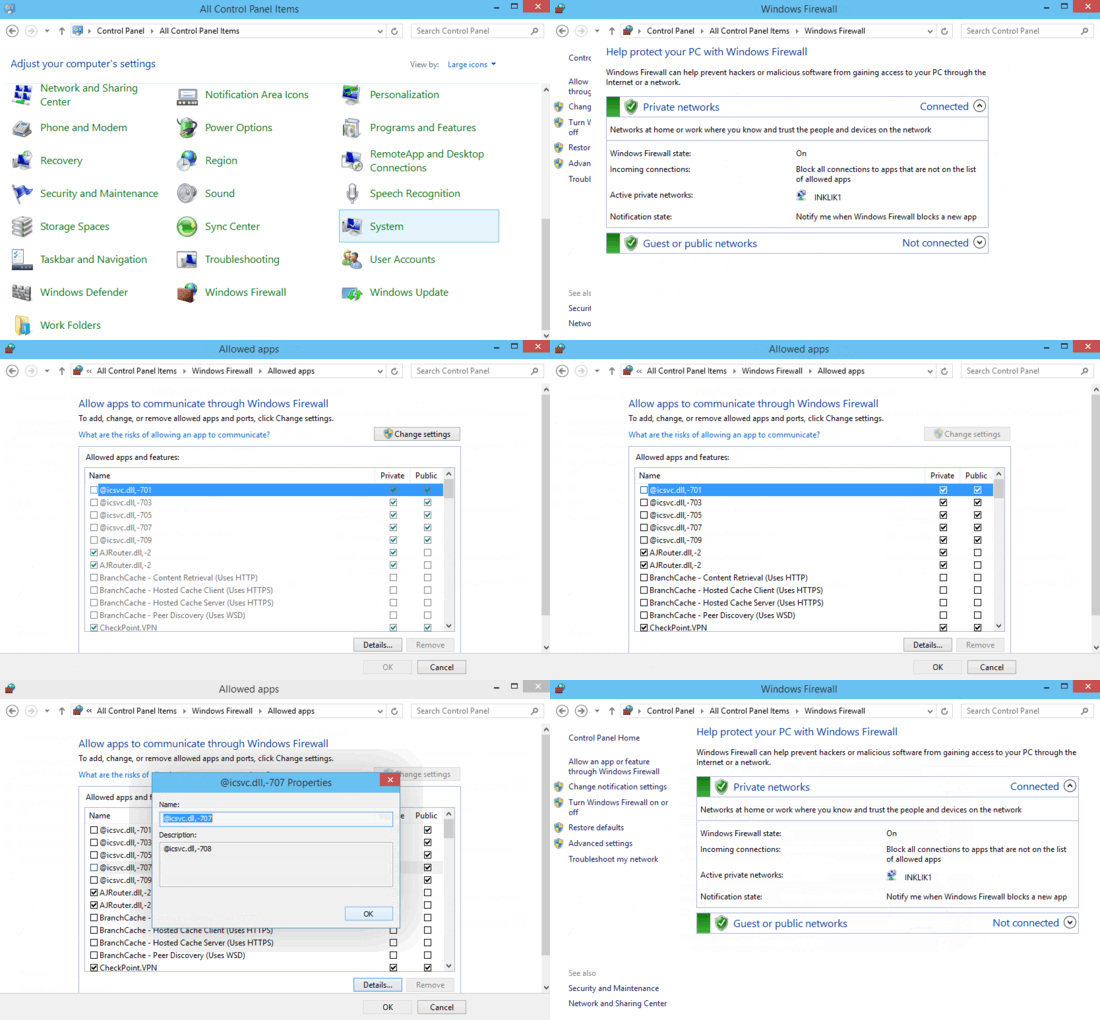
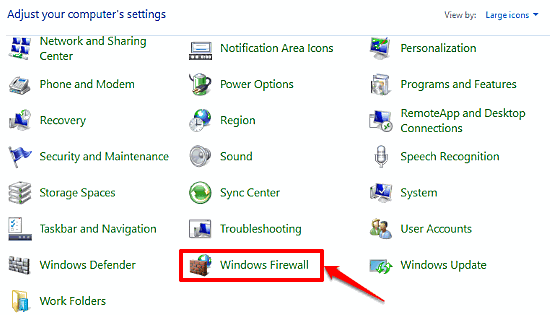
Step 1: Open up the classic Windows Control Panel, and (obviously) click on the Windows Firewall item.

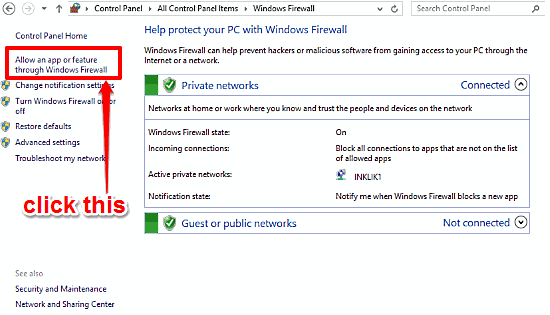
Step 2: The next screen to show up lets you view the status of Windows Firewall, as well as make all sorts of changes to it. Move over to the left column, and click the Allow an app or feature through Windows Firewall link.

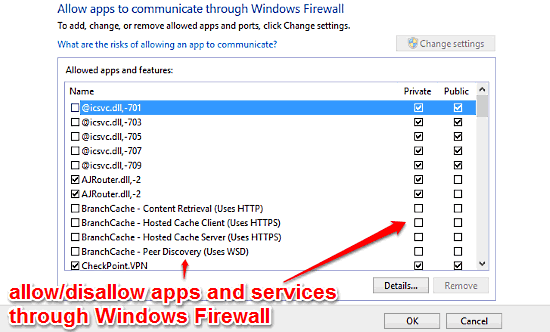
Step 3: As the final step, you’ll be directed to another screen, where you can see a listing of all the apps, programs and system services that require communication with the network. Each item in the list also has a checkmark against it. To configure which apps are to be allowed through the Windows Firewall, click on the Change settings button (This requires administrator privileges). Once you do that, the list becomes editable. To allow an app or service, simply click the checkbox against it. You can also specify whether the app or service can communicate through public networks, private networks or both. Heck you can even add custom apps to the list, or remove those that are already in there. Once done, click OK. Check out the screenie:

That’s it, fellas. From now on, Windows Firewall will no longer block apps and services that you have included in this list, whenever they try to communicate to the network via the firewall. How cool is that?
See Also: Specify Disk Space To Be Used For System Restore In Windows 10
Closing Thoughts
Windows Firewall is one of the most important and crucial built-in security features of Windows 10. Owing to its deep integration with the OS, it’s incredibly fast, and works amazingly well. However, there might be times when the blocking rules of Windows Firewall can cause it to block even harmless programs and services. For those times, this article’s your friend. So give it a try and shout out your comments down below.