This tutorial explains how to specify automatic search locations for device drivers in Windows 10. Being a highly capable modern day Operating System, Windows 10 packs in a truckload of features, both big and small. In addition to that, it’s also incredibly smart, and can automatically take care of a number of things (e.g. system updates) on its own, so that you don’t have to do the same. Out of the many features of Windows 10, one is automated searching and installation of connected peripherals. This means that every time you connect a new device (e.g. printer, digital camera) to your Windows 10 running system, the OS automatically searches for the drivers for it, and sets the device up.
Handy as it is, this feature can lead to the computer stalling in the middle of your work, as it searches a number of locations for the best drivers for the connected device, even if some of those locations are unavailable. Quite troublesome, don’t you think?
Thankfully, it can be easily set straight, as Windows 10 lets you configure the locations that are queried for device drivers. Sounds interesting? Let’s find out how you can specify automatic search locations for device drivers in Windows 10.

How To Specify Automatic Search Locations For Device Drivers In Windows 10?
Note: The steps mentioned in this article require you to tinker with the Group Policy Editor, which is an important system module of Windows. So proceed only if you’re doubly sure of what you’re doing.
By default, Windows 10 automatically searches three locations for drivers, whenever a new device is connected to the PC for the first time. These are: Floppy disk drives (are they even available now?), CD-ROM drives (useful for devices that come with their own installation discs), and Windows Update (the latest method, that relies on Microsoft’s update servers for fetching the latest and greatest drivers). However, if you want the OS to search only a specific location (e.g. CD-ROM), you can disable the search in other locations to prevent system slowdowns. Here’s how to do it:
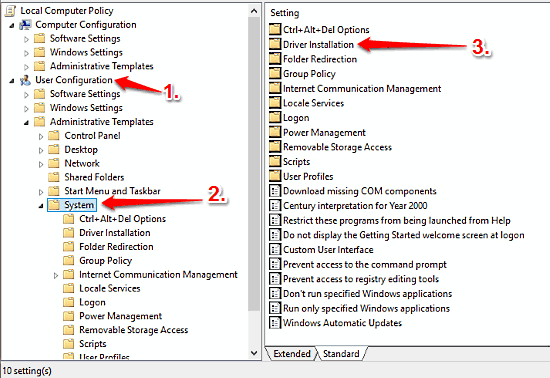
Step 1: At the Run prompt, type in gpedit.msc and click OK to launch the Windows Group Policy Editor. Once there, use the left pane to navigate to User Configuration > Administrative Templates > System. From the options presented on the right, click on Driver Installation.

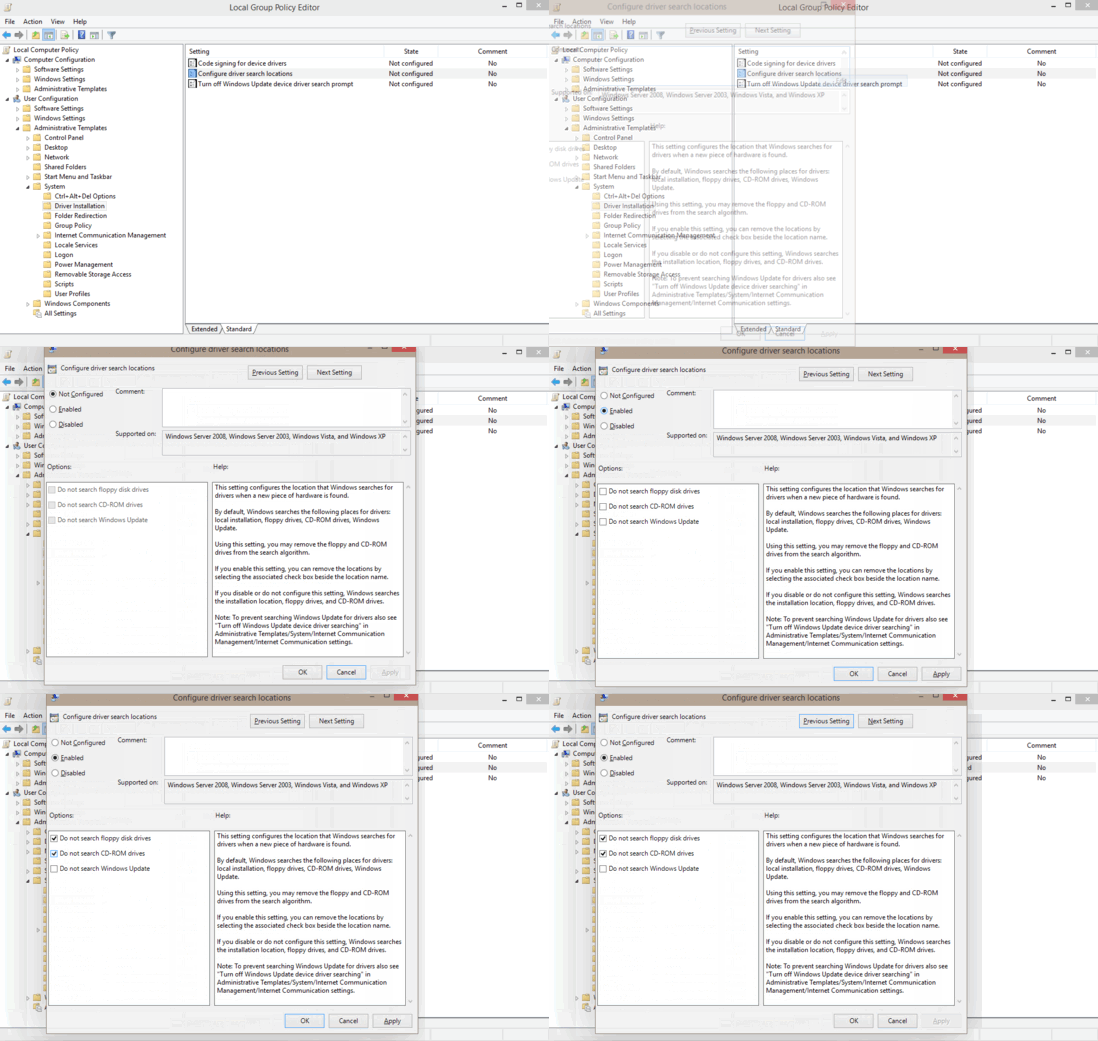
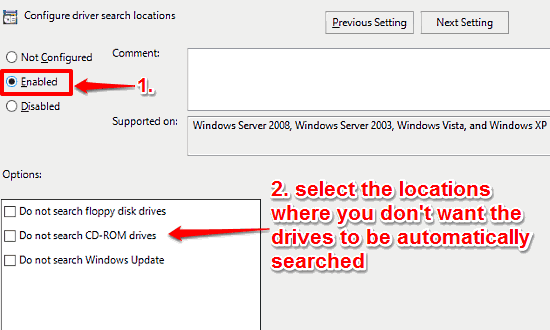
Step 2: You should now see a bunch of sub-settings. Right click on the one that says Configure driver search locations and hit Edit. When the configuration box for the setting pops-up, first select the Enabled option. Now go to the Options box at the left, and select the location(s) that you don’t want to be searched automatically for drivers. Hit Apply > OK. Check out the screenshot below:

See Also: Set Default Programs For Common Activities In Windows 10
Conclusion
The ability to manually configure the search locations, where Windows searches automatically looks for device drivers for connected devices is a pretty nifty feature. You can use it to disable searching at unavailable locations (e.g.floppy disk drives), thus improving overall system speed and performance. Try it out, and let me know your thoughts in the comments below.