This tutorial explains how to synchronize computer time with Internet Time Servers in Windows 10. We spend a whole lot of time working on computers these days (I know I do). Whether it’s surfing the web, editing documents, listening to music or anything else, our computers can do it all, and then some more. Modern day computers are capable of accomplishing such a wide variety of tasks, that they have (almost) obliterated the need for having other accessories and gadgets.
One such simple but very important accessory that we find ourselves using more and more sparingly these days, thanks to computers (and cell phones), is the humble watch. Seriously, when was the last time (forgive the pun) you flicked your wrist to check the time, when sitting in front of the computer? And why wouldn’t that be? After all, gazing at the digital clock ticking in the system tray is a lot more convenient, right?
With our computers increasingly being used to keep track of the time, it becomes extremely important that they keep correct time. And you can easily ensure that, thanks to Windows 10’s built-in Internet Time server synchronization feature. Stoked? Let’s see how you can synchronize computer time with Internet Time Servers in Windows 10.

How To Synchronize Computer Time With Internet Time Servers In Windows 10?
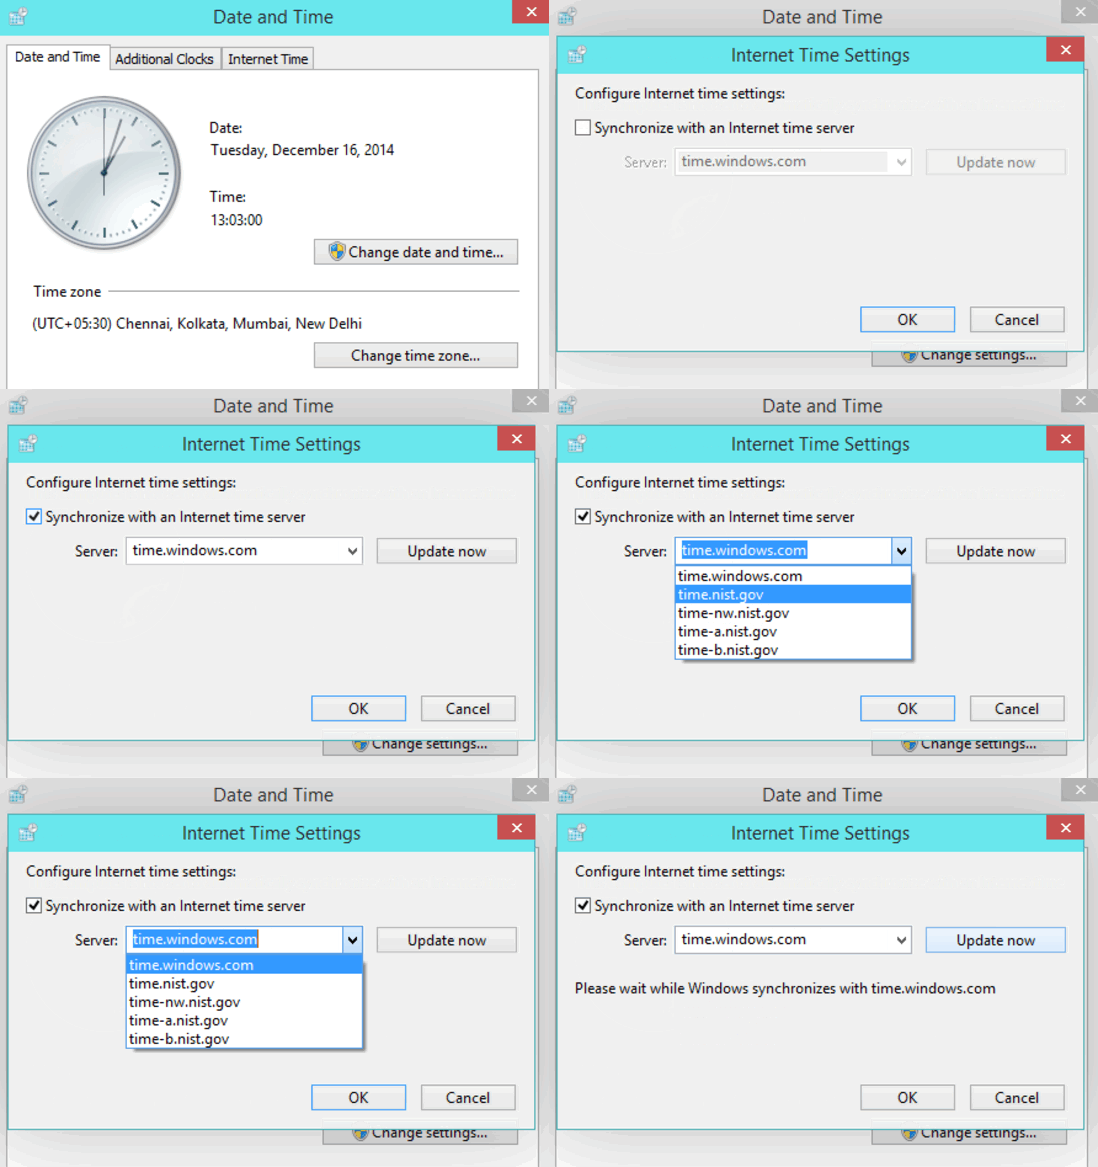
Synchronizing the current system time with the highly accurate Internet time keeping servers ensures that your computer’s clock always reports the most accurate time. You can synchronize the clock either with Windows’ own time server or with one of the time servers of National Institute of Standards and Technology (NIST). With the synchronization enabled, Windows 10 automatically keeps the system clock synchronized with the selected Internet time server at regular intervals (provided there is network connectivity). However, you can also update the time manually at any point if you want. Here’s a little illustrative tutorial, explaining how to do it:
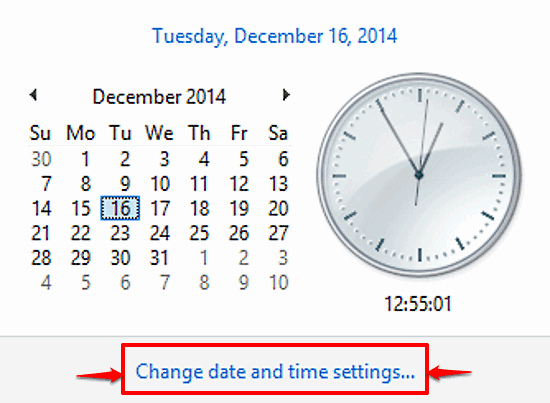
Step 1: Click on the system clock/date shown in the system tray. On the analog clock/calendar window that shows up, click Change date and time settings.

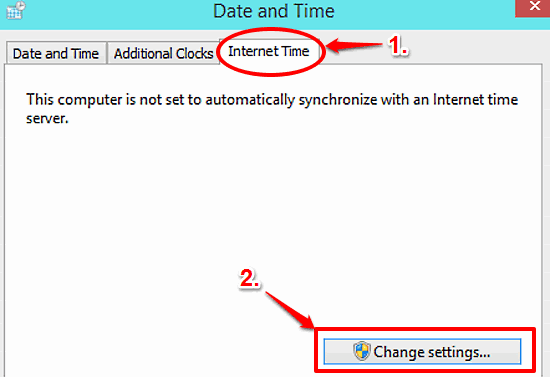
Step 2: The Date and Time configuration box will now come up. Click on the Internet Time tab, and then the Change settings button (This requires administrator privileges).

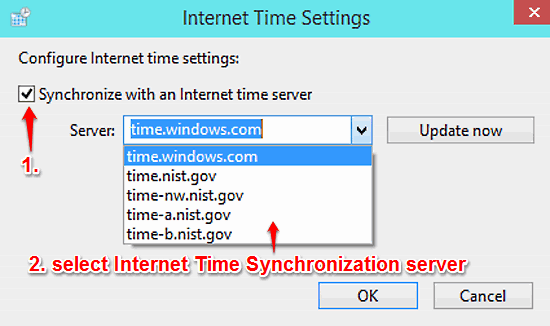
Step 3: The Internet Time Settings dialog box, displayed next, lets you configure the web-based synchronize. Click on the Synchronize with an Internet time server check box, and use the Server drop down menu to choose one of the available Internet Time Servers. You can also use the Update now button to manually synchronize the time. Here’s a screenshot:

Voila! Going forward, you won’t have to worry about your system clock getting messed up as Windows 10’s Internet time synchronization will ensure that doesn’t happen.
Also Check: How To Schedule Automatic System Maintenance In Windows 10?
Concluding Thoughts
With the time we spend gazing at our computer screens increasing day by day, it’s no wonder we hardly direct our attention to any other thing, let alone a watch. That’s probably because it’s a lot more convenient to just take a look at a corner of the screen to know the current time. And with Internet Time Synchronization, you can be sure that time is super accurate. Try it out and let me know what you think in the comments below.