This tutorial talks about how to record computer screen using YouTube.
If you want to quickly record and share your screen with others, but you don’t have any screen recorder software installed on your PC, then you can also use YouTube to do the same. Yes, you read that right. There is a way using which you’ll be able to record PC screen with YouTube.
Actually, YouTube doesn’t have any direct option to record screen, but the “Screenshare” feature of YouTube live streaming can be used to record computer screen and get a YouTube URL of the recording. So, in this tutorial, I will explain how to use YouTube “Screenshare” to start recording your computer screen with ease.
How to Record Computer Screen Using YouTube:
Step 1: First, go to the homepage of YouTube and sign in using your Google credentials. After that, select the button “Upload” at the top-right corner of the screen.

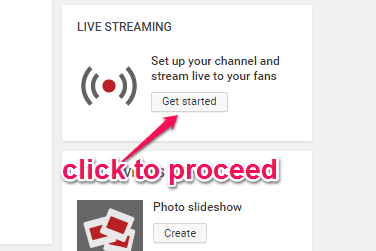
Step 2: As soon as you do that, the video upload window will appear where you’ll see an option named, “Live Streaming” on the right. Now, simply click the “Get Started” button associated with the “Live Streaming” option to proceed.
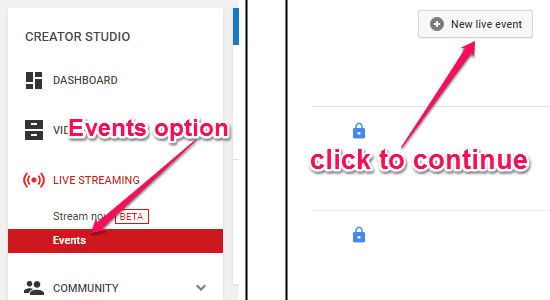
Step 3: After clicking the “Get Started” button, a new window will appear with various tabs on the left “Creator Studio” panel, like Dashboard, Video Manager, Live Streaming, etc. In order to continue, you need to choose the option “Events” associated with the “Live Streaming” tab, as shown below. On the following screen, you should see a button named, “New Live Event” on the right which you need to click to proceed to the next step.
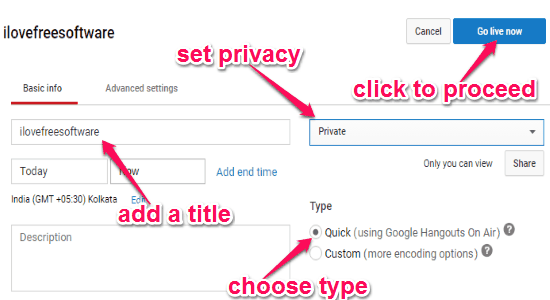
Step 4: Now, it will ask you to enter few details for the new event like a title, description, set privacy, tags, etc. Here, all you need to do is simply give a name to the event, set the privacy as “Private”, and choose the type as “Quick (using Google Hangouts on Air)”. Once you’re done, simply click on the “Go Live Now” button at the top to continue.
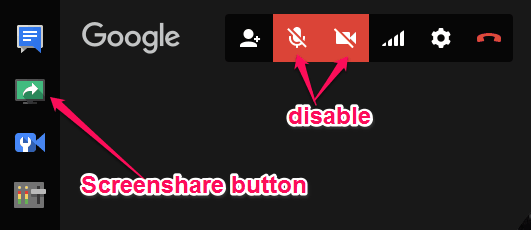
Step 5: As soon as you do that, the “Google Hangouts on Air” window will appear, where the first thing you need to do is disable the “Audio” and “Video” options and then click on the “Screenshare” button on the left.
Step 6: After that, it will ask you to choose which screen you want to share. You can either chose the entire screen or any individual window that is currently open on your computer. Remember, the screen which you choose for sharing will only be recorded. When you’ve selected a screen for sharing (recording), simply click on the “Share” button at the bottom and the screen sharing will start instantly.
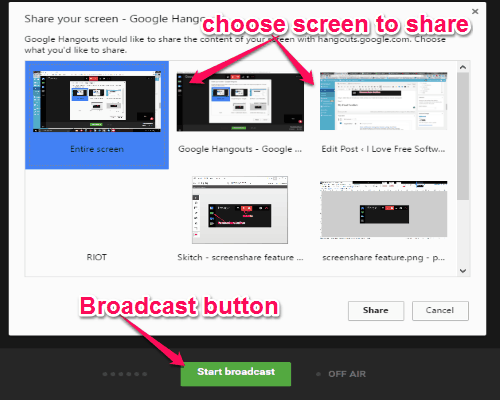
Step 7: Once the screen sharing starts, you need to hit the “Start Broadcast” button at the bottom of the “Google Hangouts on Air” window. As soon as you do that, the screen recording will start and the maximum length of the video which you can record will be up to 8 hours. Let’s say, you’ve selected “Entire Screen” in the above step, then whatever activities you would do on your entire PC will be recorded automatically.
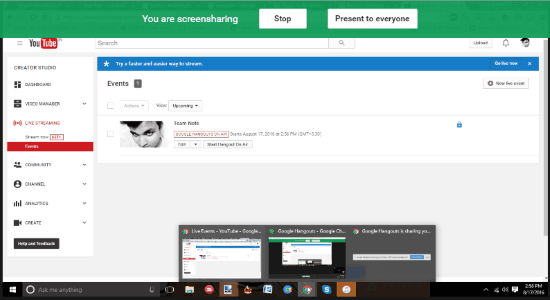
Step 8: When you’re done with recording your computer screen, simply click on the “Stop Broadcast” button at the bottom of the “Google Hangouts on Air” window to stop recording.

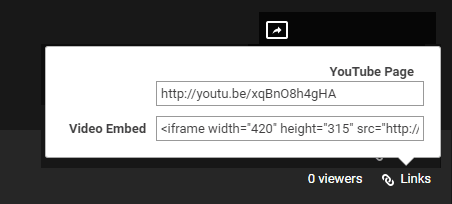
Step 9: Now, you can go ahead and click on the “Links” button at the bottom-right corner of the window to access your recorded screen. After that, a small popup will appear with a YouTube video URL for your recording and a video embed code, as shown below.
My Final Verdict:
Personally, I think recording your computer screen using YouTube can come handy in the situations when you want to record screen quickly but do not have any third-party software installed on your PC. So, whenever you would like to record your screen activities, you can go ahead and follow the simple steps mentioned in this tutorial to do the same using YouTube.
I hope you find this tutorial interesting and handy.