This tutorial explains how to enable two factor authentication in DreamHost account. This adds extra security to your Dreamhost account. It uses Google Authenticator app, that is one of the most popular methods of adding two step authentication, and popular services like Gmail, Evernote, and LastPass are already using that to provide two step authentication. Dreamhost also uses the same. This has an additional advantage that if you already have Google Authenticator app your Smartphone, you can keep using that, instead of a need to add any extra app.
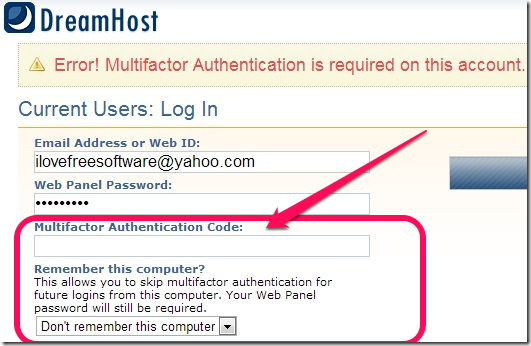
Once you enable two step authentication on Dreamhost, then whenever you try to login to panel of Dreamhost, you will get an extra box to provide Multifactor Authentication Code.
How to Enable Two Step Authentication in Dreamhost:
If you are a regular reader of this blog, you would be aware that this website was started on Dreamhost and moved on to other webhosts down the line as traffic increased. However, I still have some services with Dreamhost, so I wanted to secure my Dreamhost dashboard. I am glad that Dreamhost has added this feature of Two step authentication that makes it difficult to get into someone’s account.
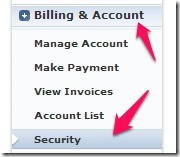
The process of implementing two factor authentication in Dreamhost is quite simple. Do note that you need to have Google Authenticator app installed on your smartphone to enable two factor authentication. Once you have that, you start by logging into panel of your Dreamhost account. In the “Main Menu” on left side, expand “Billing & Account” sub-menu. One of the item you would see under it would be “Security”.
Here, click on “Security” option, or you can directly go there by clicking here. In the Security tab, you will see a section titled “Multifactor Authentication”. The section will prompt you to enter your current password and choose method of authentication:
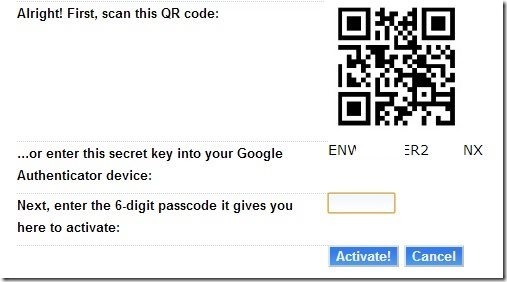
There are two authentication methods it supports (both based on Google Authenticator): Time-Based and Counter-Based. It is recommended to go with Time-Based authentication. Once you have made the choice, click on “Get Started” button. This will show you a QR code that you need to scan with Google Authentication app (Go to the app, click on Setup an Account –> Scan a Barcode).
Once you scan the barcode, Google Authenticator will add the account to your app, and will starting showing the six digit authentication code. Next step is to add that authentication code to Dreamshost in the textbox that comes right below the QR code. After that, click on “Activate!”.
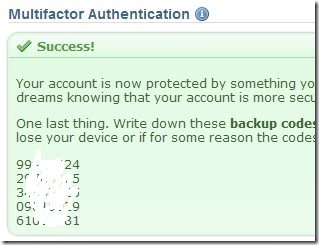
If you did everything correctly, Dreamhost will enable two factor authentication on your account. It will also show you some backup codes that you can use if you don’t have your phone handy with you. I strongly recommend to note these down and keep somewhere.
Now, whenever you login, you will need to provide authentication code generated out of Google Authenticator app, or one of the backup codes (each backup code works only once). You can choose Dreamhost to remember a computer for a week or a month so that you don’t have to provide authentication code during that period.
So, you saw how easy it is to enable two step authentication on Dreamhost. If you have an account with Dreamhost, I strongly recommend that you enable this two step authentication (and if you are planning to buy a Dreamhost account, use our coupon code ILOVE75 to get $75 discount on hosting packages).
Have you enabled Two step authentication on Dreamhost? What do you think about two step authentication? Let us know in comments below.


