This tutorial describes how to automatically save Notepad contents in Windows 10. Being the latest and greatest member of the Windows family of Operating Systems, Windows 10 is chock full of impressive productivity features. In addition to that, it includes a number of built-in applications that let you power through your daily tasks, and while some of these tools and features are entirely unique to Windows 10, there are others that have been a part of almost all prior Windows versions as well.
One such simple but heavily used native application is the Windows Notepad. Almost all of us use it on a daily basis for a variety of purposes, from jotting down quick notes to saving simple textual content from the web for further reference. But as useful as it is, the lack of autosave functionality in Notepad is a major bummer. I’m sure at some point or the another, we all have lost important unsaved information in an active Notepad instance because of something such as a random system restart. And it’s incredibly frustrating, right?
It is, but it can be easily fixed as well, thanks to a nifty utility called Notepad AutoSave. Jumping in elation already? Head over to the other side of the jump and find out how to automatically save Notepad contents in Windows 10.

How To Automatically Save Notepad Contents In Windows 10?
Notepad AutoSave is an incredibly useful application that’s sure to appeal to those who are regularly busy typing away stuff in Notepad, but don’t like (or remember) to press the Ctrl+S combination every once in a while. Super lightweight and easy to use, Notepad AutoSave runs in the system tray, constantly monitoring the active (currently in focus) Notepad window for changes, and at a regular time interval (30 seconds by default, but can be changed), automatically saves the contents of the active Notepad window. This means that even if you keep forgetting to periodically the content you’re working on, Notepad AutoSave has you covered. The best thing about Notepad AutoSave is that it can even save Notepad instance that’s completely unsaved, automatically firing up the Save As dialog box after the specified time interval. Here’s an illustrative walkthrough, explaining how Notepad AutoSave works:
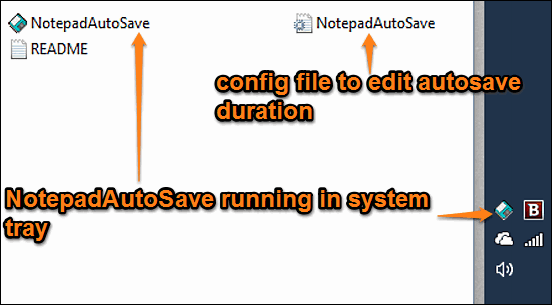
Step 1: Download the lightweight application, available as a zipped archive from its homepage and extract it. Now, execute the NotepadAutoSave application, and it should start up in the system tray, displaying its icon.

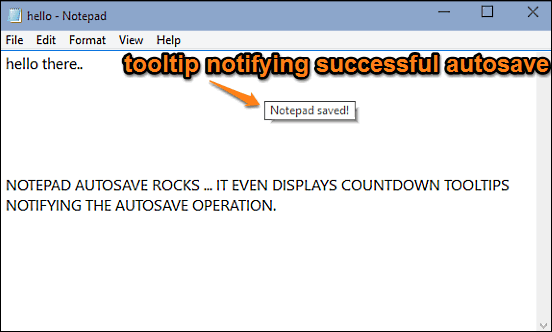
Step 2: Well, that’s pretty much it. All you have to do is open up a Windows Notepad instance and start working on it. Notepad AutoSave will constantly monitor this Notepad window and automatically save its contents to the hard disk at a regular interval. If you haven’t saved the contents of the Notepad instance even once, the application will first launch the Save As dialog box, prompting you to give an initial save location and name to the file. If you want to change the autosave duration (in seconds), you can easily do so by editing the application’s namesake configuration file, in the same folder as NotepadAutoSave. It can even display (optionally) a countdown tooltip (saving in 3..2…1) just before triggering autosave. Nice, isn’t it? Check out the screenie below:

Do Check Out: How To Add Desktop Gadgets In Windows 10?
Closing Thoughts
Windows Notepad is a simple but incredibly useful native Windows application that almost all of us use on a near daily basis. And while it works perfectly well for what it is, the fact that it doesn’t automatically save the content periodically leaves a lot to be desired. But with Notepad AutoSave, you can keep working on your notepad documents without any worries. Give this thing a shot, I’m sure you’ll love it.