This is a quick tutorial to explain how to annotate a video using Photos app of Windows 10. Microsoft has made built-in Photos app of Windows 10 much more than just a photo viewer. There were some tools already to do some basic image editing but now it lets you edit a video as well. For video editing, you can use different tools like 3D effects, video trimmer, slow motion effect, and of course the annotation tool. The “Draw” tool of the Photos app lets you annotate a video and save it. For the annotation part, you can draw anything using the pen, pencil tool over any frame of the video. However, currently there are no arrows or shapes tool available. You can only draw over any part of the video and save the changes.
Although, there are a lot of video annotation software available, but if you want a simple and light video editor, then Photos app of Windows 10 is amazing. You can annotate any video easily and save changes. And not only the annotation, but you can use other tools as well for your video. For example the 3D effects tool of the app is amazing tool. But for using that, you must have good graphics configuration on your PC. Otherwise the video will not play smoothly after 3D effects like rain, bubbles, etc.

How to Annotate a Video using Photos App of Windows 10?
If you like video editing then I am sure that you will like Photos app of Windows 10. And most of the features are also available in the Windows Phone version of the app as well.
Here is how to use the Photos app to annotate a video in Windows 10.
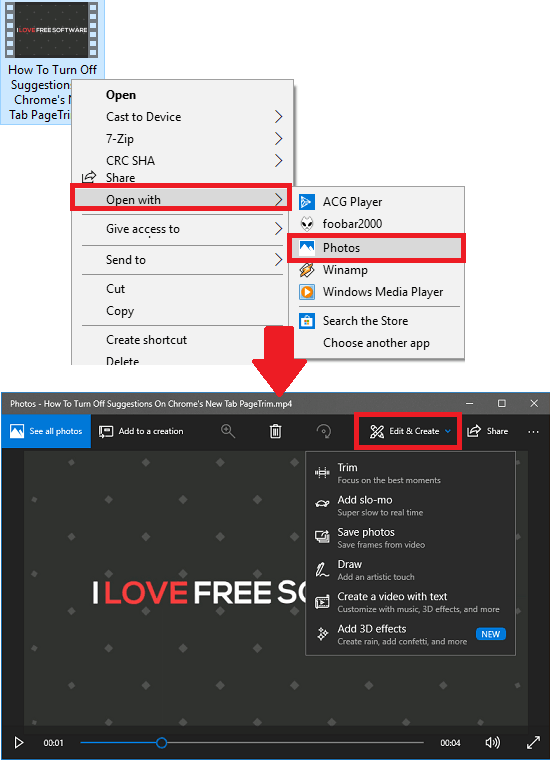
Step 1: Just right click on the video that you want to annotate and then open it with Photos app. After that, you can choose “Edit & Create” drop down from top right side. See this screenshot.

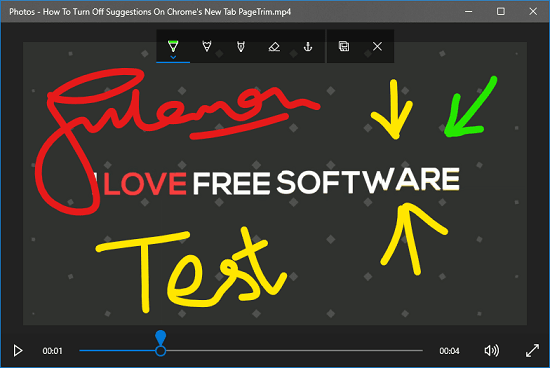
Step 2: For the annotation part, you can use the “Draw” tool and then options for pen, pencil will open up on the top side. You can use that to annotate your video. Use freehand drawing or writing to add text. You can draw different shapes and use different color for the ink along with eraser tool.

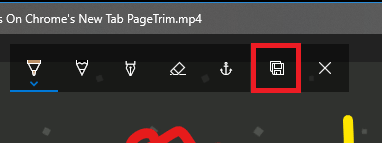
Step 3: Finally, when you are done, simply save the video. For saving a video, you can use the “Save” icon from the toolbar. After that, you can specify a location where you want to save the video. Next, you can do whatever you want.

In this way, you can use the native Photos app of Windows 10 to annotate a video in a few minutes. No heavy software or internet connection is required to process your videos. Just open your video in the editor, annotate it, and then save it wherever you want.
Closing thoughts
At first I really didn’t know that in Windows 10, there is a video editor hidden inside the Photos app. And When I found it, I was really amazed by the different tools that it offers to edit a video. You can use those tools and annotate your video to make it interactive. Also, other tools like 3D effects, slow motion maker are awesome; do check them out.