Here are 2 free software to bulk create thumbnails from context menu. You customize parameters such as size, format, quality, etc. of thumbnail images. While creating the thumbnails of images, you can choose various resampling filters to make thumbnails.
Creating thumbnails of images sequentially can take a lot of time. To overcome this problem, these software come in handy. Just right click on the images for which you want to create thumbnails, and then these software will create thumbnails of all the images together in one go.
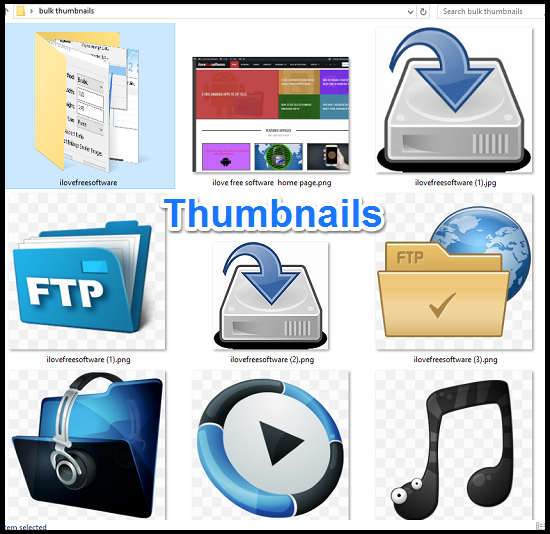
Let’s see what it takes to bulk create thumbnails from context menu.
Free Software to Bulk Create Thumbnails from Context menu: Right Thumb
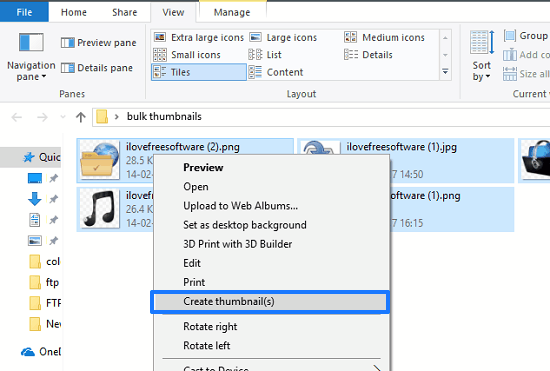
RightThumb is a free and lightweight software to bulk create thumbnails from context menu. It is probably the only one dedicated software to do the same. RightThumb comes as a portable software and you can start using it from the moment you have downloaded it. It doesn’t have any interface, except configuration panel. And you can invoke it to create thumbnails from the context menu of Explorer. Also, it allows you to customize certain image converting criteria such as thumbnail size, format, quality, and target folder. It adds an option Create thumbnail(s) in the list of Context menu items. And you can always remove it from the context menu without deleting the software.
Getting started with RightThumb is pretty easy. After grabbing the setup file of RightThumb from the above link, launch it. After its configuration panel opens up, customize the parameters, like output directory, image quality, etc. And when all the configuration has been done, you are ready to use it. To use it simply, select some images and from the right click menu choose Create thumbnail(s). After that, you will see that it has exported created thumbnails to the directory you specified in configuration window.
Apart from specifying a custom size, you can also specify a fixed size such as 640 x 480 or 1020 X 720, etc. And do remember that fixed size has more priority that the specified size, so if you have specified both parameters, then Fixed Size will take the precedence. And from the bottom of the RightThumb Options window, you can specify a desired target directory where the thumbnails will save. You can also leave it as blank, so the source directory will be used as the target directory.
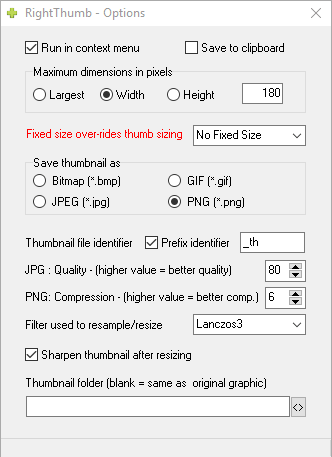
So, in this way, you can easily bulk create thumbnails from the context menu using RightThumb. And what I really like about this freeware is that, it lets you choose resampling filters that you want to apply on thumbnails.
Bulk Create Thumbnails of Images from Right-click menu: ImageBadger
ImageBadger is another free software to bulk create thumbnails from the right-click menu. The process of creating thumbnails from context menu using Image Badger is not very straightforward, though. Basically, ImageBadger is meant to batch convert, batch rotate, batch flip, batch blur images, etc. You can also apply all these modifications concurrently to a group of images. And it supports creating profiles in which we can specify certain settings and execute the profile in just one click. That’s the feature of the ImageBadger that I will use to achieve our goal.
Step 1: Install ImageBadger after downloading it from the above link. After that, open it up, you will find its interface similar to the following screenshot.
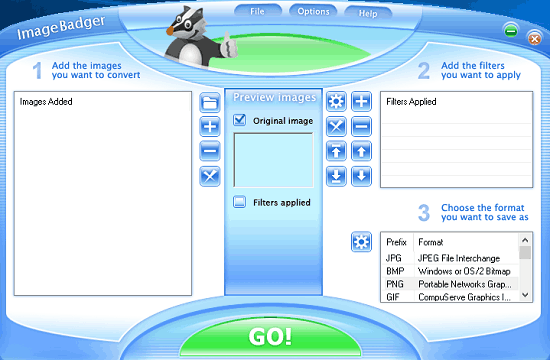
Step 2: Navigate to the second section that is Filters Applied. Click on the plus (+) button and a pane will be pop up, choose Resize from it.
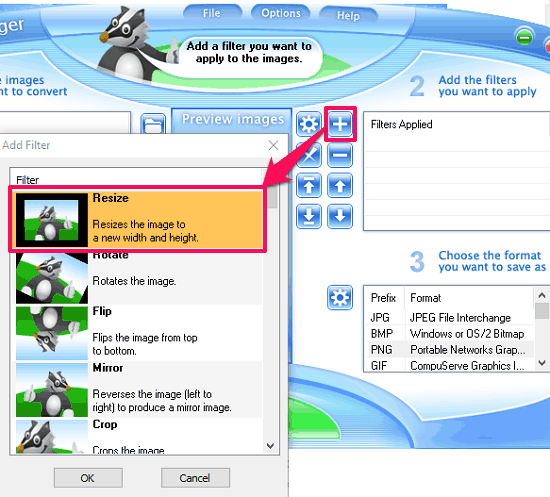
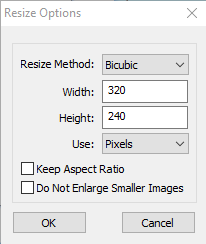
Step 3: After choosing the resize filter, resizing options window will pop up. Here you can configure various options such as size, resize method, units of image dimensions, etc. Specify the values according to your needs.
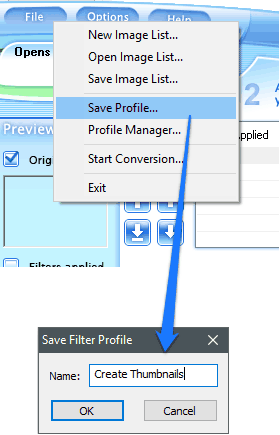
Step 4: Navigate to the File menu and choose Save profile from it. When it asks, specify a name (“Create Thumbnails” in my case) for this profile and hit the OK button.
Now, at this point the profile has been created and is ready to use. After following the above steps, you will see an extra sub context menu option Current Profile in ImageBadger context menu.
To start creating thumbnails using ImageBadger, select some images and navigate to the ImageBadger > Current Profile > Create Thumbnails context menu option. Now the Create Thumbnails is the default profile. Again open the context menu and choose the desired image format from the list in which you want to export the generated thumbnails. If you want to retain the same format for the thumbnails as that of the source images, then choose the same format from the context menu. When you do so, then a dialog will appear asking you to specify the target directory where you want to save the thumbnails. After that, the thumbnails will be exported to the specified directory.
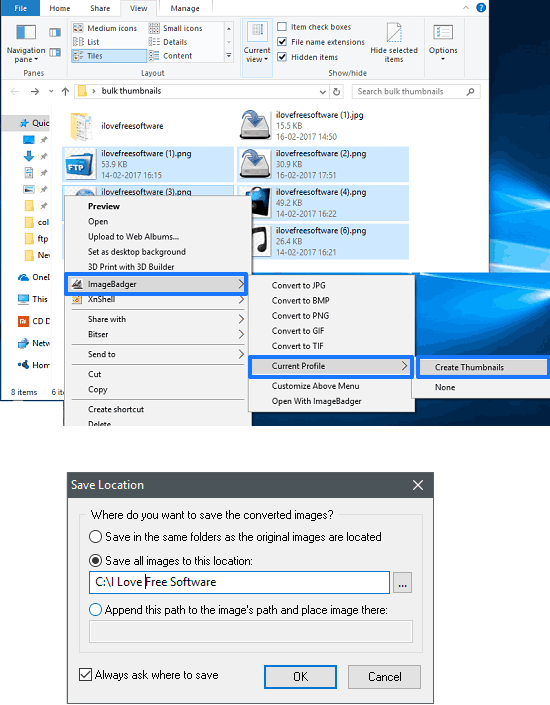
So, in this way you can use ImageBadger to bulk create thumbnails from context menu. However, In this case you cannot set resampling filters as were there in case of RightThumb.
Closing Thoughts
These were the two best free software to bulk create thumbnails from context menu. Using these free software, you can easily create thumbnails of images with just a click. Also, these software let you customize the size of the thumbnails, so you can create thumbnails of almost any size.
Personally, I like RightThumb more, as it is specifically meant for the purpose, and it is very easy to start using it.