This tutorial explains how to edit photos on iPad using built-in iOS 8 Photo app features. If you are an old iPad user, then you already know that iPad doesn’t allows you to edit photos directly from native Photo app. You need to rely on third-party photo editing apps to make your photos look the way you want them to. But Apple has solved this problem by adding built-in photo editing features to iOS 8 Photo app for iPad, iPhone, and iPod Touch. Some of the photo editing features are: Auto Enhancer, Crop & Rotate, Effects, Light, and Color.
Earlier, iPhone users had to use third party apps for editing photos like Studio Design and Litely but no more. Now, it has become very easy to use edit photos using iOS 8 built-in photo editing features. Lets get started with the tutorial.
Steps to Edit Photos On iPad Using Built-In iOS 8 Photo App Features:
To start editing your photos, first go to iPad’s home screen and tap on Photo app to launch it. You can surf through all your photos by swiping on the screen in left and right. Tap on Edit option at top right corner to select photo for editing. On tapping the option, your photo will be opened in the photo editing area. You can do all the experiments with your photos from here using different options available to you. You can find these options at bottom: Auto Enhancer, Crop & Rotate, Effects, and Adjustments.
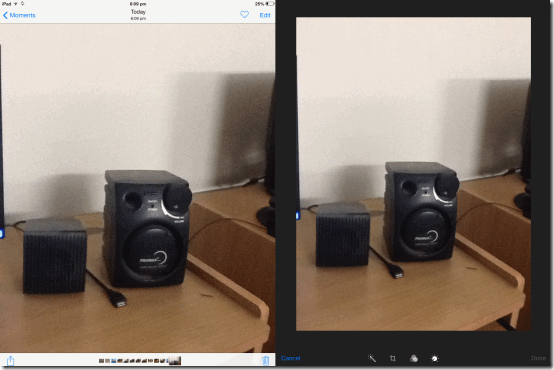
- Auto Enhancer: This option is represented by a magic wand icon and it also works like one. You have to tap on it once and it performs all the adjustments for your photo automatically. If you don’t like the adjustments done by it , then you undo the changes by tapping on the icon again.
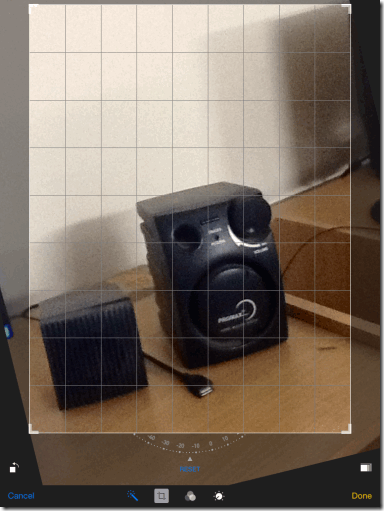
- Crop & Rotate: Use this option to crop and rotate the photo. You can crop the photo by using pinch and zoom feature and holding the corners of frame and then resizing them as per your choice. Apart from this, you can also choose from preset crop ratios by tapping on icon at bottom right. For the rotation purpose, you can see that there is a slider wheel beneath the photo. Tap on the dotted line to rotate it wherever you want to rotate the photo.
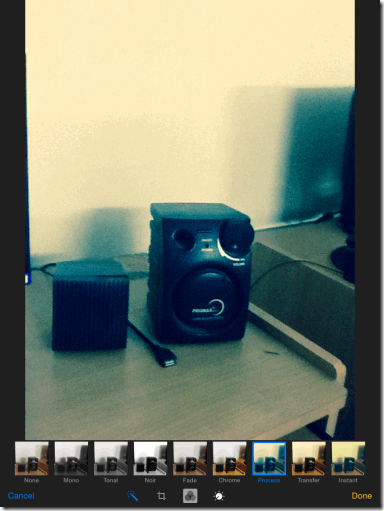
- Effects: This option simply lets you add filters by just tapping on the desired filter. You can’t make any changes to these effects, although you can check the changes in real time before applying them to photos.You can choose from 8 unique filters for your photos.
- Light Effect : Use this option to make adjustments to Light effects to your photos. The Light options shows you different photo frames with different Light effects. You can go through all the frames to preview each of the effect by swiping on frames. If you want to adjust Light mode manually, then you can do so by tapping on three bar icon. It lets you adjust values for Exposure, Highlights, Shadows, Brightness, Contrast, and Black Point. You need to tap on each of the aspect’s name to get the slider for altering values.
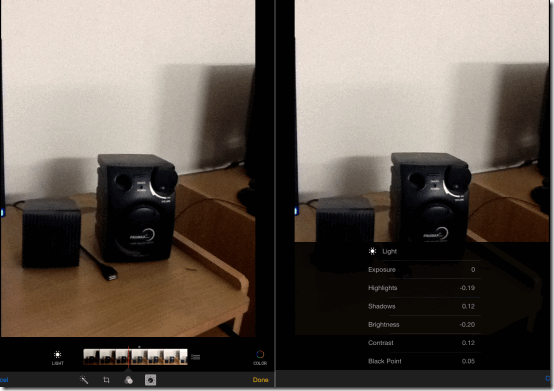
- Color: Similar to Light effect, it lets you adjust color effects to your photos and with same number of steps involved. Use slider to preview all the effects and tap on three bar icon to adjust them manually. You can adjust Contrast, Vibrancy, and Cast for applying to photo.
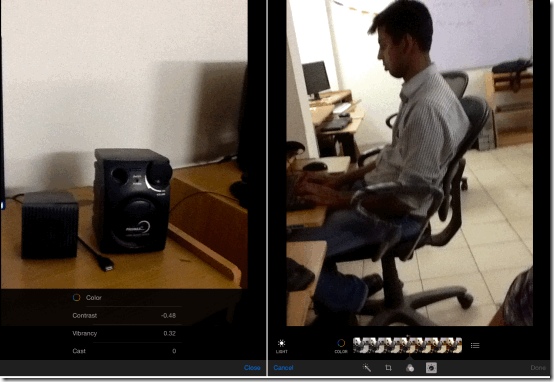
When you have finished editing photo, tap on Done option at bottom right corner to save the changes. With this final step, I conclude this tutorial for How to edit photos on iPad using built-in iOS 8 Photo app features.