The use of animations in Slides is sometimes difficult and tedious since there is no default method to change the animations style, delay etc. In this article we will be explaining the steps to easily add Animations to Google Slides using keyboard shortcuts facilitated by an Extension named TurboAnimator.
This is a free Chrome extension that enables you to automate animation-related tasks in Google Slides like adding / deleting animations using simple key combinations.
Working:
1. Click on this link to download and install TurboAnimator from the Chrome Web Store.
2. Next, launch Google Slides and load any presentation. Click on any element in the presentation that you wish to animate.
3. Just press Alt + A on your keyboard and the default animation will be applied to the selected element.
4. To verify if the animation has been applied, right click on the element, choose the ‘Animate’ option and view the ‘Motion’ panel on the right side to confirm. Alternatively, you can launch the slideshow to confirm if the animation has been applied.
5. You can also select multiple elements and use the same keyboard shortcut to apply the default animation.
6. TurboAnimator allows you to set multiple animation options and specify their hotkeys from its Settings page. For this, click on the ‘Extensions’ icon ahead of the Chrome address bar and choose ‘TurboAnimator for Google Sides’.
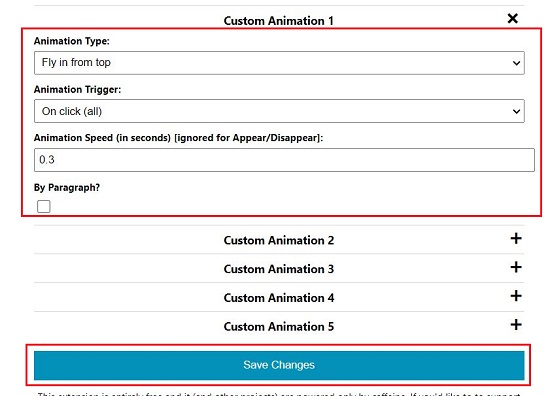
7. Click on the ‘+’ sign beside ‘Custom Animation 1’ and specify the Animation type, Animation trigger, and Animation speed using the respective drop-down menus and click on ‘Save changes at the bottom. Repeat the same procedure for any additional Custom Animations that you want to configure.
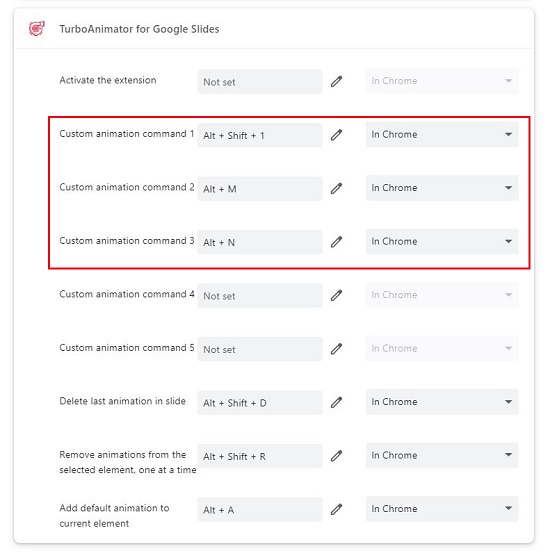
8. To bind the keyboard shortcuts to the respective Custom Animations, click on the link ‘Click here to change Keyboard Shortcuts’, scroll down to the section ‘TurboAnimator for Google Slides’, click on the ‘edit’ icon ahead of the specific Custom Animation and then press the key combination on the keyboard. Verify that it is registered and appear in the box beside the ‘edit’ icon. Repeat the same process for registering all your keyboard shortcuts depending on the Custom Animations that you have configured in the ‘Settings’ page.
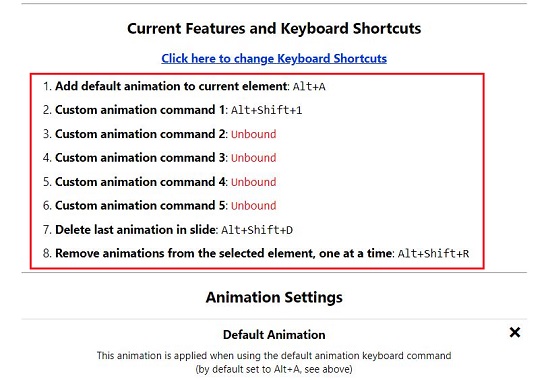
9. You can view all your Custom Animations and their keyboard shortcuts by scrolling to the section ‘Current Features and Keyboard Shortcuts’ on the settings page.
10. Now go ahead and use the apply any Custom Animation to your chosen elements in Google Slides using the method that we described earlier in Steps 2 and 3.
11. To delete the last animation in the current order, use the key combination Alt+Shift+D. Additionally, to delete the last animation for the selected element you can use the shortcut Alt+Shift+R. You can modify these shortcuts as well as the one for applying the Default Animation using the same method that we have described above.
Closing Commands:
TurboAnimator is a fine Google Chrome Extension that enables you to easily apply Custom Animations to objects and elements in Google Slides using simple keyboard shortcuts. You can create your own custom animations and also specify their keyboard shortcuts as per your requirements.
Click here to download and install TurboAnimator extension for Google Chrome.