Here is a free software to compare two Excel files side by side and highlight the differences. This Excel Diff software is known as “ExcelMerge“. It shows all the data of source and destination files and highlights the cells having different values. You can also open its console box to see which value of which row and column was replaced with what value. This way, it becomes very easy to find out the changes between two Excel files.
The best part of this Excel comparison software is that you have the option to view full data along with differences or show only that data which is different between those two files. You can also change highlight color as per your choice. Moreover, it also lets you copy data as CSV or TSV format.
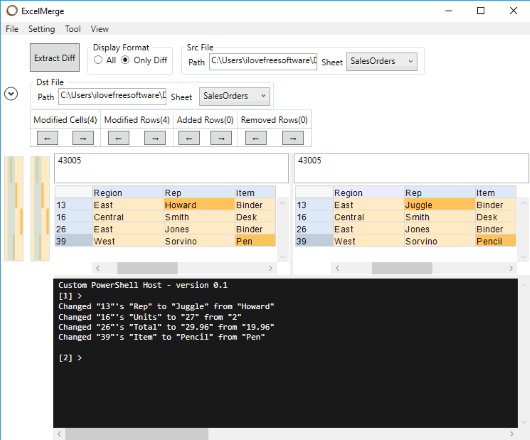
In the screenshot above, you can see the interface of this software. Here, it shows the difference between data (in orange color) of two Excel files. The console box (in black color) is also visible where it shows which data was changed with what data in a particular row and column.
Note: Before using this software, make sure the Excel files that you want to compare aren’t opened in MS Excel or another viewer. Otherwise, the software won’t be able to help you and it will crash.
How To Compare Two Excel Files Side by Side and Highlight Differences Using This Free Software?
Step 1: Get this ExcelMerge software with the help of the link I have added at the end of this review and install it.
Step 2: Open its interface and then add a source Excel file and a destination Excel file. It supports both XLS and XLSX formats. Moreover, it also supports CSV and TSV files but I am covering this review for Excel files. When the files are added, you can select which sheets of those files you want to compare.

Step 3: Finally, you can press “Extract Diff” button and it will analyze both the files. Once this process is done, it will show data of both the files on the left and right part and the differences are highlighted with orange color.
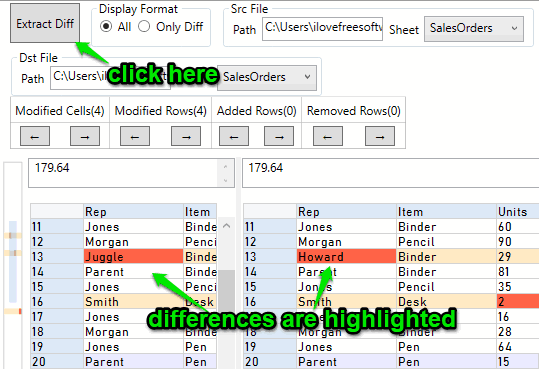
If you don’t want to see the whole data, then you can also switch to show difference only. For that, just press “Only Diff” button.
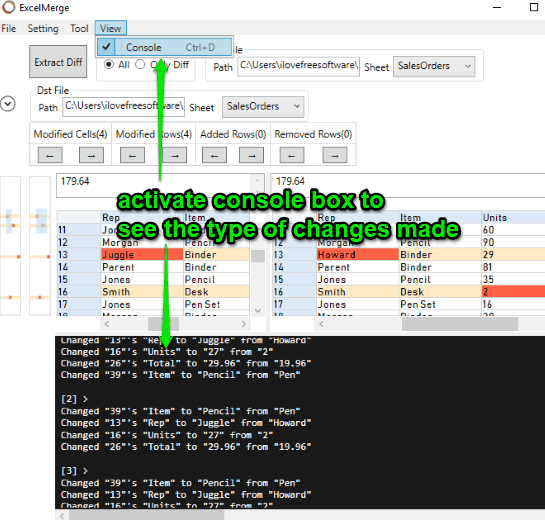
Step 4: Use this step when you want to see which data is replaced by what value and in which column and row using console box. This box is not activated by default. You can activate it using View menu and selecting “Console” option.
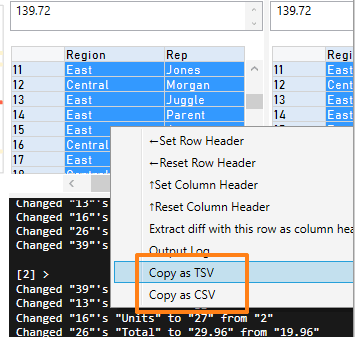
Step 5: This step helps to copy the data of any of the input files as CSV or TSV format. Simply select all data on left or right side, then right-click and use Copy as TSV or Copy as CSV option. This feature works good but the strange part is when I selected left section data and used TSV/CSV option, it copied right section data and vice-versa.
Step 6: If you want to change highlight color for difference, column header color, row header color, change font, etc., then you can do this easily by accessing Setting menu and then “General Setting” option. It will open a separate window.
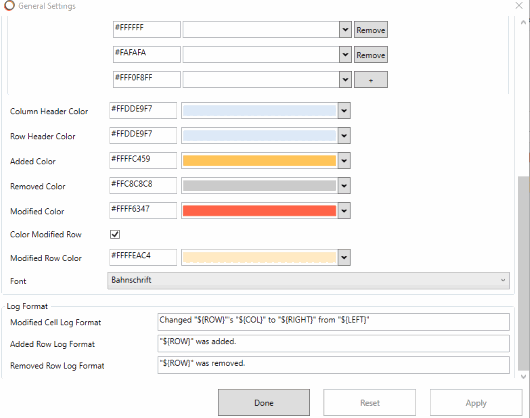
Set options in that window and then save all the changes.
The Conclusion:
There are many other Excel comparison tools also available for free. Some of them are covered here. Still, the feature to highlight differences and then copy only differences to clipboard as CSV or TSV format data make this software better than others.