This is a small and simple tutorial that explains how to disable Task Manager in Windows.
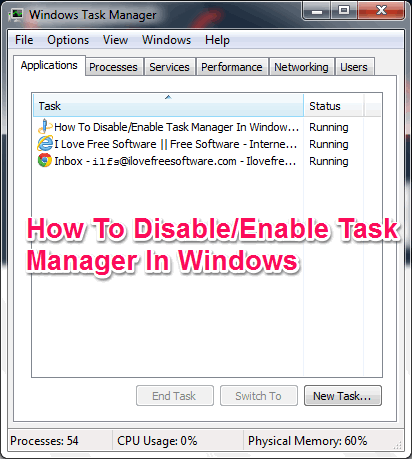
Windows Task Manager provides many useful system information, such as: currently running Applications, Processes, Services, CPU Usage, RAM Usage, etc. But, did you know that you can actually disable Task Manager?
Yes, Windows Task Manager can be easily disabled and enabled from within Windows, without using any other software. It can be done by opening Local Group Policy Editor of Windows and following some simple steps. Let see how to disable and enable task manager in Windows.
Steps to disable Task Manager in Windows:
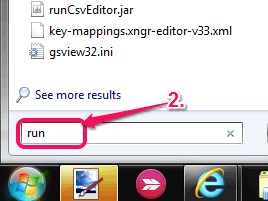
Step 1: Open Start Menu. Enter Run in the Search field available in Start Menu and press Enter.
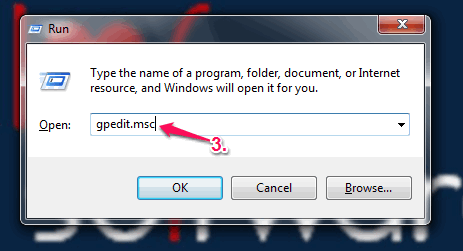
Step 2: A Run dialogue box will open, enter gpedit.msc in the Search text-field and press Enter. It will open Local Group Policy Editor of Windows.
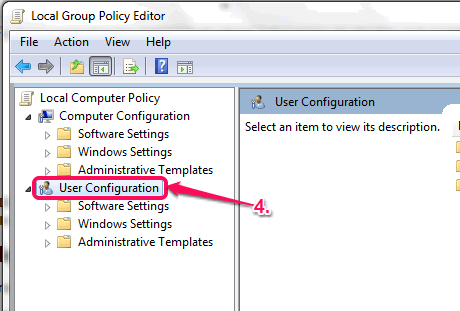
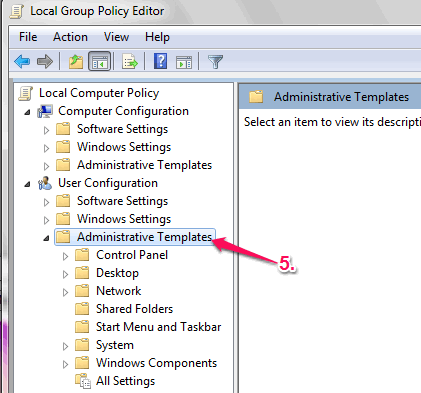
Step 3: Local Group Policy Editor interface is divided into two parts. The left side is the navigation pane and on the right side is the Explorer pane. In navigation pane, click on User Configuration option.
Step 4: It will show three options under User Configuration in navigation pane. Select Administrative Templates option, which is the last option.
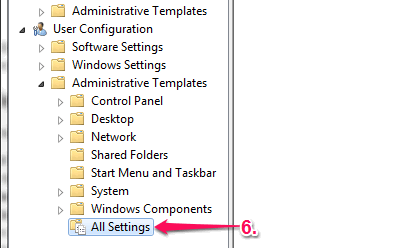
Step 5: Under Administrative Templates, select All Settings (last) option. It will show a list of All Settings options in the Explorer pane on the right side.
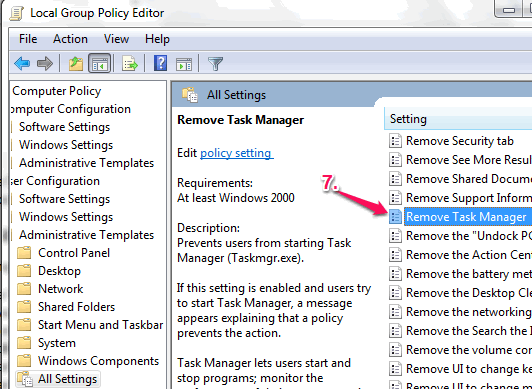
Step 6: Search for Remove Task Manager in that list in Explorer pane and open it. A new Remove Task Manager windows will open.
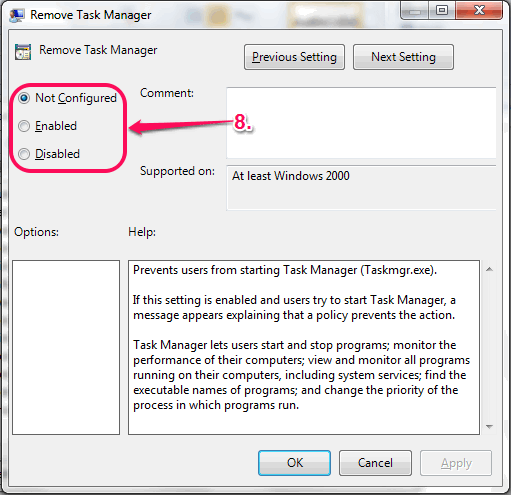
Step 7: On the top left corner of Remove Task Manager, there are three options: Not Configured, Enabled, and Disabled. Select Enabled option to disable Task Manager from Windows, and select Not Configured or Disabled option to enable Task Manager in Windows.
Now when you try to open Task Manager, you will see that it will come as disabled.
Conclusion:
Disabling and enabling Windows Task Manager is quite simple. You can do it by following simple steps mentioned in this tutorial.
Also see: 5 Free Task Manager Programs for Windows.
