Ever since the day it was released into the wild a few years back, Google’s Chrome browser has had an impressive array of features to set it apart from the crowd. Fast forward to present, and Google Chrome is the most popular and widely used browser out there. And why shouldn’t it be? It has a clean & unobtrusive UI, a massive array of official and third party extensions, and then some more. The best thing is that it’s constantly updated with a host of features and improvements. One such important feature is the hugely useful automatic synchronization.
Thanks to automatic synchronization, all of your bookmarks, installed extensions, history, themes, practically everything is synchronized with the Google Account that you use to sign in to Google Chrome. This makes sure that all of your preferred browser settings are always available, regardless of the system that you use. That’s certainly awesome, but what if you want to sync only a handful of items to your Google Account, and not everything?
Not a problem, as this is what you’ll be able to do once you’re done reading the awesomeness that this post is. Let’s head over to the other side of the break and see how you can sync selective items in Google Chrome.

How To Sync Selective Items In Google Chrome?
By default, Google Chrome synchronizes pretty much everything to the Google Account that you use to sign in to the browser. This includes Apps, Extensions, Settings, Autofill, History, Themes, Bookmarks, Passwords & Open Tabs. This is useful, but not so much when you’re looking towards synchronizing only a few of these. Here’s a little walkthrough, explaining how to selectively synchronize items in Google Chrome:
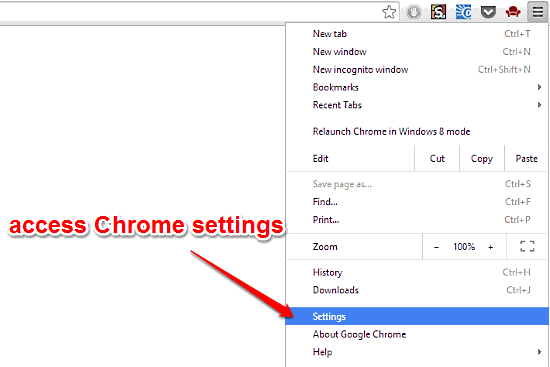
Step 1: Launch Google Chrome as you normally would. Now, click on the hamburger icon, and go to Settings.

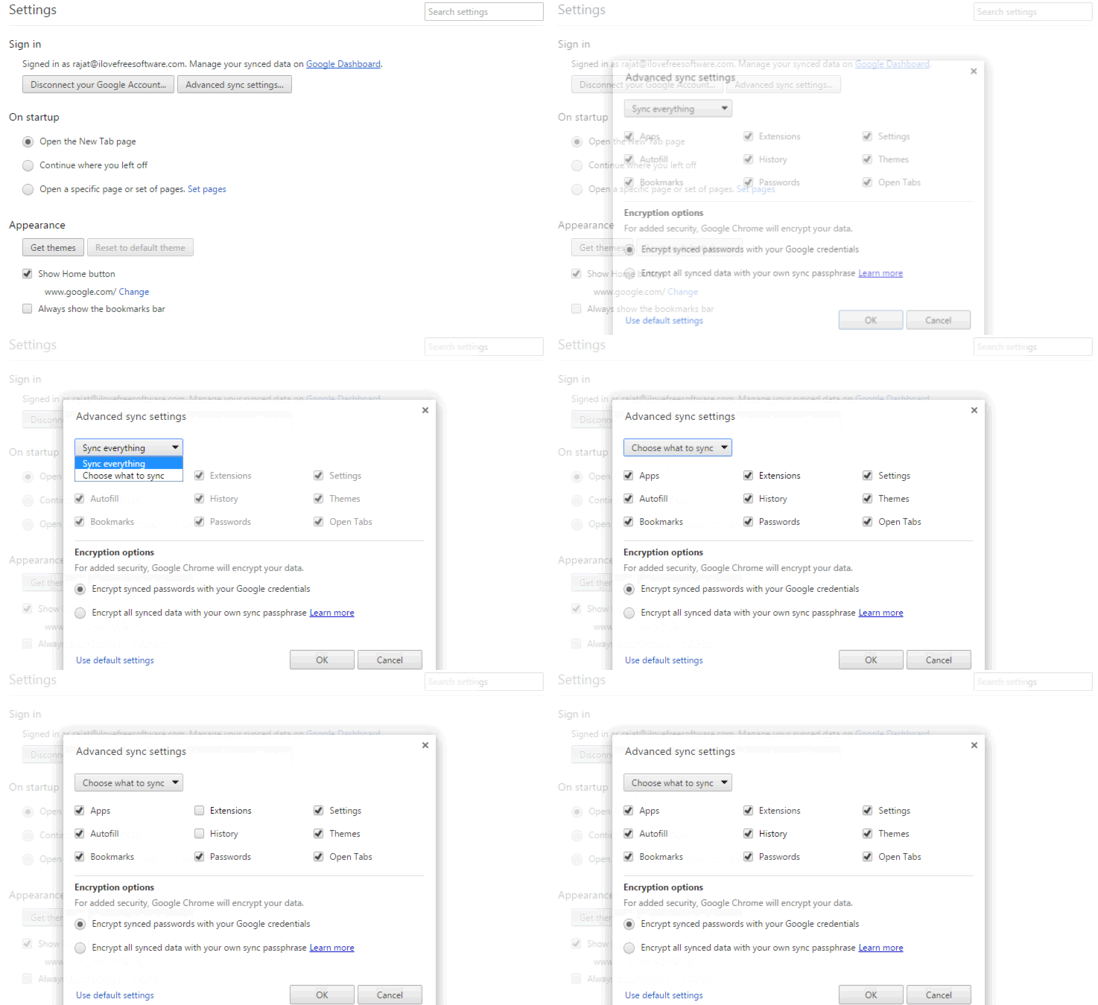
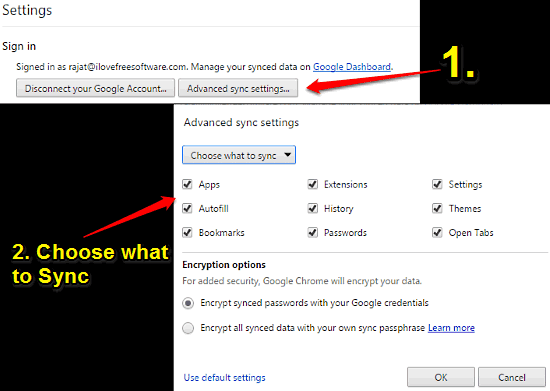
Step 2: You should be now on the Google Chrome Settings page. Under the Sign in subsection, click on the Advanced sync settings button. Once you do that, a small pop-up will, well, pop up. Select the Choose what to sync option from the drop down menu, and check the items that you want to be synced, unchecking the ones that you don’t want synced. Once done, click OK. Here’s a screenie:

That’s it. Your changes will be instantly synchronized to your Google Account. Easy, isn’t it?
See Also: Revoke Google Account Access For Third Party Apps
Conclusion
Automatic synchronization of bookmarks, tabs, settings etc. is a really handy feature of Google Chrome, and it ensures that your preferred browser settings are always available for you, regardless of the device you’re using. And the fact that you can selectively choose which settings you want synced and which not, makes it even better. Give it a shot, you’ll love it.