FFMpeg Drive is a free cross platform graphical user interface for the very popular video manipulation utility ffmpeg. Currently it has three very useful features, image to video conversion, video to video conversion and the ability to play a very large number of video formats. FFMpeg Drive is still early in development, so you might see more features implemented further down the line.
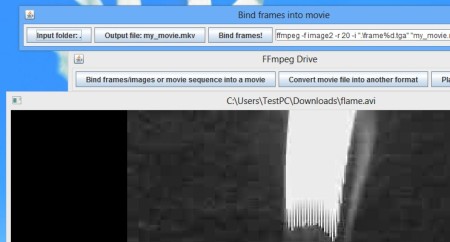
All three features that are available in FFMpeg Drive, that we mentioned in the introduction can be seen on the image below. Each one of them will have it’s own window. As you can probably see from the icon in the top left corner of the window this is a Java based application. To use it, you’re gonna have to have the Java runtime environment installed on your system.
Similar software: Eusing Free Video Converter.
Key features of FFMpeg Drive are:
- Good format support – works with AVI, MKV, WMV, MP4, 3GP, MPEG, etc.
- Image to video – merge and bind images from a directory into a video
- Graphical interface – provides a GUI for the ffmpeg video editor
- Converter – video conversion between supported formats possible
- Video player – plays videos – all the supported formats can be opened
- Cross platform – works wherever Java works – Linux, Windows, Mac OS
ffmpeg is a very powerful cross platform video manipulation utility, with a lot of useful features, but it’s a command line application which makes it less usable for inexperienced users. Less usable than a video processor with a graphical interface would be. FFMpeg Drive does exactly that. Here’s a few pointers to help you get started.
How to watch and edit videos with FFMpeg Drive free graphical interface for ffmpeg
Watching videos is pretty easy. Select Play from the main window and navigate to the location where your videos are saved. What’s more interesting is the image to video converter.
Use the Bind frame into movie window in order to select the input folder, where image files are located. They should be in TGA format. Output file is the output video that you’ll like to use. When you’re done with the setup, click the Bind frames button to start the merging of images into video files.
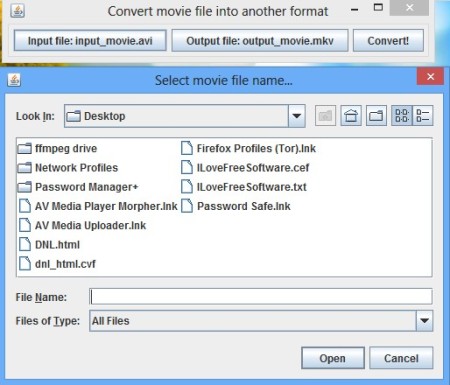
Video conversion works the same way that the image to video conversion does. The only difference being that now you need to select a video file, instead of the input directory with images. Set the output format by saving the output video with appropriate format at the end of it. When you’re done, click Convert.
Conclusion
FFMpeg Drive might still be a bit disorganized, but when it comes to taming ffmpeg, this free video converter has a lot to offer. Commands that are passed to ffmpeg, which can’t be seen on the images above, can be edited manually. By using commands you get much more control over the conversion, but you’re gonna have to read up on ffmpeg for this. Graphical interface should be more than enough for most people. Give it a try and see how it goes.


