This tutorial explains how to record video with audio in VLC player.
We all love VLC media player because of its vast features and ease of use. Its interesting features help in many cases. For example, we can record desktop using VLC, sync VLC playback on multiple PCs, take snapshots of video, and more. Just like these handy features, there is one more valuable feature in VLC using which you can record a video along with audio. This is especially helpful when you want to fetch one of your favorite moments from a movie or TV show and share it. You won’t need any video cutter to perform this task.
Your recorded video(s) are saved automatically in the same format as original. So lets see how you can make it possible.
How To Record a Video with Audio in VLC Media Player?
Follow these steps to record a video in VLC Media Player:
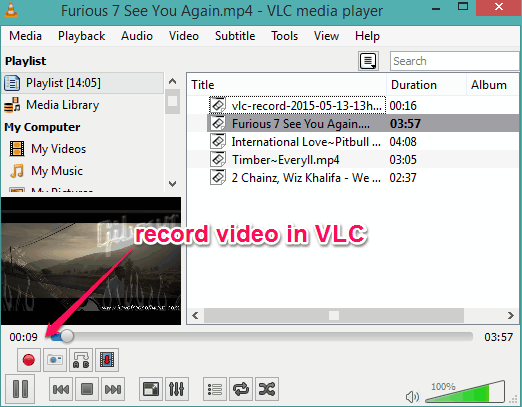
Step 1: Run your VLC media player and play a video that you want to record. You can also pause your video or jump to a particular part from where you want to start the recording.
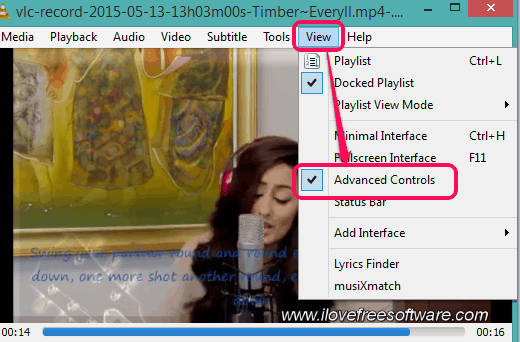
Step 2: Now click on View menu. You will find Advanced Controls option. Click on that option.
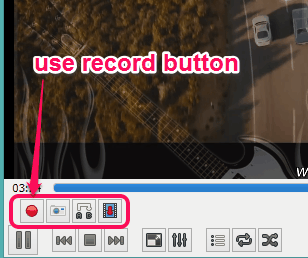
Step 3: You will notice that Record and other buttons have appeared just above playback controls. See the screenshot below:
Step 4: Now you can play your video and tap on Record button. This will immediately start the recording. Whenever you want to stop the recording, tap the same Record button again.
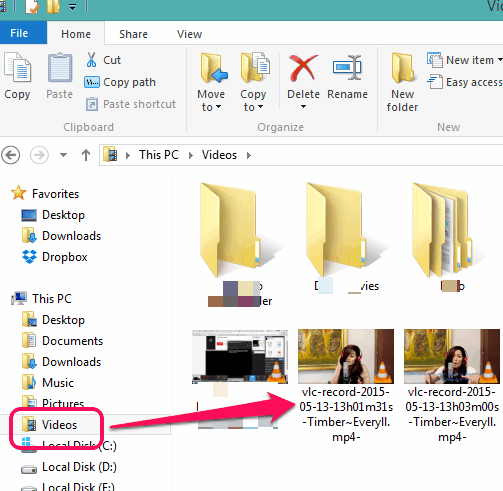
Step 5: To access the recorded video, go to Videos library that appears on navigation pane of File Explorer. You will find your recorded video that you can play and share anywhere you want.
That’s it folks. Go ahead and record your favorite moments and play, instead of playing the full movie or video.
And if you want to enhance the functionality of your VLC player, just in case, then you may try some good plugins of VLC.


