Here are 5 free software to add watermark to video. Using these software, you will be able to easily add text or images as a watermark to your videos. Almost all these software allow you to add the text or image to any specific part of the video or to the entire video. You can add text or image to the video and change their position and size as you desire. Some of them even have the option to change the text font, text color, background, etc.
Among these software, most of them are typical video editors (including some open source video editors) and allow you to do many more things, like crop video, trim video, zoom video, and more. Ultimately, these software can come in handy if you want to overlay a text or insert your logo image over your videos.

Now, let us get started with the video watermark software and see how to use them to add watermark to video.
Free Video Watermark Maker:
Free Video Watermark Maker is a dedicated free software to add watermark to videos. Among all the software in this list, this one is the simplest as it is not a typical video editor and only has the option to add watermark. You can use this software to easily add text and image watermark to your videos.
How to Use Free Video Watermark Maker to Add Watermark to Video:
Step 1: When you open this software, the first thing you need to do is import the source video. To do this, simply click on the “Open File” button at the bottom of the window. You can import video files like AVI, MOV, MP4, etc.
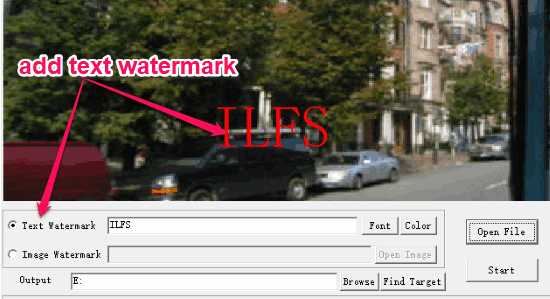
Step 2: After importing a video, if you would like to add a text watermark, then simply enable the “Text Watermark” option and then type anything you want in the input field. As soon as you do that, the text will be added at the top of the video, as shown below.
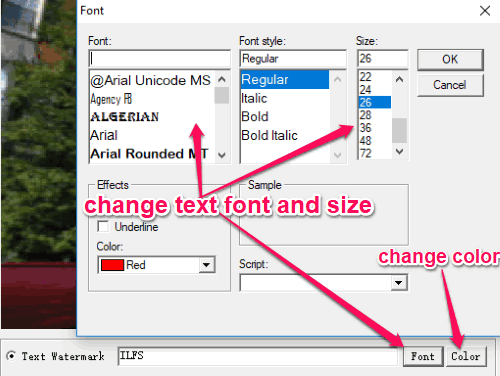
Step 3: Now, you can simply select the text on the video and drag it to any position you want. Apart from that, you can click on the “Color” button on the right of the input field to change the text color. You will also be able to change the text font, font style, and size of the text by clicking on the “Font” button.
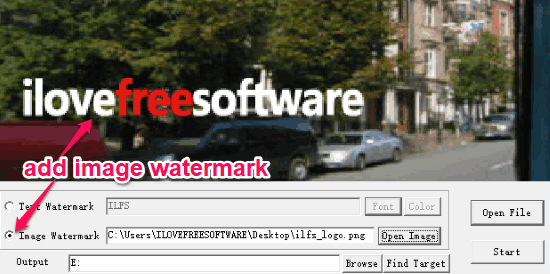
Step 4: If you want to add an image watermark to the video, then enable the “Image Watermark” and then click on “Open Image” button to select the image. Once you select an image, it will be added to the video and you can move it to any area on the video. Unfortunately, it doesn’t have any option to resize the image. But, you can use any of the image editors to resize the image before adding it as a watermark.
Shotcut:
Shotcut is a free and open source video editor that is my favorite video watermarking software. It lets you add a watermark by inserting images and text to videos. It also provides useful editing features such as color correction, cutting, trimming, cropping, etc.
How to Add Watermark to Video using Shotcut:
Step 1: To get started, open up Shotcut on your PC and click on the “Open File” button at the top to import a video. You can import video files like MP4, MPEG, AVI, MKV, WMV, and more for editing. After that, simply drag and drop the video file from the preview window on the timeline.
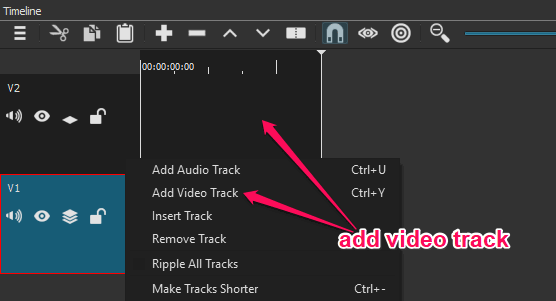
Step 2: Now, let’s say you want to add an image as the watermark. Then simply right-click on the “Video Track” section on the timeline and select “Add Video Track” option. This will add a new video track where you can insert the image that you want to use as watermark.
Step 3: To add an image, simply click on the “Open File” option and select the image from PC. After that, drag and drop it from the preview window on the new video track which you have created on the timeline. When you do that, the image will be added on the top of the video, as shown below. On the timeline, you can change the playback duration of the image and move it to any specific video part or set it for the entire video.

Step 4: Now, to change the size and position of the image, simply select the “Filters” tab at the top of the timeline. Then click on the “+” button and select “Video Filters”. From the list of video filters, you would need to select “Size and Position”. After that, you can either manually enter the size and position of the image or use the image frame on the preview window.
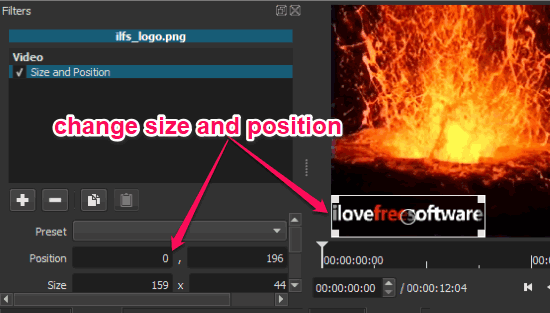
Step 5: If you want to add a text watermark, then on the “Filters” tab select the “Text” video filter. After that, you will be able to type anything you want and add it to the video. After adding text, you will be able to change the text font, text color, add outline color, and change text background.

In addition to that, you can change the position and size of the text either by entering the values manually or using the text frame on the preview window.
HitFilm Express:
HitFilm Express is also one of the best options for you to add watermark to video. It is an advanced video editor with numerous features like trimming, video effects, composite editing, cropping, scaling, etc. In addition to that, it also allows you to add image and text overlay over a video for watermarking.
How to Add Watermark to Video with HitFilm Express:
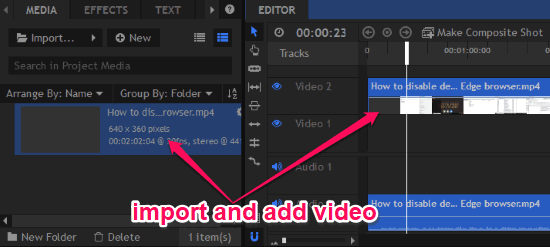
Step 1: To get started, open up HitFilm Express and create a new project and hit the “Start Editing” button to open up the editor. Now, click on the “Import” option under the “Media” tab to add the video file. It supports different file formats such as AVI, MOV, MP4 (AVC/H264 & AAC), MPEG, WMV, etc. After adding a video file, simply drag and drop it to the timeline, as shown below.
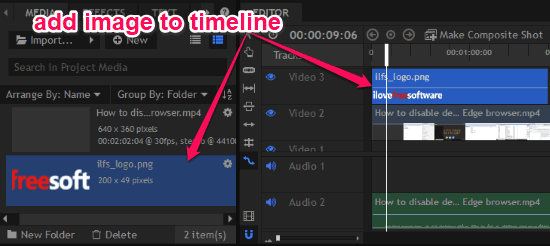
Step 2: Now, if you want to add an image as the watermark, click on the “Import” option and select the image or logo which you want to add to video as watermark. After that, simply drag and drop the image on the track which is above the other track on which you have added the video to the timeline.
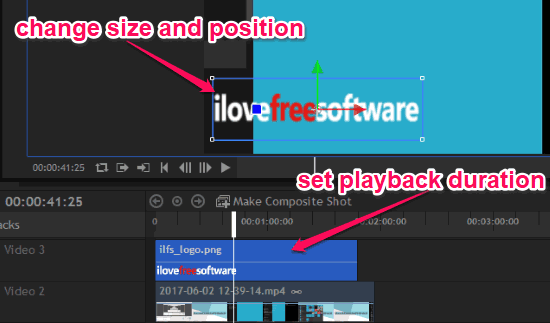
Step 3: After that, you can move the image watermark on the timeline to any specific video part or overlay it to the entire video by dragging it. Now, if you would like to change the position and size of the image watermark, then you can simply use the image frame on the preview window to do that.
Step 4: Now, to add text watermark using HitFilm Express, the first thing you would need to do is click on “New → Composite Shot” under the Media tab. After that, select the “Text” icon on the left of the preview section. Then you can click on the preview screen and type any text you want.
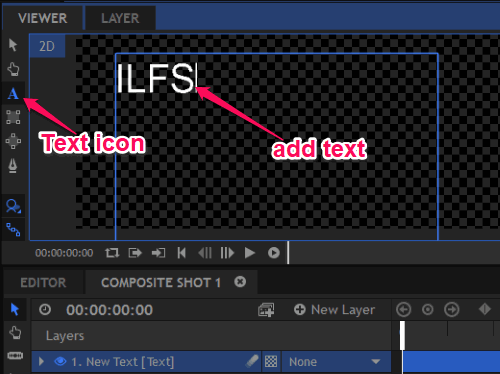
Step 5: When you’re done typing the text, go back to the editor mode. The text will now be added as a new composite shot and will be visible under the “Media” tab. You can simply drag and drop the composite shot on the timeline just above the video track. This will add the text watermark at the top of the video. You can use the text frame on the preview window to resize or move the position of the text watermark.
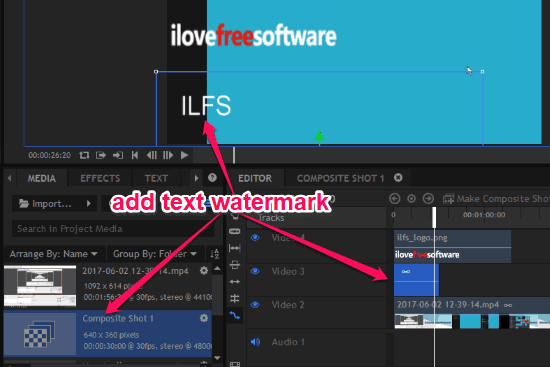
Additionally, you can also change the font, text color, background, etc. by selecting the “Text” tab adjacent to the Media tab.
VSDC Free Video Editor:
VSDC Free Video Editor is another useful video editor with dozens of editing tools such as trim, crop, split, cut, video effects, etc. In addition to these tools, it also comes with the option to add watermark to videos. You can either add a text watermark or an image watermark to your videos.
How to Add Watermark to Videos using VSDC Free Video Editor:
Step 1: When you open VSDC Free Video Editor, click on the “Import Content” option to choose the video file to which you want to add a watermark. You will be able to import video files like 3GP, WMV, MP4, MKV, FLV, etc. After importing a file, it will get automatically added to the timeline.
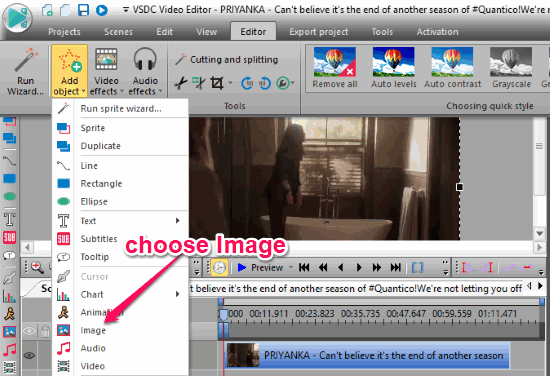
Step 2: Now, to add a watermark to the video, the first thing you would need to do is click on the “Editor” tab at the top and then select the “Add Object” option. After that, you will be able to see various objects such as Line, Text, Tooltip, Chart, Image, etc. Now, if you would like to add an image watermark to the video, then select the “Image” object from the list.
Step 3: Then you can choose the image from your PC which you want to add. When you do that, the “Object Position Settings” window will appear where you can set the layer’s position, position locking to parent position, and object position in the timeline. This will help you define the exact position of the image watermark.
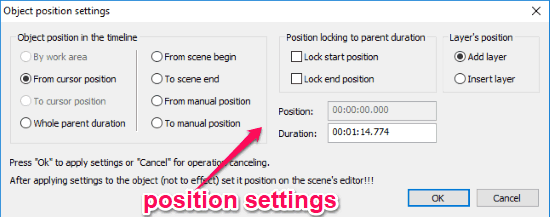
Step 4: Once you’re done with position settings, simply click “PK” and the image will be added to the video. Now, you can use the image frame in the preview section to move and resize the image as required. Apart from that, you can also change image settings like object creation time, object drawing duration, coordinates, background color, etc. from the “Properties Window” on the right.
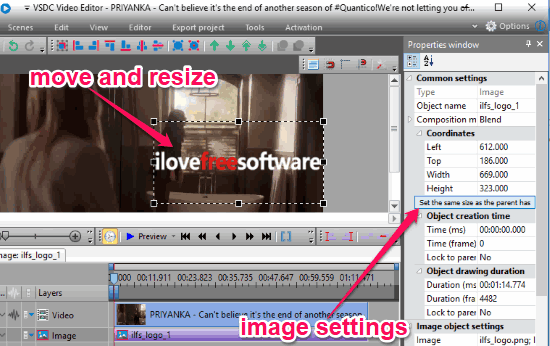
Step 5: Suppose, you want to add a text watermark, then from the list of objects you need to select “Text”. After that, the same “Object Position Settings” window will appear where you can configure the position of the text watermark as required. Then simply click on the video in the preview section to add a text box.
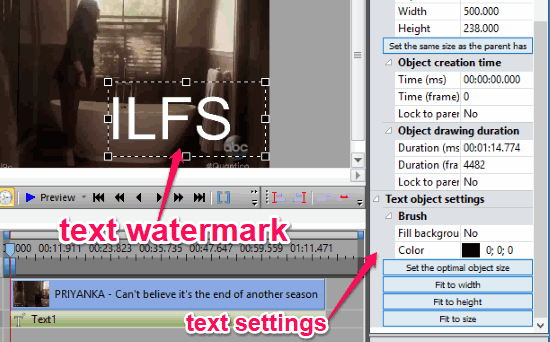
You can now type anything you want inside the text box. Apart from that, you can also change the text color, background, size, position, etc. from the “Properties Windows”.
OpenShot:
OpenShot can also be used to add watermark to videos. It is actually an open source video editor with features like crop, zoom, split, snapping, trim, cut videos, etc. Not only that, it also comes with the option to add watermark to videos by overlaying images and text.
How to Add Watermark to your Videos using OpenShot:
Step 1: First, open up OpenShot and select “File Menu → Import Files” at the top. Then you can import the video for adding a watermark. It lets you import various video files like MP4, WMV, AVI, and more. When you do that, simply drag and drop the video on the timeline at the bottom.
Step 2: Let’s say you want to add an image as the watermark on the video, then simply import the image from the “File Menu” and drag and drop it to another track on the timeline. You must add the image to the track which is just above the other track to which you have added the video, as shown below.
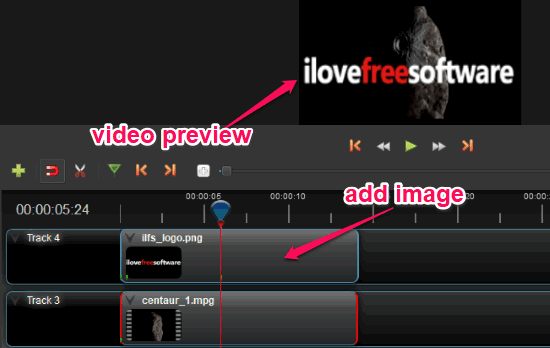
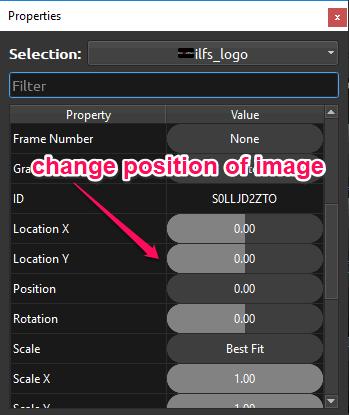
Step 3: After that, you will see that the image is added at the top of the video in the “Video Preview” section. Now, to change the position and size of the image, simply right-click on the image on the timeline and then select the “Properties” option. Then the “Properties” window will appear on which you will be able to configure the position, orientation, size, and more for the image. You can also right-click on the image and select the “Transform” option to use the image frame in the preview section to adjust the position and size of the image.
Step 4: If you would like to add a text watermark using OpenShot, then the first thing you would need to do is select “Title Menu → Title” at the top bar. After that, a new window will appear where you will see more than 30 text templates. You can choose any template you want and then type the text in the “Line” input field, as shown below. Apart from that, you will also see the options to change text font, text color, and background of the text.
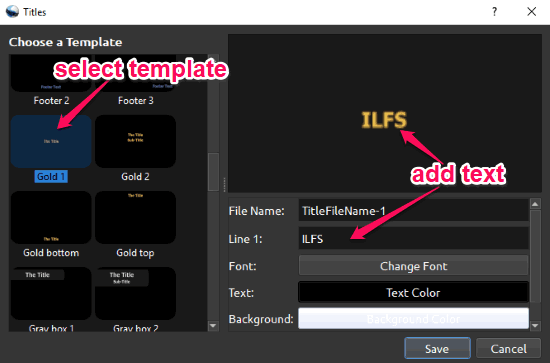
Step 5: When you’re done typing the text, simply click “Save” and the title file will be visible on the “Project Files” section. Now, you can drag and drop the title file to the track just above the video track. This will overlay the text on the video. To change the size and position of the text, you can either use the “Properties” window or the “Transform” option in the same manner as you can do with image watermark.

Closing Words:
These are some of the best free software for Windows to add watermark to videos. They make it very easy and convenient for you to add text or images as video watermark. The process of adding a watermark using the video editors might look lengthy, but if you follow the steps explained in this post then it will be a walk in the park for you.
Try them out and do let me know if you’re familiar with other software to add watermark to video.