[yasr_overall_rating] [yasr_visitor_votes]
Here is a quick tutorial that explains how to delete search history in Windows 8.
In the new Windows 8 whatever you search using the global search or search within an app is automatically saved by default. In this tutorial we are going to learn how to delete search history in Windows 8.
Also, here we will learn how to disable search history entirely or within a particular app. This tutorial will guide you through the process in a step-by-step guide.
Steps to delete search history in Windows 8:
- First thing to do is to bring up the charm bar in Windows 8. To do this just press the Windows key + C combination. Now just click on the settings button in the charm bar, which is located on the lower part of the charm bar as pointed out in screenshot below for your convenience.

- After that the settings panel will open up as shown in the screenshot below. Now just click on the Change PC settings button as pointed out in the screenshot.

- Now the settings windows will open up as shown below, just select the Search settings from the list on the left from all the settings, and then all the settings related to the search history will appear as shown below.
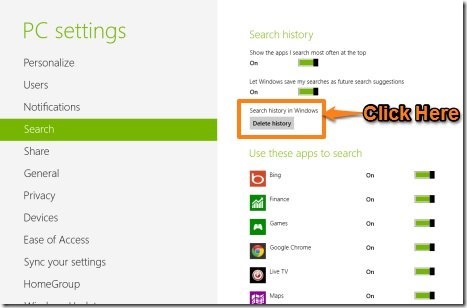
- As shown in the screenshot below click on the Delete history; this will delete all the history from global search as well as individual software as shown in the screenshot.

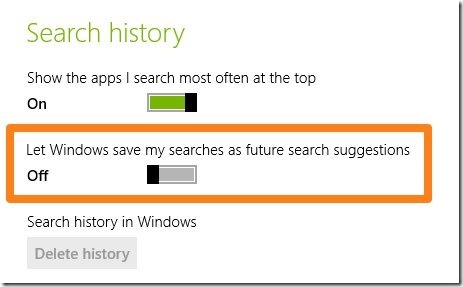
- You can also disable the history feature in Windows 8; by toggling a button as shown in the screenshot below. After this feature is turned off, Windows will stop saving your search results. In this manner, you can configure Windows to not save your search history.
Now you are done with this tutorial and all of the history for the apps and the global search will be deleted and cleaned.
Here are some other interesting tutorials for Windows 8:
How To Use Task Manager In Windows 8
How To Get Start Menu In Windows 8
