This is one handy Windows 8 tutorial on, How to record screens of metro apps in Windows 8, and then export them as compressed .AVI video file. Microsoft did give an option to capture the screen of metro apps as well as desktop apps in Windows 8. But, there’s no direct way that, you can record whatever you do in Windows 8 desktop apps and metro apps. The only way out of this situation is, using third-party apps for the very purpose, there are many desktop apps for recording screens. But, only a few can actually record the screen of metro apps.
I am going to use a very handy, simple, and effective desktop app for recording metro apps’ screen: BB Flashback Express Recorder, plus in order to export the recording in .AVI video file format, I am using one more product from the same developers, BB Flashback Express Player. Both of them are completely free and come, bundled in one installer. And, you can download it from the link given at the end of this article. The size is not that big and downloads fast. Simply, run the exe, and the necessary BB Flashback Express products gets installed.
Since, every necessary desktop app comes bundled in one installer, this makes it possible, to work easily and effectively with all the BB Flashback apps. Every step simply follows just one after another.
This Windows 8 tutorial going to help all video bloggers, and even the regular users can use it to record Windows 8 metro game app’s screen, and then share it with friends, showing off their good gaming skills.
Here’s how you can record screens of Windows 8 metro apps by following steps of this Windows 8 tutorial:
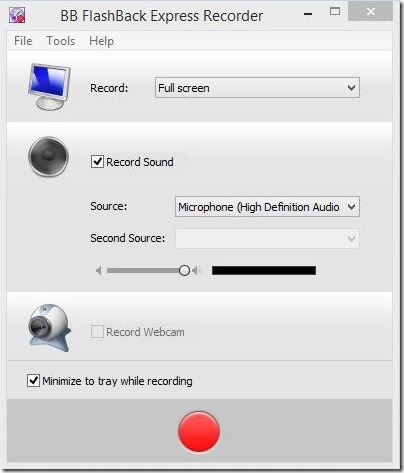
Once, you successfully install the BB Flashback Express recorder and player. Simply, run BB Flashback Express Recorder from the Start Screen (if it’s not there then, go to All Apps view of Start Screen). You’ll get a very minimalist recording UI. Simply, choose the screen area that you want to capture, by using the drop down list besides Record: label. In this case I am using Full screen. If you have a microphone or speaker, and want to record audio as well, then check on record Sound option and choose desired device. Finally, don’t forget to check on Minimize to tray while recording option, and then click on Record (red colored) button. You’ll get a countdown of 3 seconds, and the app starts recording. Don’t worry that, you are still on the desktop, because later you’ll have the option to crop the unwanted parts of the recording.
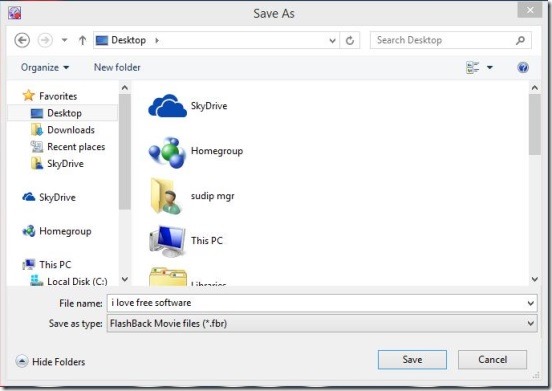
Simply, switch to which ever metro app you want to record, and do what you want to record. Once, you are done, simply press Shift + Ctrl + S keys to stop the recording, or you can open the recoding app again, by double clicking on it’s tray icon, and click on pause or stop. The app then asks you to either save the recording or discard it. Simply click on Save, and then, you can save the video recording in .FBR file format (a flashback file format).
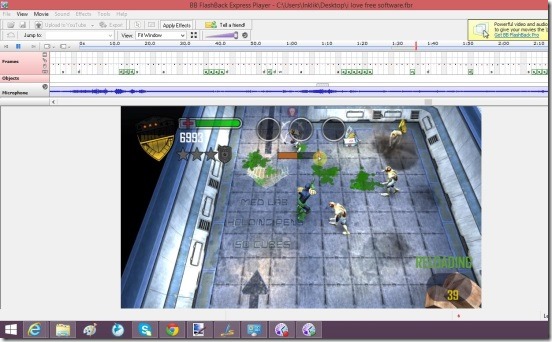
After saving the recording, the app asks you to either open the .FBR file in BB FlashBack Express Player or, directly move to exporting, as .AVI video file. I am going to go for open option. This opens the player. It is a player plus editor. You can add effects if you want to, highlight mouse properties like clicks etc. You can even directly upload the recording to YouTube. There are buttons for all these in menu bar and tool bar.
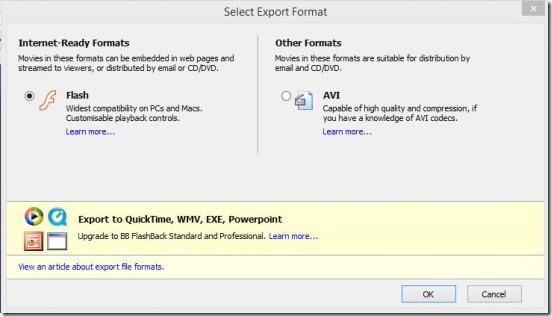
Once, you are done doing everything, click on Export button. This gives you two options; either export recording as .SWF file or .AVI. I am going to choose .AVI.
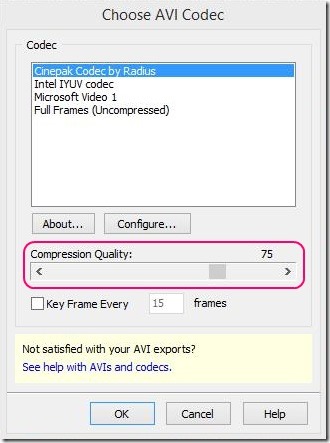
Then, choose the type of codec and compression quality. If you want to compress the recording and want a decent video quality, then 75 is fine.
Click OK, after that, you’ll get the option to scale that is, choose video dimensions and option to crop recording .
Finally click on Export button and save the file.
Conclusion:
That was all about this Windows 8 tutorial for recording screens of Windows 8 metro apps. Simply, follow the simple steps, try giving different settings, and see if you get the right results.
Get BB FlashBack Express here.
Also check out some more good Windows 8 tutorials, that we have covered:
Zoom Windows Store, Start Screen, and Desktop apps.
