WebBotify is a ChatGPT powered chatbot that you can setup and integrate with your website in just a few clicks. You only need your website URL to train the chatbot to resolve specific queries.
WebBotify helps you to engage your visitors with personalized conversations and boost your conversions. The AI chatbot provides quick support and helps resolve customer queries 24 / 7. You can let the chatbot handle all the repetitive tasks such as answering FAQs to guide users, and more. This helps you to free up your team’s time and resources which can be focused on other vital issues related to your product.
All that you are needed to do is specify the URL of your website, add your customized logo, and embed the chatbot in your website using the embed code that is provided to you.
Working:
1. Click on this link to navigate to WebBotify and sign up for a free account using your Google credentials.
2. Click on the ‘Create Chatbot’ button, paste the URL of the website for which you want to create one and click on ‘Fetch’.

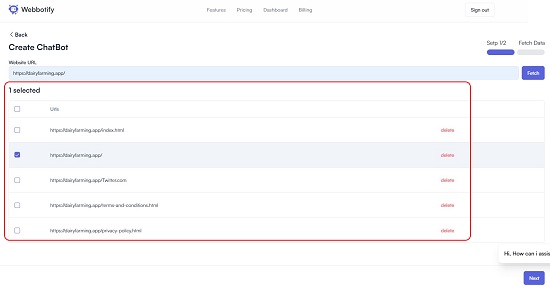
3. Wait for some time while WebBotify analyses your website and displays the URL’s of all the available pages. Enable the checkbox next to the page on which you wish to embed the chatbot and click on ‘Next’.
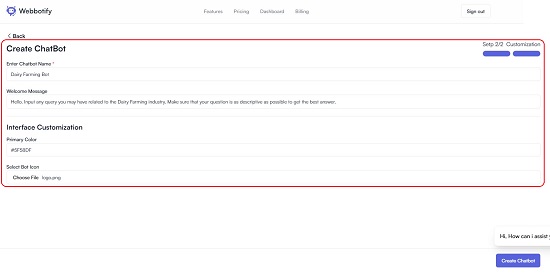
4. Now, enter the Name of the Chatbot & Welcome Message, choose the Primary color, upload the chatbot icon or logo and click on ‘Create Chatbot’.
5. The chatbot will be create in just a few seconds and the summary will be presented on the dashboard. Scroll down the dashboard and click on the ‘Copy’ button in the ‘Embed to Website’ section to copy the embed code in the clipboard.
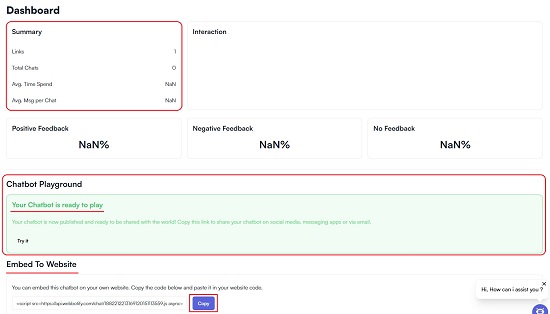
6. Now paste the embed code in your website and your chatbot will be integrated. To try the chatbot without using the embed code, click on ‘Try it’ in the Chatbot Playground section.
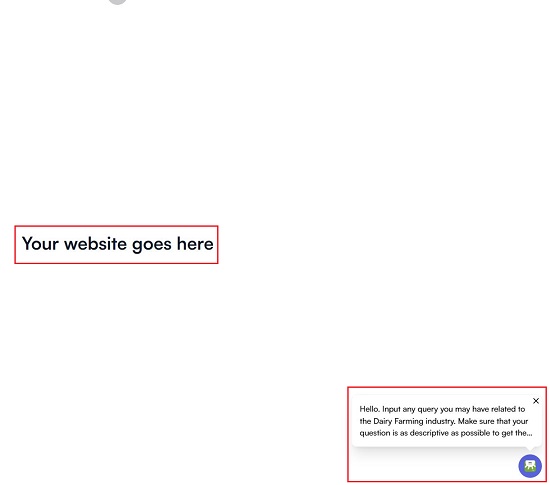
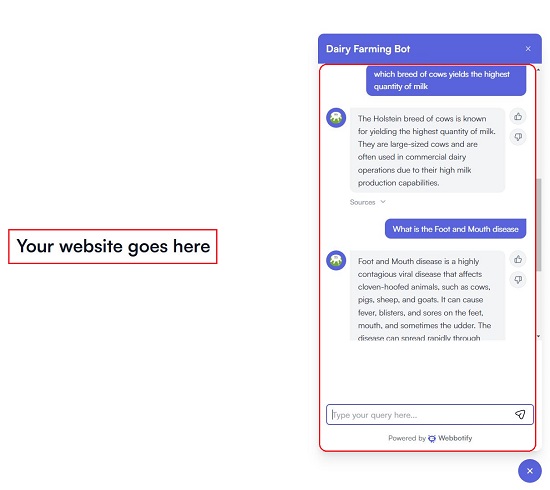
7. You can check if the chatbot is working by visiting the page that you specified in step no. 3 above and asking the relevant queries. You must remember that your Chatbot will be up and running only after the ‘Chatbot Playground’ section notifies you that your chatbot is ready to play.
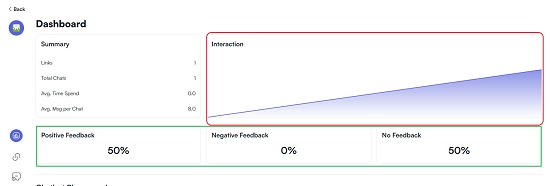
8. Once the chatbot is being used, you can keep viewing the dashboard to view a graph of the interactions with the chatbot and to get the positive / negative feedback.
9. You can click on the ‘Settings’ icon in the toolbar on the left to modify the System and User prompt. System prompt is used to change the Tone of the chatbot while User prompt can be used to feed additional instructions to the chatbot. You can also configure the creativity of the Chatbot which decides how conservative it can be while generating answers from your existing content.

Closing Comments:
WebBotify works like a ChatGPT trained for your website that you can embed and supercharge your visitors’ engagements in the least possible time. It is extremely easy-to-use and integrate with your website and will go a long way in engaging your customers and boosting your conversions by harnessing the power of AI models.
Try it for free now and let us know what you think. Click here to head towards WebBotify.