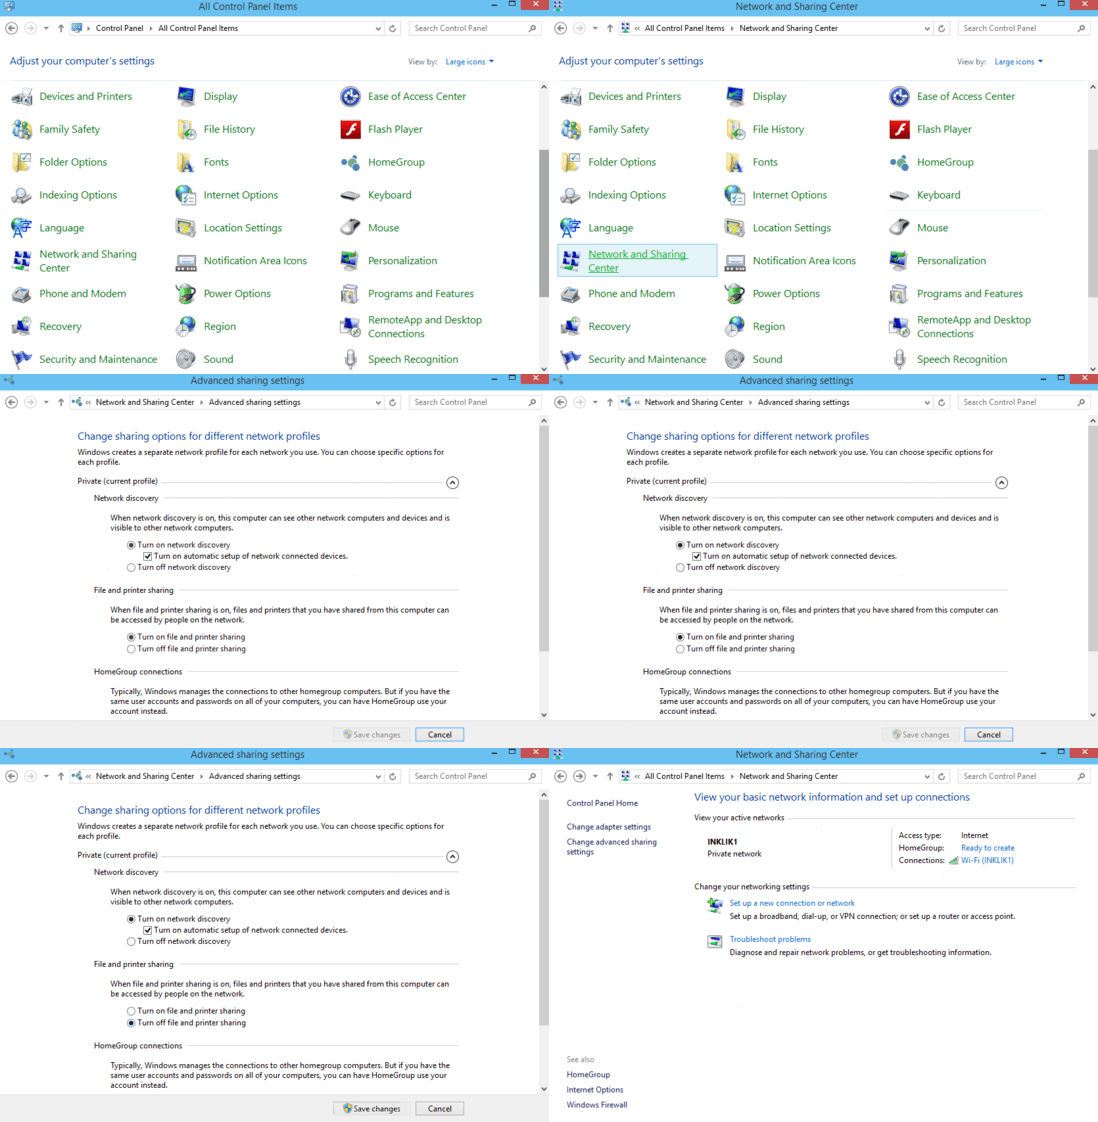
This tutorial details how to disable file and printer sharing on a network in Windows 10. Over the course of the past few years, Computers (and in general, technology) have become an indispensable part of our daily lives. Whether it’s home, school, or workplace, it’s nearly impossible to imagine getting things done without computers. And the rapid advancements in Internet connectivity have made it possible to stay connected at all times, even when you’re on the move.
Computers of today are extremely capable machines, and when connected to each other (either through LAN, or the Internet), they get even better. Out of the many things multiple computers connected to the same network can do, one is the sharing of files and peripherals (e.g. printers, scanners), even when they’re not directly connected to them. While it’s hugely convenient and awesome, but what if you don’t want it, and would rather have it disabled (say, to prevent unauthorized use of networked devices by others)?
Looks like your wish has been granted, as Windows 10 allows you to do just that. Can’t wait to know more? Head over to the other side of the break to find out how you can disable file and printer sharing on a network in Windows 10.

How To Disable File And Printer Sharing On A Network In Windows 10?
File and Printer sharing is enabled by default in Windows 10. However, it can be easily turned off. The best part is that you can turn it on/off individually for private and public network profiles. Here’s a detailed stepwise walk-through, complete with illustrations, to get things rolling:
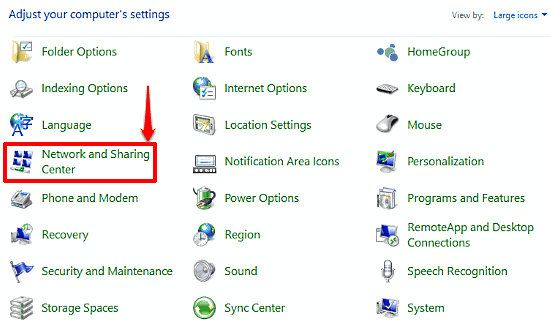
Step 1: Head to the classic Windows Control Panel, and launch Network and Sharing Center.

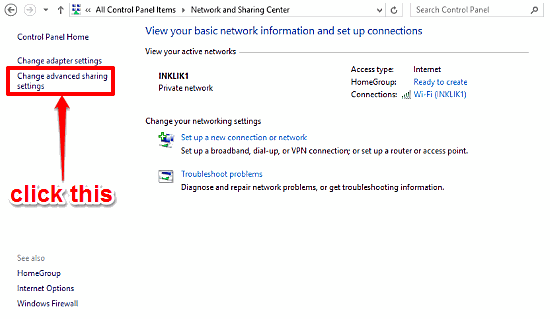
Step 2: The Network and Sharing Center module of Windows provides you essential information such as network connectivity status, connection type, and things like that. In addition to that, it also lets you set up new connections, edit existing ones and modify some advanced settings. Click on the Change advanced sharing settings link in the left column.

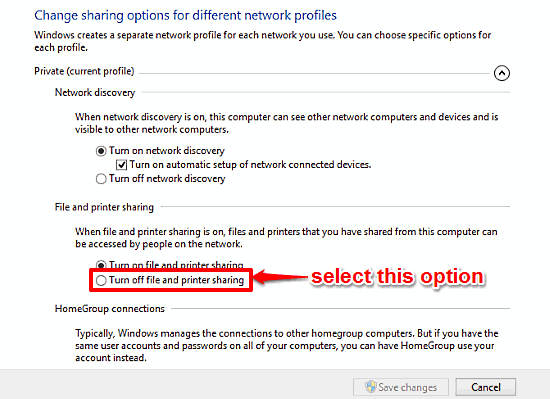
Step 3: You’ll be now directed to a screen where you can configure sharing options for all your network profiles. To view the options corresponding to the currently active network profile, click on the downward-pointing arrow corresponding to it. Once the options are displayed, select the Turn off file and printer sharing option under the File and printer sharing subsection. When done, click Save Changes (requires administrator privileges).

That’s it. Going forward, other users won’t be able to access the files and printers that you’ve shared from your computer, even if they are on the same network as you are. How cool is that?
See Also: How To Manually Update Device Drivers In Windows 10?
Wrap Up
File and Printer sharing over a network is a pretty useful feature, as it lets other users connected on the same network access files and peripherals, even if they aren’t directly connected to them. However, there might be reasons (e.g. your workplace’s policies don’t allow networked sharing) when it needs to be disabled. And as you now know, doing that is easier than you think. So try it out, and let me know your thoughts in the comments below.