Opentoonz is a free 2D animator software brought to you by the famous Japanese animation studio: Studio Ghibli. This is a very robust and complex software that experienced animators will love to use. It contains all the tools that are necessary for developing a 2D animation project. From line art cleaning to final animation rendering, Opentoonz does it all. Even though Opentoonz feels heavy, it employs the same frame to frame animation interface where you can create motion tweens easily. There is no keyframe mechanism in Opentoonz. Users can just select a frame, draw a scene and then extend that scene over a couple of frames. Efficient and easy isn’t it?
Opentoonz might give beginners a bit of a hiccup. For beginners, there are lots of free 2D animation software. But before running any of these, you can practice your drawing skills on GIMP. Learning some of the animation terms and Opentoonz drawing tutorials on YouTube will help a lot too.
Let’s give Opentoonz an eye.
How to Use Opentoonz to Make an Animation
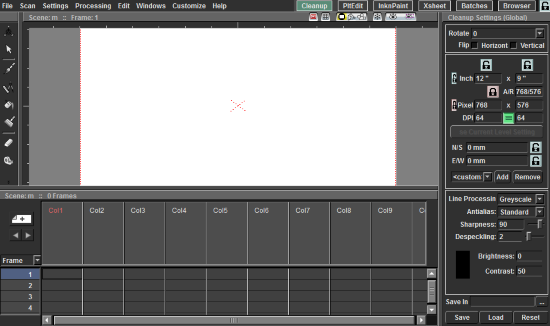
Opentoonz has a variety of tabs aimed at different levels of creating 2D animated scenes. These can be chosen from the top right. Cleanup tab is used basically for fixing the line art of a particular 2D animation’s frame. Line art can be imported directly from the scanner on this tab. The Batches tab lets you add batch servers, rendering and cleanup tasks in a batch.
PltEdit and InknPaint are the tabs where you can start drawing the frames. InknPaint gives special focus on all the frames of a level (a drawing layer) drawn in the PltEdit tab. In InknPaint, you can color and ink each scene efficiently.
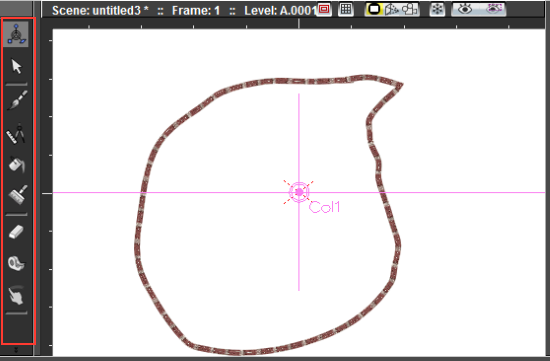
To make a simple animation, open the PltEdit tab. Below the canvas is the timeline where you can jump between time frames to illustrate the animation. Initially, you’ll find the tool bar missing. Select Windows>Other Windows>Toolbar to make it appear.
For the demo I am going to tell you how to create a simple animation to show a police spotlight going over a brick wall. Use the brush tool to draw a closed irregular border around the canvas. Make sure you add the color from the color wheel on the left to the Level Palette. Click on Apply after selecting a color and the line-art to do that.
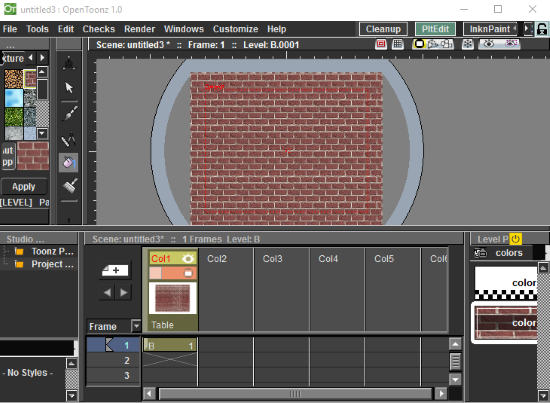
A color can be also be added in the level palette by right-clicking the level palette and selecting New Style. I used the bucket tool to fill the border with brick texture from the color and texture panel at the left. All of this will be done in the first column of the time line. A sketch on a column will superimpose the previous one.
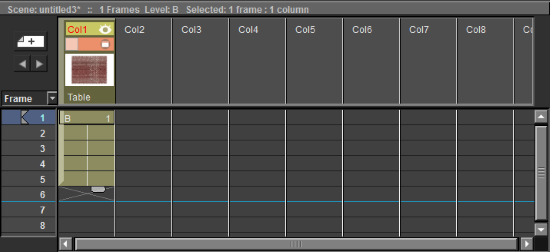
To retain a design for a selected number of frames, select the flap of the first frame in the selected column and drag it down to the number of frames you like.

Select the next column and use the geometry tool to create a circle. Right-click on the Circle’s column in the timeline and select FX to add the ‘glow’ effect. This will cause it to look like a spotlight. Extend the frames of the circle in the timeline with the flap as explained before. The last step is to add the motion tween to the spotlight. Select the edit tool and change the position of the circle in the first and last extended frame on the extreme sides of the canvas. This will animate the circle to travel from one side to another. The animation has been completed.
In normal line art drawing, you can right click the canvas and select Activate Onion Skin to see what you have drawn in the previous frame. It’s a good tool to guide your illustration.
How to Export an Animation in Opentoonz
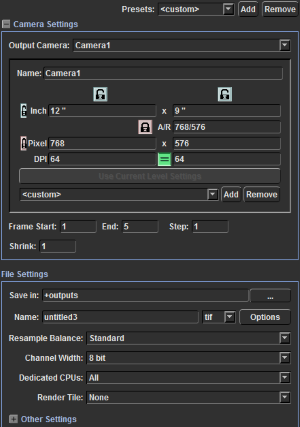
Once you have completed the animation, you can export it into HD images as well as an HD avi file. Click on Render in the menu bar and select Output Settings. Here you can select the output file’s resolution, format, and the location where it will be rendered. Next select the Render option below the Output Settings to start exporting the animation.
Final Words
It feels awesome to actually use a tool that had helped Studio Ghibli make cartoons like Spirited Away, Ghost in the Shell, From up on Poppy Hill, etc. Apart from that Opentoonz gives you a variety of useful tools and a common platform to create detailed frames of an animation. However, I couldn’t find an English manual to explore Opentoonz further. This free 2D animation software deserves 5 stars for all the experience it provides in a free package.
Get Opentoonz here.