This tutorial covers how to enable Windows 10 Sandbox to run applications in isolation. That means you can run some executable program/app, which might be harmful, without affecting the entire PC and some other programs. This is handy when some app or program is malicious or you have some doubt about that app. This feature is similar to sandbox feature of popular antiviruses. With the introduction of this feature, Windows 10 becomes more useful.
This feature is currently available with 18305 or higher builds of Windows 10 (Pro and Edition versions). If you are already using any of those builds, you can try it now. Or else, you can wait for the next stable version of Windows 10. Along with that, there are other conditions like AMD64 architecture, at least 4GB RAM, etc., to use such feature. You can check the details here. And, if all conditions are OK for you, then you can try this feature.
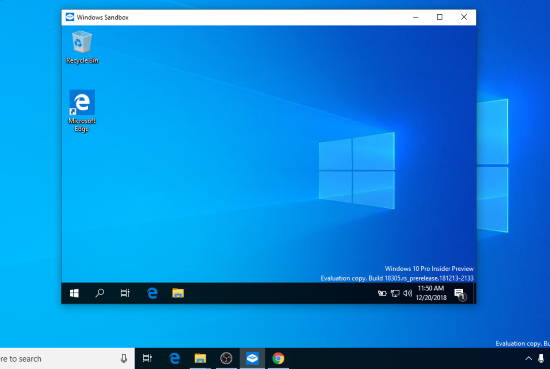
In the screenshot visible above, you can see that Windows 10 Sandbox mode is visible.
You may also check the video demonstration to enable sandbox mode in Windows 10:
Note: It doesn’t show any EXE or programs already installed in the original Windows. Only Windows 10 apps, like Microsoft Edge, are visible run in the sandbox mode. But, you can download EXE files and install and run programs in the sandbox mode separately. Those downloads EXEs and installed programs won’t visible in the original Windows. Such items are also deleted or wiped out automatically as soon as you close the sandbox window. That means complete isolation from the original stuff.
How To Enable Windows 10 Sandbox to Run Applications in Isolation?
Step 1: First of all, you should check if your PC/laptop supports the Hyper-V feature. It is a virtualization feature which lets you run Windows 10 instance in Sandbox mode.
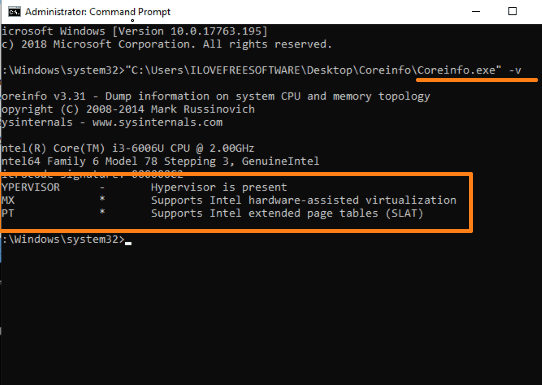
Step 2: This tool (Coreinfo) helps you check if your PC/laptop supports hypervisor feature. Simply, download and extract the zip file of this tool. After that, run Command Prompt window with admin rights, drag n drop its “Coreinfo.exe” application, type -v, and execute the command. It will show if your device supports Hyper-V feature. See the screenshot added below.
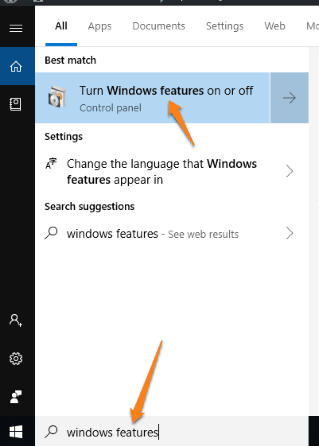
Step 3: Now open “Windows Features” window. You can do that by typing windows features in Search box.
Step 4: Under Windows Features window, you need to turn on:
- All Hyper-V options, and
- Windows Sandbox option.
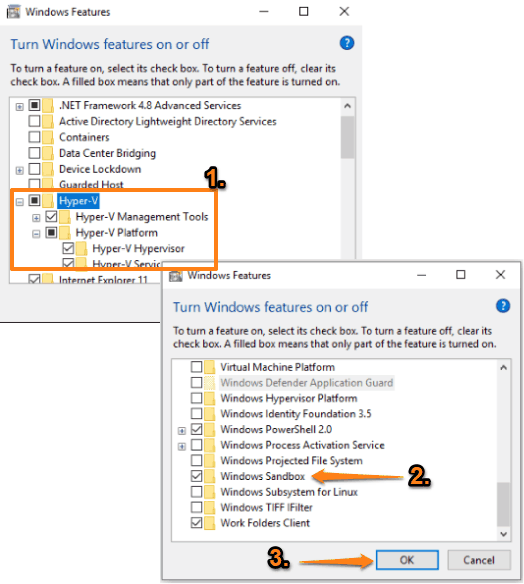
Apply and save the changes. After that, you have to restart the PC.
Step 5: Open the Start menu, scroll down the list of installed applications, and then click on “Windows Sandbox“.
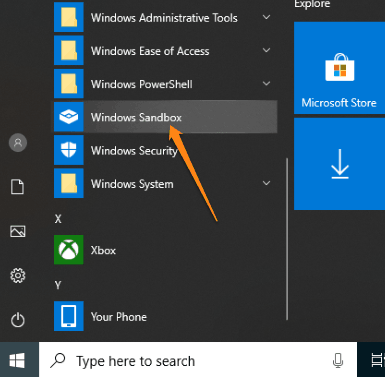
Now Sandbox window will be visible to you (like I added the first screenshot). Microsoft Edge and Recycle Bin shortcuts will be visible to you in the desktop under Sandbox window.
You will be able to use Start menu, Search box, File Explorer, etc., but only built-in apps of Windows 10 can be accessed and opened by you in the Sandbox mode. You need to download third-party programs in sandbox mode to use them.
As soon as you close sandbox window, all those downloaded items and programs are also removed completely.
The Conclusion:
Windows 10 Sandbox is indeed a very good feature. Windows Defender already provides Controlled Folder Access to protect files and folder from ransomware attacks and other issues, this Sandbox feature is gonna help a lot in the same direction. You can wait for the stable release of this feature or try it now.