This article covers how to play two subtitles together in VLC player. It will be very helpful when you want to play subtitles of two different languages in VLC. Though natively you can play only one subtitle in VLC at a time, there is a very simple trick to help you show two subtitles at once in VLC.
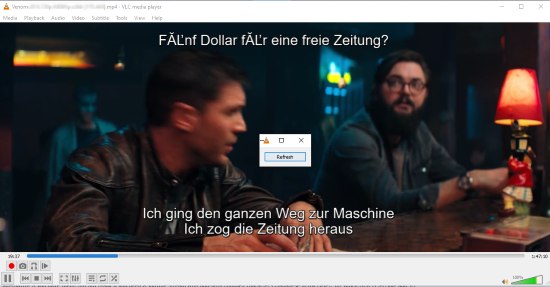
For that, you need to install a free VLC extension and a software. The extension loads the second subtitle and the software helps that extension to display/load the second subtitle. In the screenshot below, you can see that two different subtitles are visible in VLC player. The primary subtitles are visible on the bottom part and secondary subtitles are displayed on the top part.
Let’s check the steps.
How to Play Two Subtitles Together in VLC Player?
Step 1: First of all, you need to download an extension named “Subtitler lite mod“. A zip file will be downloaded. Extract it and you will see multiple folders for different versions of VLC. Open a folder based on the version of your VLC player and you will see “Subtitler (lite) mod.lua” file. Copy it to the clipboard.

Step 2: Now access the Extensions folder of VLC (available in the installation location of VLC) and paste the copied file.

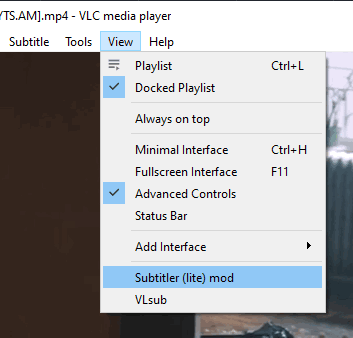
Step 3: Once the extension is installed, you can access it from View tab in VLC player. Now, the problem is this when you run this extension, it provides a Refresh button and you need to keep pressing that button always so that it can display the second subtitle.
To solve this problem, you need to move to the next step.
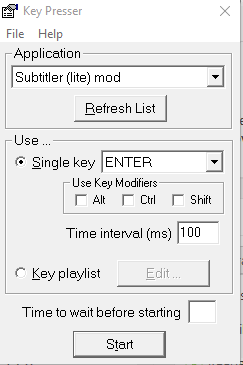
Step 4: Download Kee Presser software and launch it. This software helps to keep pressing a button for the specified application. So, launch it and from the drop down list, select “Subtitler lite mod“. After that, Enable single key option on its interface and select “ENTER“. In the time interval box, you can add ‘100‘ as value. That means this software will keep pressing Enter key for you automatically after every 100 ms.
Step 5: Now open VLC player, add a video or movie, and then use the built-in feature of VLC to add the primary subtitle.
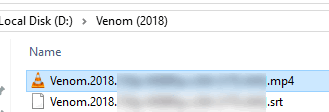
Step 6: Add second subtitle file (it must be SRT) to the same location where your video or movie is available. Also, you need to rename the subtitle file with the same name of video/movie.
Step 7: Now click on View menu of VLC player and select “Subtitler lite mod” option. This will show the Refresh button of this extension.
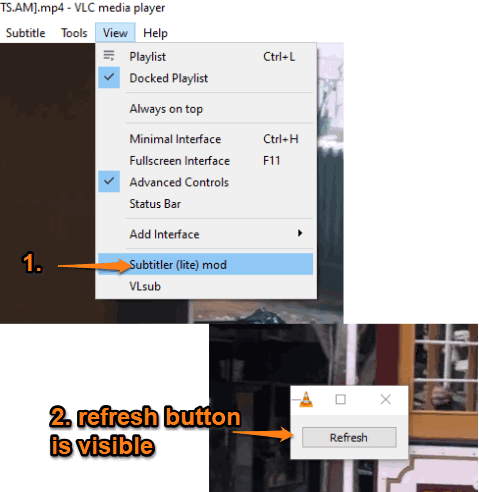
You don’t need to press that button as you need to use Kee Presser software (that you used in step 4) to press that button for you. Press Start button in that software.
That’s it! You will notice that the second subtitles are started playing on the top part of VLC player.
Did you know you can also import YouTube playlists in VLC?
The Conclusion:
There are a lot of users who want to play two subtitles together in VLC player. This trick is gonna save time as well as help a lot of users. You just need to set up things once and then you can enjoy playing two different subtitles in your favorite VLC media player. Try it.