Fillout is a powerful online Form Builder application that assists you in generating Forms that you require to collect data from anyone and save the responses in MySQL, Notion, Salesforce, Google Sheets and other 3rd party applications. You can use it for quickly designing simple forms as well as complex ones with validation logic, conditional branching, multiple pages and much more.
Features:
- Variety of Forms: You can use Fillout to build and publish a variety of forms like Login, File upload, Scheduler, Lead generation, Contacts and many more. You simply need to imagine the type of form you require and Fillout will be able to build.
- Data Storage: Data from the forms can be stored in the systems that you already use such as Slack, Sales Force, My SQL etc.
- Pre-built components: You can design any type of customer experience using the drag and drop pre-configured components. Additionally, you can style your form so that it best matches your brand.
- Complexity: You can insert complex conditions in the Form with validation logic, and pre-filled fields, all without resorting to any code. This reduces the chances of any errors and makes the form very easy build and publish.
- Resume submissions: People who are filling your form will never lose their form submission mid-way. Forms built with ‘Fillout’ support ‘Resume Submission’ due to which, the person filling it will return to the same point in case the form reloads accidentally or due to network glitches.
- Mobile Responsive: Fillout forms are compatible and work flawlessly on all mobile devices.
- Keep out Bots: You can add email, SMS or Captcha verification to ensure that only humans are filling out your forms.
- Accessibility: Fillout forms are compatible with Screen Readers and hence accessible to all your customers.
- AI powered form creation: You can type a few words / phrases about the form that you wish to build and the AI logic of Fillout will automatically create the form for you with the required fields. You can then check and customize it as per your requirements.
How it Works:
1. Click on the link provided at the end of this article. Click on ‘Get Started’ and sign up using your Google credentials for a free account.
2. Click on ‘Quick Start’ to use AI logic to build your form automatically. Alternately if you are certain about where you want to store the responses of your form like Airtable, Google Sheets etc, click on the appropriate option.
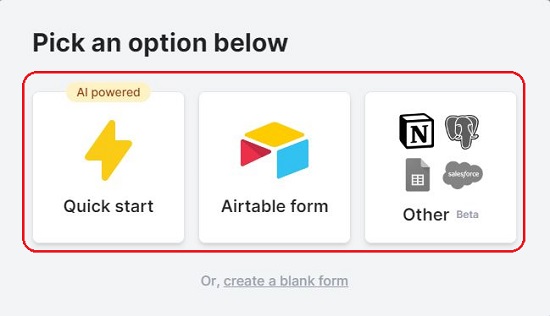
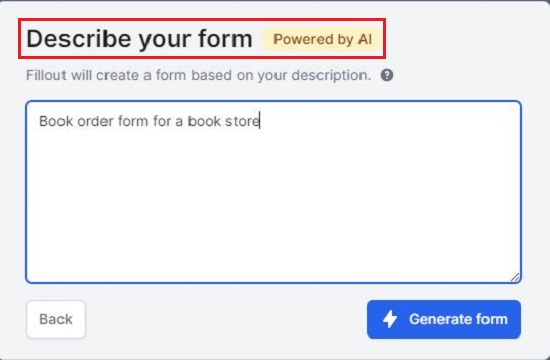
3. Type a few words to describe the form and click on ‘Generate Form’. Fillout will automatically create the form for you in a while based on the description that you input and load the Form Editor for further customization.
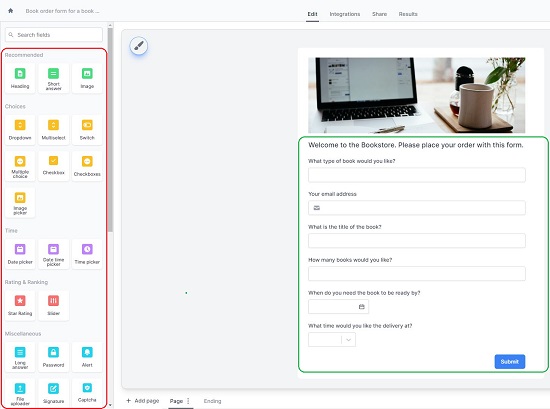
4. The left panel of the Form Editor categorizes and displays all the fields that you can insert into the form such as Drop-down, Multi-select, Checkboxes, Date / Time picker, Rating, File uploader, Signature, Captcha and more. You can click on any field to insert it into the Form
5. When you select any field that you have inserted into the form, a context sensitive panel is displayed at the right of the form that you can use to configure various elements of the Field such as Caption, Default value and more. You can also design the logic and configure the validation for the selected Field using the right panel. A bunch of different configuration options and settings will be displayed based on which field in the form has been selected.
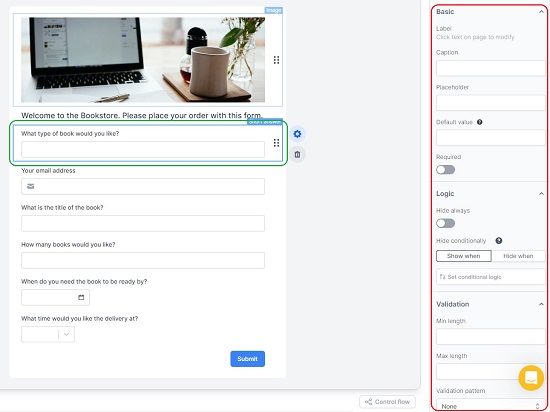
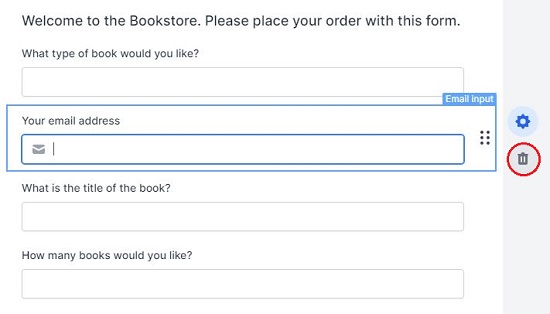
6. To delete any field from the Form, select it and click on the ‘Delete’ icon at the right. To change the sequence in which the fields appear in the Form, click and drag them using the 6-dots icon and place them at the appropriate location.
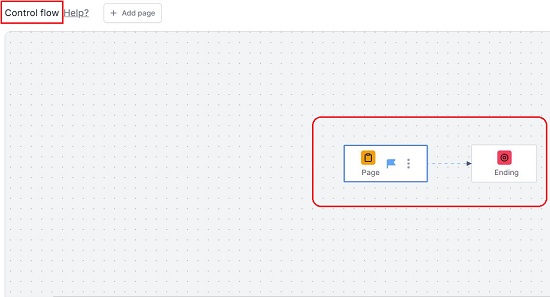
7. To add a new page to the form, click on the link ‘Add Page’ at the bottom of the Editor. To View and Control the flow of your Form, click on the ‘Control Flow’ button at the bottom right of the Editor.
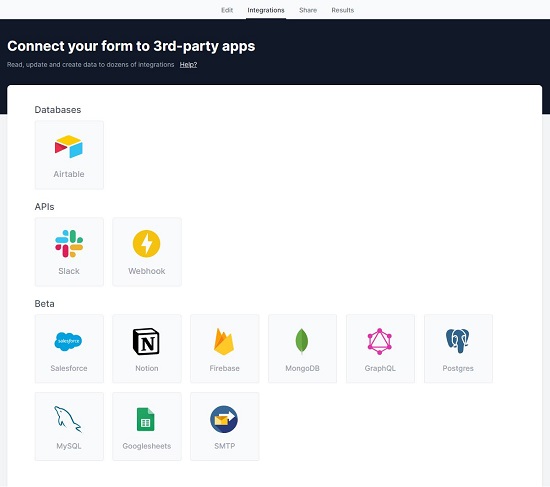
8. To connect your Form to a 3rd party application to store data, click on the ‘Integrations’ link in the toolbar at the top of the page. Presently, you will be able to connect to Airtable, Slack and Webhook using the required API keys. Connections to Notion, Google Sheets, My SQL etc. is still in the Beta Phase and not yet activated.
9. Click on the ‘Preview’ button at the top right of the Editor to visualize the look and feel of the form.
10. Once you have checked and verified all the Fields and are satisfied with the Form Preview, click on the ‘Publish’ button at the top right of the screen. You can now click on the ‘Share’ link in the toolbar at the top, copy the URL of the form and share it with others.
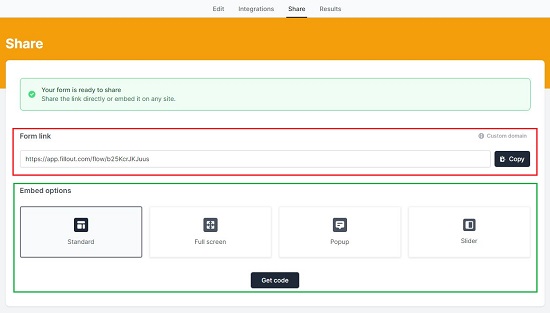
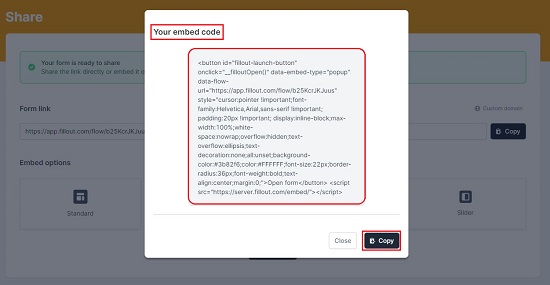
11. To Embed the form in your existing webpage, click on one of the required Embed options such as Standard, Full screen, Popup etc and then click on ‘Get Code’.
12. To view the Form submissions (provided you have integrated the 3rd party applications to store data), click on ‘Results’ in the toolbar.
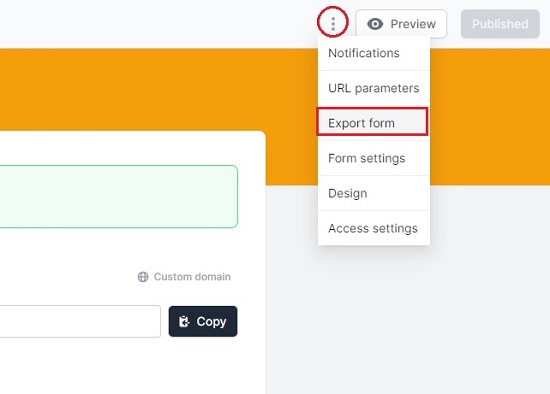
13. Fillout also allows you to export the form in JSON format by clicking on the 3-dots icon (beside the Preview button) and selecting ‘Export form’
The free version of Fillout allows you to build a maximum of 3 full-featured forms with unlimited submissions. To overcome this limitation, you can subscribe to their paid plans. Click here to learn more about them.
Closing Comments:
Fillout is a great Form Builder for simple as well as complex forms with a provision to store the form responses in a multitude of 3rd party applications. It hardly takes a couple of minutes for the entire process right from designing to publishing. Fillout offers a lot of flexibility and scalability in building and deploying forms that can help you to improve the customer experience as well as the conversion rate.
Click here to navigate to Fillout