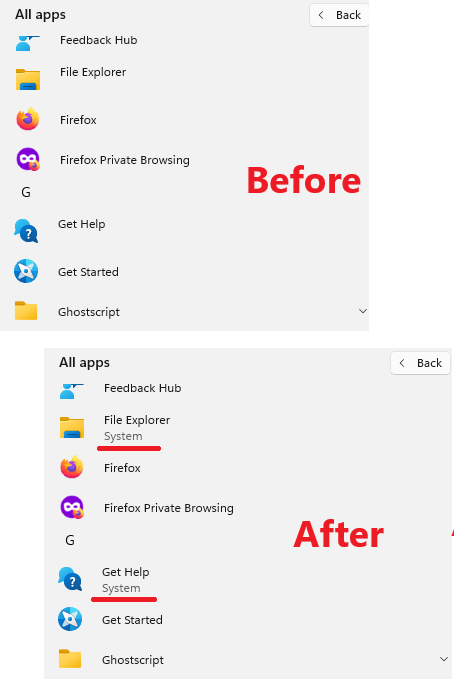
This is a quick tutorial to explain how to enable system app labels in Start menu on Windows 11. If you would like to manually access the new system app labels feature then this post is for you.
The latest insider builds of Windows 11 have a new feature that adds “System” label to system apps to differentiate them from the user apps. It helps to remove confusion but the problem is that it is not shown to some users. Well to fix it, here I am going to mention a simple step by step guide that you can follow.
How to Enable System App Labels in Start Menu on Windows 11?
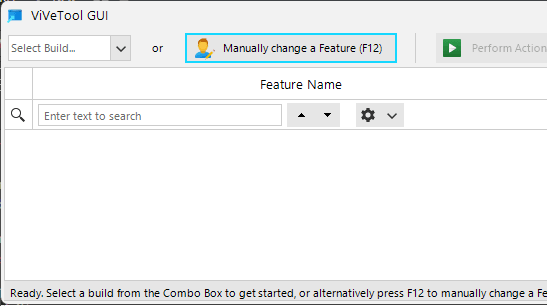
To enable system app labels, we will use a free open-source tool called ViveTool GUI. So, you download it and then run it. It has a very simple interface and when you have launched it, just follow these steps.
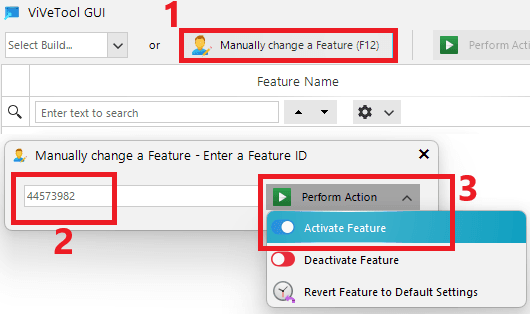
- Click Manually Change a Feature button and then in the box that appears, enter this feature ID: 44573982 and then enable this.
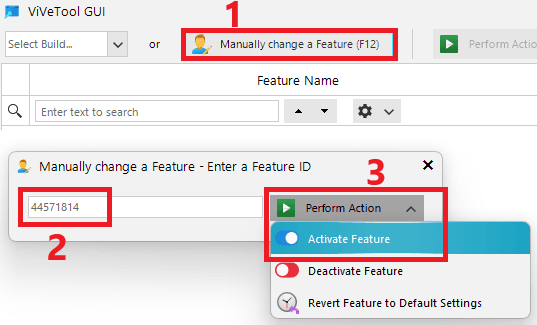
- Repeat the above step but now add a different feature ID 44571814, and then enable it as well.
- Restart Explorer. Or, you can also restart the PC if you like.
- Done.
After following the above steps carefully, open the Start menu. You will now see a “System” label under the system apps such as Get Help, Calculator, File Explorer, Microsoft Store, Phone Link, Xbox, and System Security.
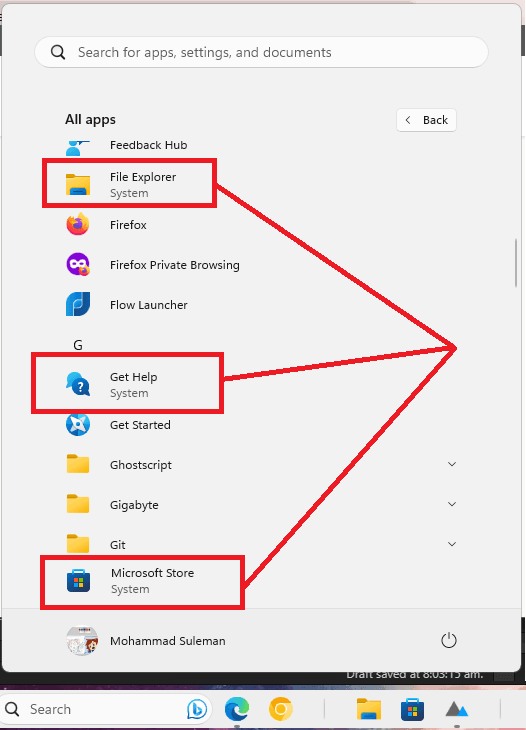
This is it. You now have enabled system labels. If you’d like to go back to the way Start menu was then you can disable the feature IDs that you enabled in the above steps.
Closing thoughts:
If you want to see the system app labels under the system apps on Windows 11 then you can follow the steps I have mentioned here in this tutorial. Here I used this tool on the Canary build but you can try this on another latest insider builds from Dev channel as well. Just a few clicks and you can have the system labels to easily spot the system apps and then you can debloater scripts or unnecessary apps remover software to uninstall them.