This tutorial explains how to run Android apps in Windows 11. Yesterday, Microsoft announced the early preview of the Android app support in Windows 11 Insider build in Beta channel. But the Android support is very limited. For now, only 50 apps are available to install so far.
Windows subsystem for Android appeared in Windows Store quite sometime ago, but you can now actually use it for running Android apps. There are strict hardware requirements which need to be met in order to have smooth Android experience on Windows. And in this post, I will tell you how to enable Android support in Windows 11.
As mentioned earlier, only Windows Insider build in Beta channel have Android support. So, one sad thing about this is that a lot of insider users are on Dev and Release Preview channels, which don’t have Android support. But in this post, I will show you how to run Android apps on those Windows builds as well.
This post is divided into 2 sections. In the first one, I will discuss how to add Android support to Window 11 in the official way. And in the seconds, part, I will walk you through the steps to manually install Windows Subsystem for Android with Amazon App Store.
Before getting started, let’s have a look at the general requirements to run Android apps on Windows 11.
- Your PC must be in the Windows Insider Beta Channel.
- Your PC needs to be on Windows 11 22000.xxx build series.
- PC must have supported processor (Intel® Core™ i3 8th Generation, AMD Ryzen™ 3000, Qualcomm® Snapdragon™ 8c, or above).
- 8 GB of RAM and solid-state drive (SSD).
- You will have to enable Virtual Machine Platform.
- You need Amazon App Store with the United States based Amazon account.
- PC region must be set to the United States.
You now have an idea what is required in order to enable Android support on Windows 11.
The simple way: Run Android Apps on Windows 11 Beta
If your PC meets the location and hardware requirements, then you won’t have any trouble running Android apps. Here are the steps that you have to take.
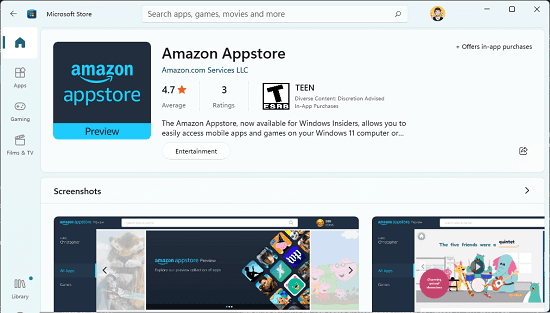
- Follow this Amazon App Store link and then install it from the Window Store. After that, you do that, then you can start launching the apps.
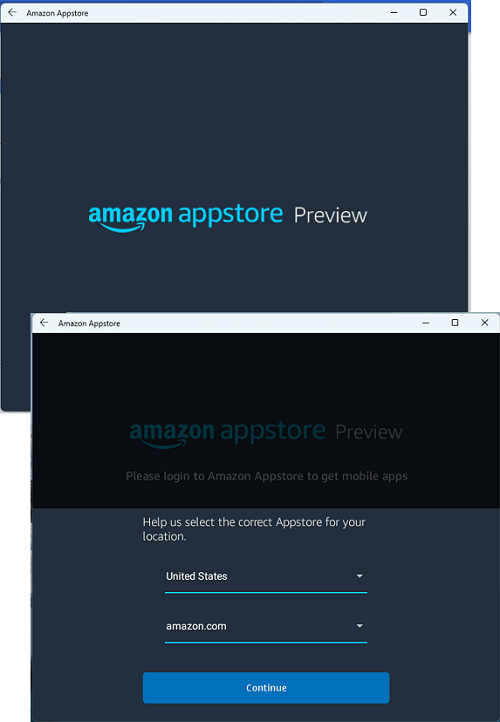
- Open the Amazon App Store and then sign in using your Amazon account, which has a USA mobile number in it. If you are from any other country than the USA, then you will not be able to install apps.
- After you log into the Amazon App store from your Amazon USA account, you will be able to see the apps which you can install. Install them in a click and after the installation, find them in the Start Menu.
- Launch the installed app from Start and then you are done.
The app will run like any other Window 11 app. You can close it and even remove it. To uninstall an app, you just right-click on it in the Start Menu and click “Uninstall“. This is as simple as that. Also, do note that Google Play Store is not available and probably never will. You have only 2 options to install apps; from Amazon App Store or by manual app sideloading.
The Hard Way: Run Android Apps on any Windows 11 Insider Build
Since the Android works in beta insider channel builds only, a lot of people are left from trying it out. If you are on other insider channel such as Dev, then you can follow a simple workaround to enable Android support. Basically, you will have to manually install the Windows Subsystem for Android and Amazon App Store to install and run Android apps.
However, you will be only able to install apps if you sign in using an Amazon account from the United States. Otherwise, you will have to sideload the apps in order to run them. And I will walk you through all the steps involved in manually enabling Android support in Dev Insider build.
Here are the steps to manually install Windows Subsystem for Android with Amazon App Store and Side load APK files.
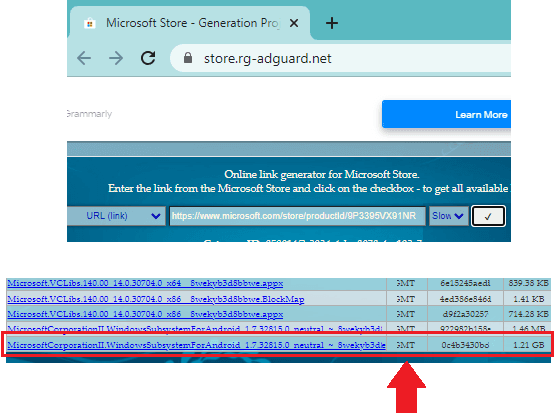
- Download the MSIXBundle file for Windows Subsystem for Android, which is about 1.2 GB in size from here. On this website, you enter the URL as
https://www.microsoft.com/store/productId/9P3395VX91NRand select “slow” option from the cycle dropdown option. Download this file on your PC.
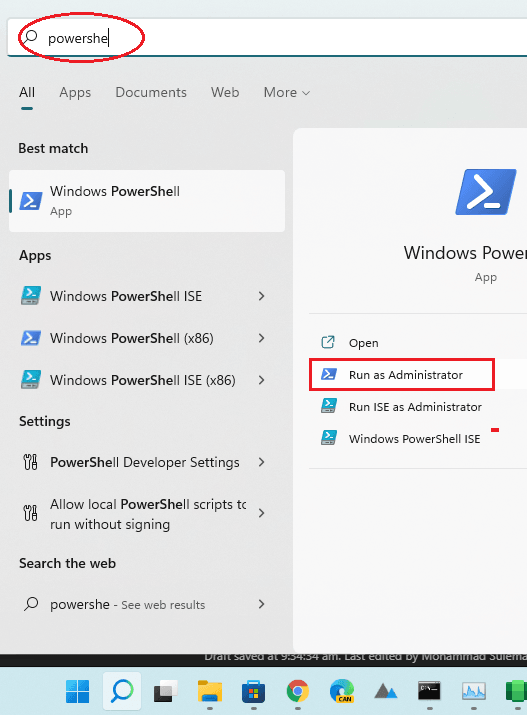
- After the download has finished, open a PowerShell Window with administrator rights.
- Change directory to the “Downloads” folder where you have the 1.2 GB MSIXBundle file. You can rename it for convenience as well. For example in my case, I have renamed to ilfs.msixbundle.

- Now, execute the command in PowerShell like this to install this.
Add-AppxPackage -Path "BundleName"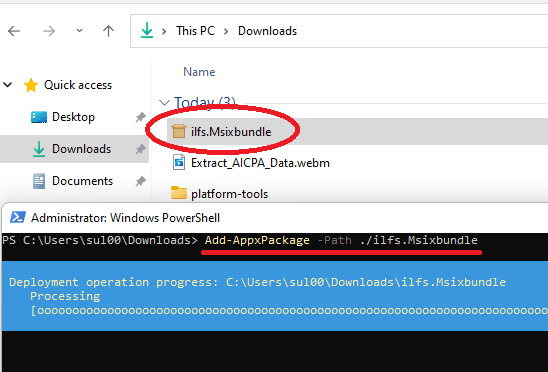
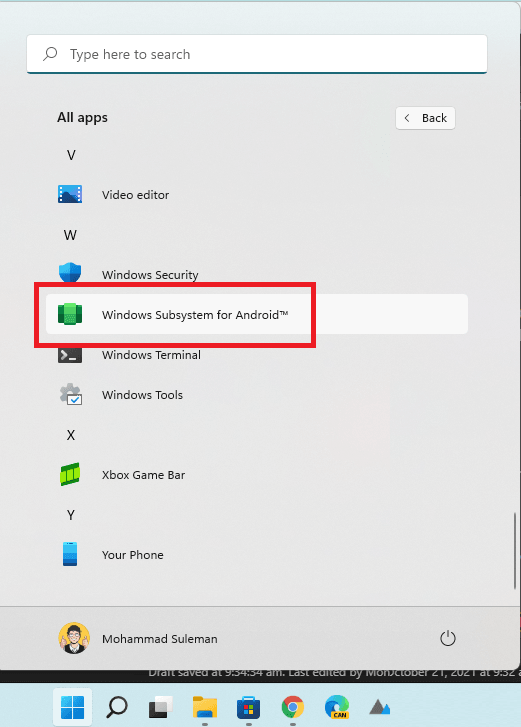
- After the installation is successful, you will see an icon for Windows Subsystem for Android in the Start Menu.
- Now, one last thing to do is enable Virtual Machine Platform from the Windows Features. Go to Settings and then in the Apps select “Optional Features“.
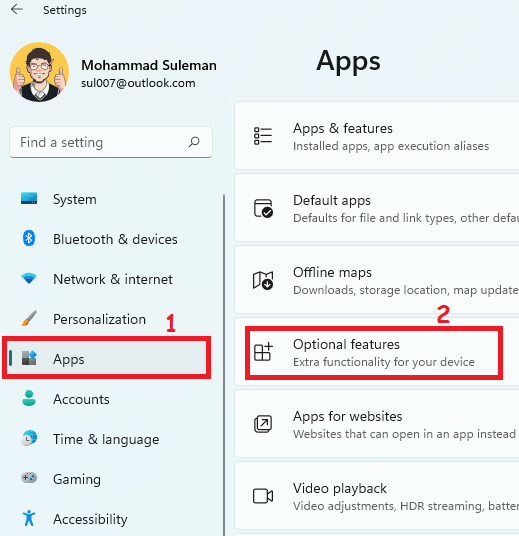
- From the “Optional Features” page, select “More Windows features” option. A window will open and in this. find “Virtual Machine Platform”, check it, and then click on “OK“. Windows will now install it and your PC will be restarted.
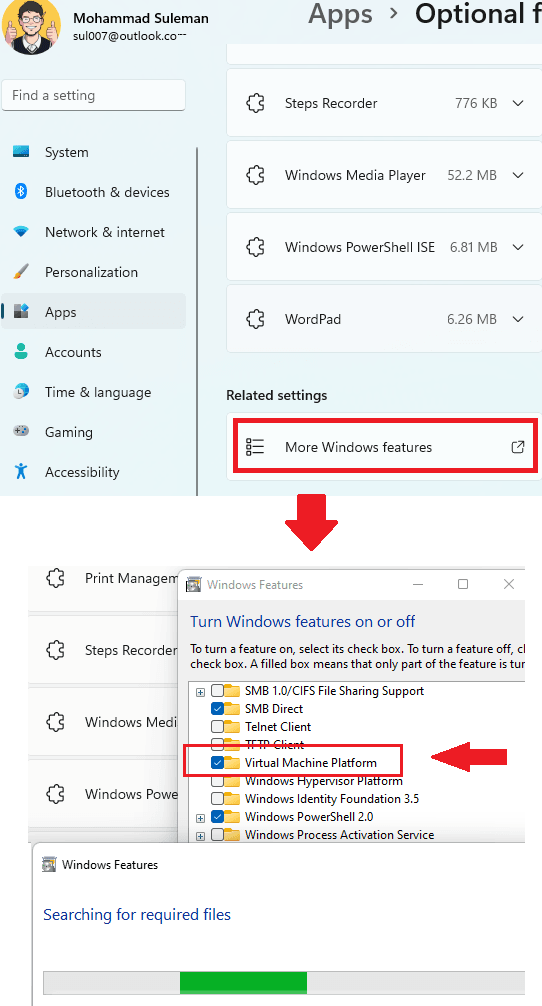
- After you resat your PC, you will see Amazon App Store as well the newly installed Windows subsystem for Android.
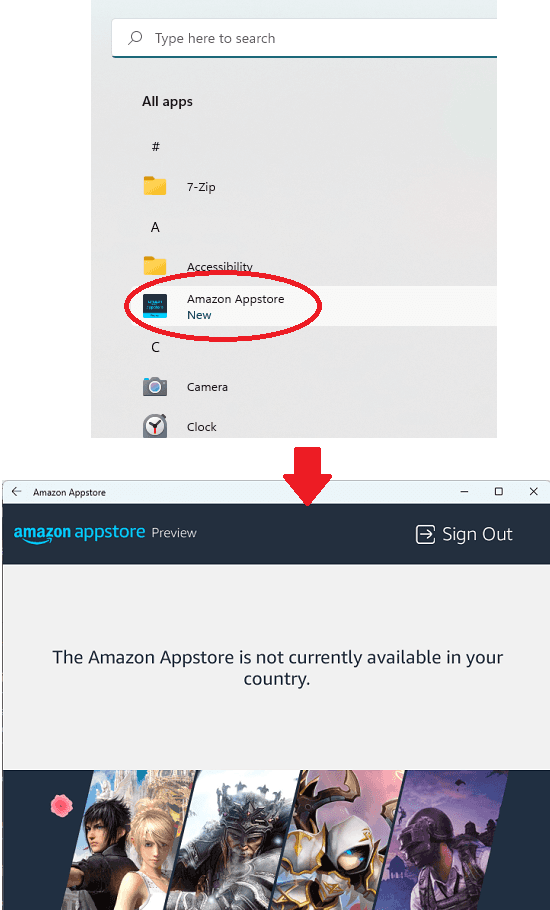
It is all ready to use. You can sign in to Amazon App Store and then install the apps. But if you are located outside the USA, then you will have to sideload APKs. For that, refer to the next section.
Sideloading APKs in Windows Subsystem for Android
You can sideload APK to the Android system, which is running virtually on your PC. You can install apps using the popular Android Debug Bridge, aka ADB. Download adb from here as a part of SDK Platform Tools. After that, extract the ZIP file somewhere and open a command prompt.
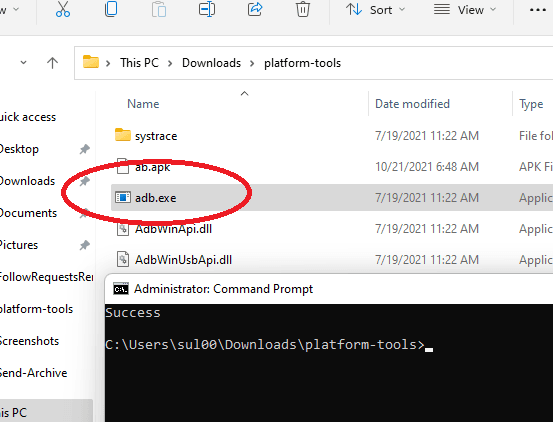
Now, follow these steps to install Android apps.
- Connect the Windows Android device first. Open the Windows subsystem for Android and enable Developer Mode. After that, copy the IP address.
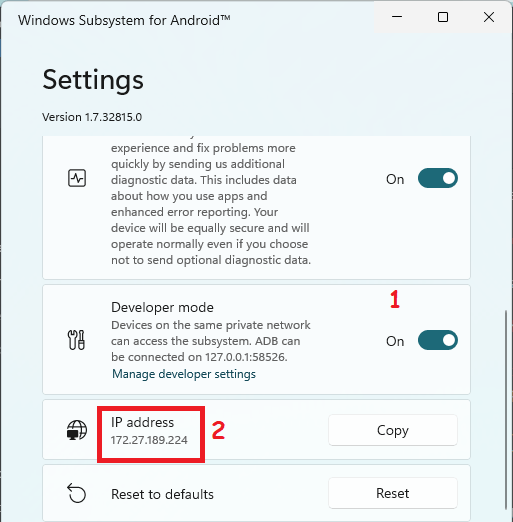
- Connect to the device by running the following command. Supply the IP address in the command that you copied in step 1.
adb connect <IP Address>

- Now, the device has connected to the adb. Go to a site like APK Mirror or APK Pure. Download an APK for simple game or a simple app for testing. After downloading, you can rename the app to some simple name, say “ab.apk” for Angry Birds game.
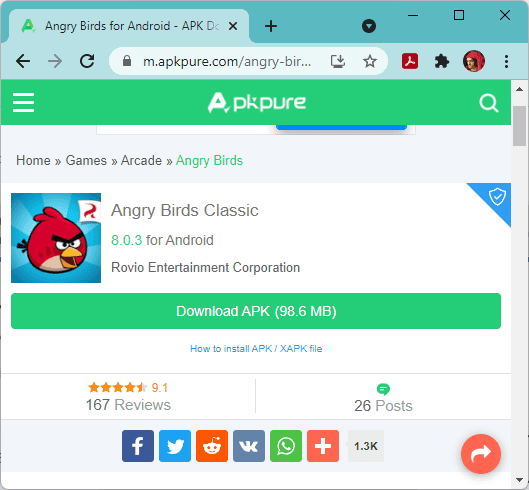
- Paste the downloaded APK file in the same folder where
adb.exeis. After that, run the command in the following syntax to install the app.
adb -s 172.27.189.224:5555 install "NameOfAPKFile"
- After the app installs successfully, you will find it in the Start Menu. Simply launch it from there and use it. If it was a game, then it will run smoothly and you start playing it right away.
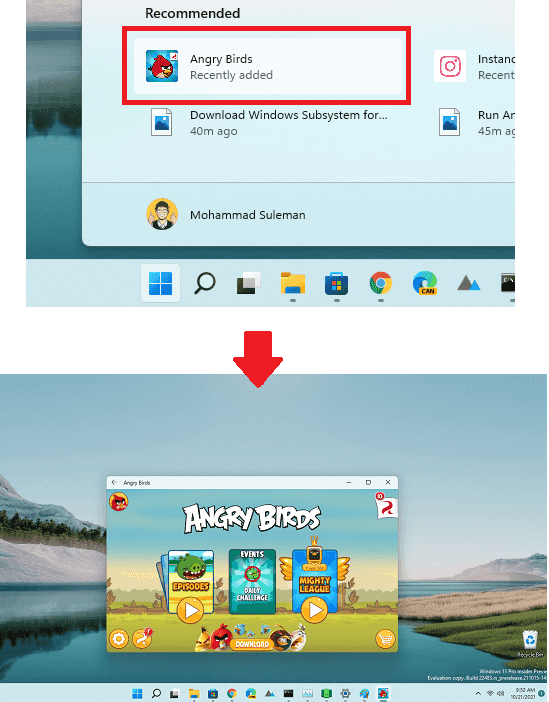
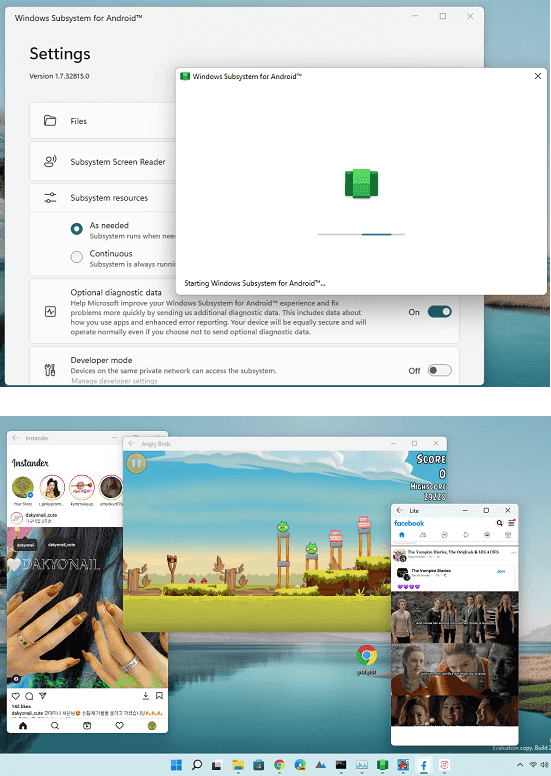
Follow the above steps to sideload any APK file. Launch it, and then you are free to do whatever you want. It will run most apps, but some won’t run. For example, it failed to run Chrome and Microsoft Edge Android apps. But games and social media apps worked just fine. Below, you can see Facebook Lite and Instagram Android client running on my PC.
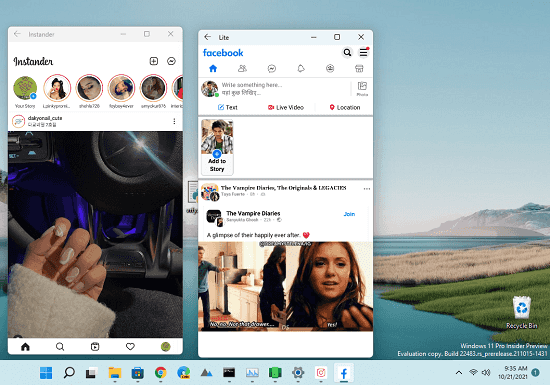
In this way, you can install Android apps on Windows11. It works and it is amazing.
Final thoughts:
It is not the first time that Microsoft has brought Windows subsystem for Android. They did it once for Windows Phones at some point, and unfortunately it didn’t prove to be a wise move. But now they have added it to the desktop, and I think this time it may give a tough competition to Chromebooks. However, I think that is not the point, but having Android support will definitely impel users to go for Windows now.